
The Easy Way To Finish Off Tiled Edges
I am adding another -very easy - method for finishing off ugly tiled edges using sealing tape.
03/03/2021
How to finish off an ugly tiled edge
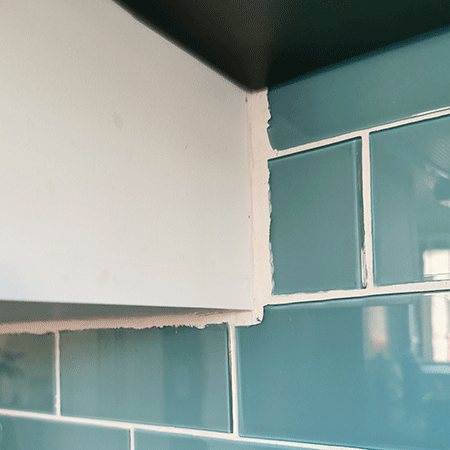
In 2020, I posted an article offering advice on ways to finish off tile edges. I finally completed tiling my kitchen backsplash and there is an ugly row of cut tiles just underneath the cabinet. Being in such an awkward position, there wasn't much else I could do within my budget to disguise the ugly edge of the tile until inspiration hit.
A couple of weeks back, I posted an article on not having to use messy silicone for around a bathtub or in a shower by using sealing strip. The area where the sealing strip was placed looks great and I didn't have to mess around with silicone either. That got me thinking about how else I could use the sealing strip and when the inspiration hit to use it to finish off the ugly edge of tiles in the kitchen. While this installation might not work for every tile edge, it certainly worked for me.
I know there are a few people out there saying that if I got a professional to do the job I wouldn't have this problem, but hey, I'm a DIY Diva! I'm always willing to give a project a shot before I say I can't do it and it was the tiles themselves, being thick glass, that made the cutting difficult, despite trying all different types of tools to do it. The finished job looks just as good as a professional job, just not including the ugly edge!
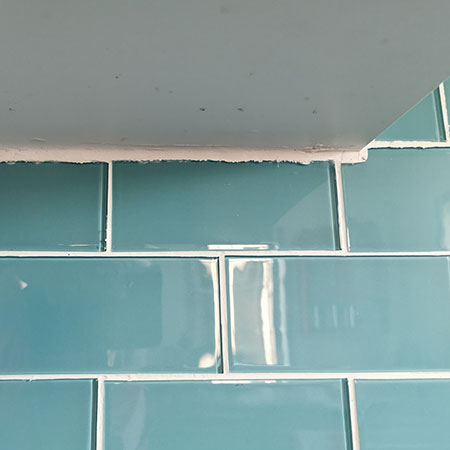
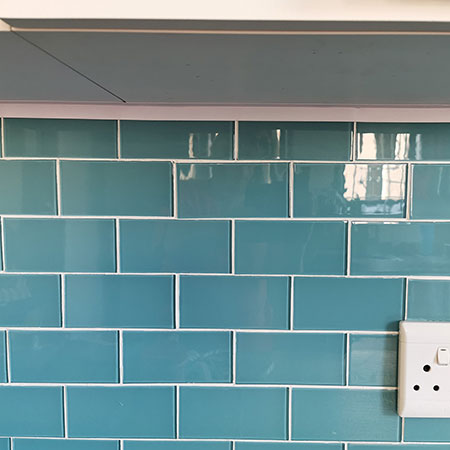
The before (above) and after (below) speak for themselves. The ugly tiled edge is gone and the sealing strip adds a neat finish to the tiled backsplash.
BTW... I bought the sealing strip from Takealot.com and I'm very happy with the easy installation and neat finish it provides. Perhaps in 10 years, I'll give you an update on how long the sealing strip managed to do its job.
Installing the tape took about 5-minutes. Cut the tape to length. Before applying the sealing strip I folded it along the centre line, which is already impressed in the tape, and only removed the paper backing as I was applying the tape along the length.
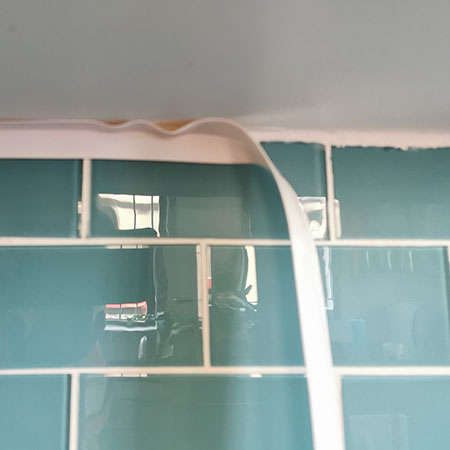
When I reached the end of the cabinet, I left some of the paper backing on to make it easier to trim the tape to fit. The 45-degree angle on the lower section of the strip will match up to the 45-degree edge I cut into the strip going down the side of the cabinet.
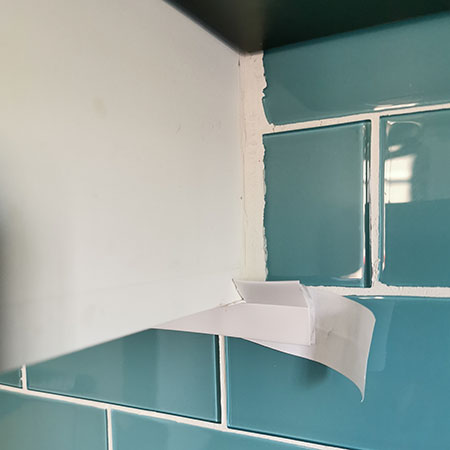
Cut away any excess sealing strip and then cut a 45-degree angle in the lower half of the tape, as shown below. With the section underneath the cabinet done, I then you can cut another short piece of sealing strip to length to fit down the side of the cabinet. The tape was stuck down in the same way and then I cut away the edge using a matching 45-degree angle.

The project took 10-minutes from start to finish and I now have a neat, precise edge under and around the kitchen cabinet.