Make a Kitchen Cupboard for Under Sink
In this tutorial, I will show you how I made a kitchen cupboard to fit under the sink and also provide plenty of storage.
02/12/2019
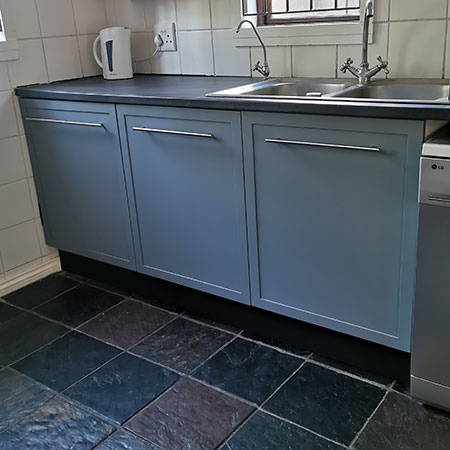
With the kitchen countertop starting to swell along the front edge, I decided to rip out and replace the kitchen cupboard under the sink and fit this with a cupboard that has built-in storage for kitchen cleaners, etc. You will find detailed instructions for assembling and fitting the finished under sink cupboard here.
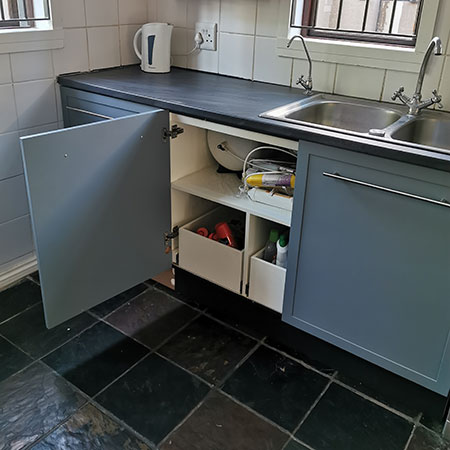
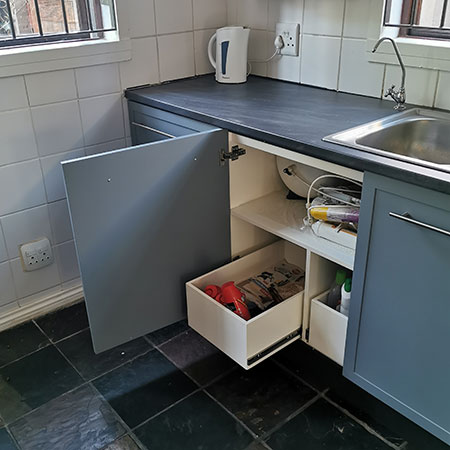
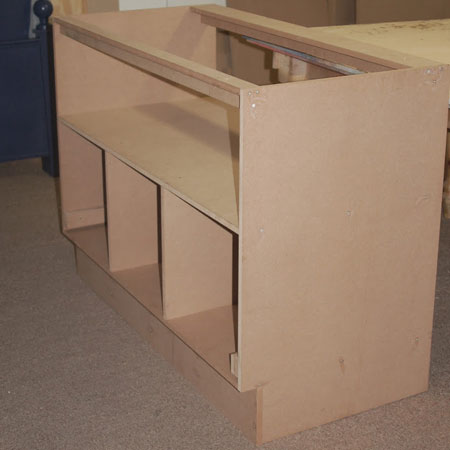
The top shelf of the cupboard is reserved for my RO water filtration system, leaving me with the lower level to fit pullout drawers (on ballbearing drawer runners).
YOU WILL NEED:
16mm SupaWood
600-grit sandpaper
Plascon Polvin
Clear acrylic sealer
Pattex No More Nails adhesive
Wood filler
TOOLS:
Drill / Driver plus assorted bits
Jigsaw
Random Orbit Sander plus 120- and 240-grit sanding pads
Bosch PFS Spray Painting System
Tape measure and pencil
HERE'S HOW:
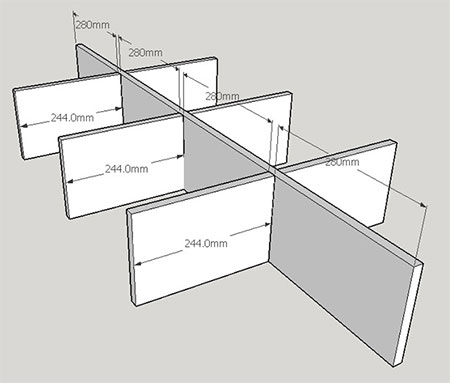
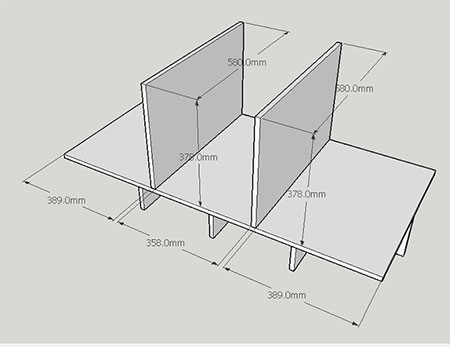
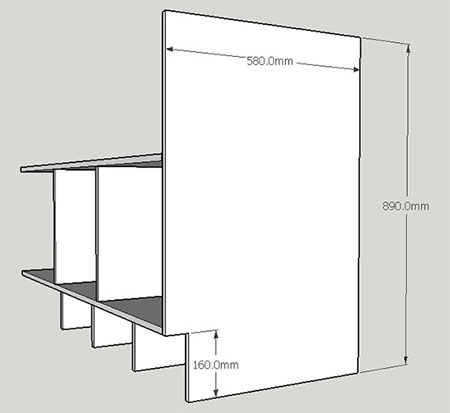
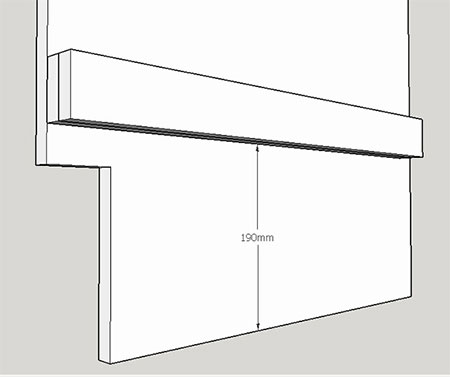
Use the diagrams below to calculate the individual sections required to make your undersink kitchen cupboard. You will also find more information here on assembling a DIY kitchen cabinet.
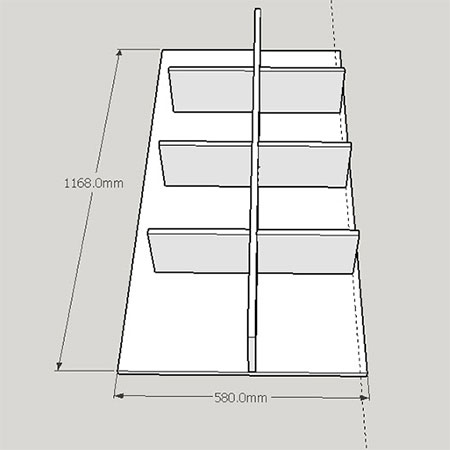
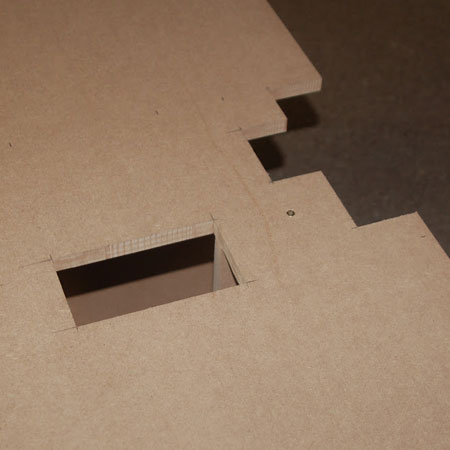
1. When assembling the unit, make allowance in the top shelf for any drains or plumbing pipes. You will need to cut out sections to fit around these, as shown above.
2. It is essential to add cross pieces to provide support and stability. These cross pieces should be fitted to the top and back of the cupboard frame.
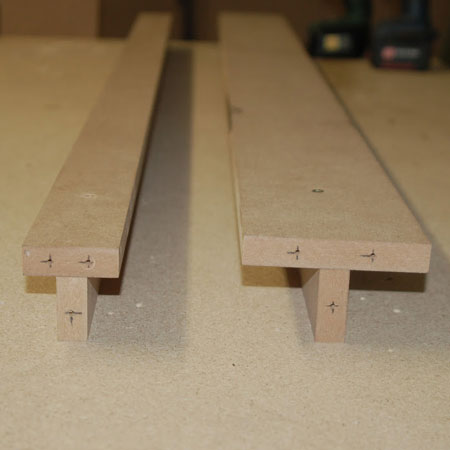
GOOD TO KNOW: The cross pieces consist of two pieces arranged as shown below. These will provide strength to the structure and also reduce bowing along the length of the cupboard.
3. Once assembled, fill all holes, first with a dab of No More Nails and then with wood filler. The entire cupboard is sanded smooth, paying particular attention to the cut edges. Wipe down to remove any traces of dust and then paint the cupboard.
Finishing
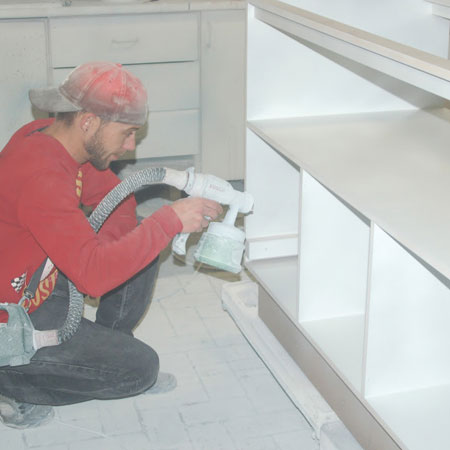
My paint sprayer of choice and that I use for all my painted projects is the Bosch PFS 2000. It's lightweight and portable and very easy to use.
Steps:
1. Apply 2 coats of Plascon Polvin and let dry before sanding smooth with a random orbit sander and 240-grit sanding pad.
2. Apply a further 2 coats of Plascon Polvin and let dry, but this time sand with 600-grit sandpaper.
3. Apply 2 coats of clear acrylic sealer and you are finished.
4. Assemble, sand, paint and add the drawers.
Find detailed instructions for assembling and fitting the finished under sink cupboard here.