
Replace undersink kitchen cupboard with new storage cupboard
I have finally got started on my kitchen renovation and take you step-by-step with instructions on how each part of the renovation was done.
02/12/2019

Work in Stages or Zones
It has taken a long time, but I have finally managed to get some work done on the kitchen renovation, squeezing jobs in between my projects and other work for the Home-Dzine.co.za website. The DIY kitchen renovation was done in stages, partly to make it easier and also to make it more affordable. Another good reason for doing it in stages is that you don't have to be inconvenienced as much while the renovation takes place.
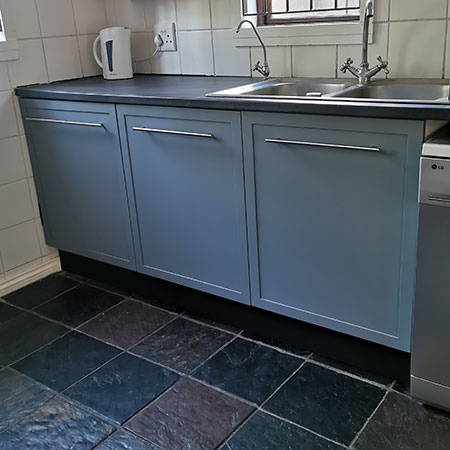
I don't have a large kitchen, but it's big enough for me and my family and works well. It's a basic design that allows easy flow from cleaning to food prep and cooking, so I'm not looking to make any drastic changes - just give it an updated look.
Once you have seen the entire DIY kitchen renovation and the total cost involved, you will see that giving your kitchen a brand new look isn't difficult and won't cost a fortune if you take the do-it-yourself approach.
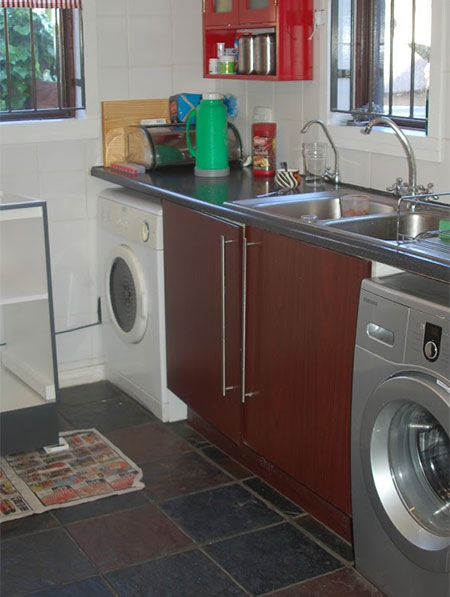
Stage One - Kitchen Cleaning Area
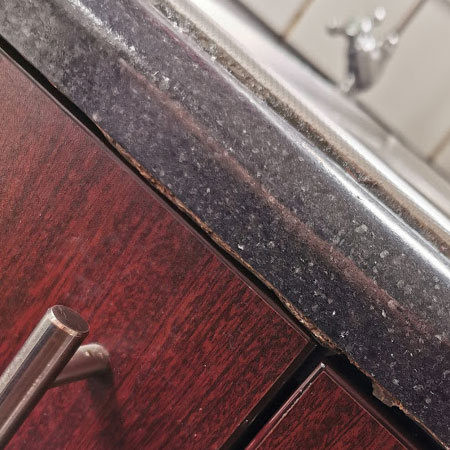
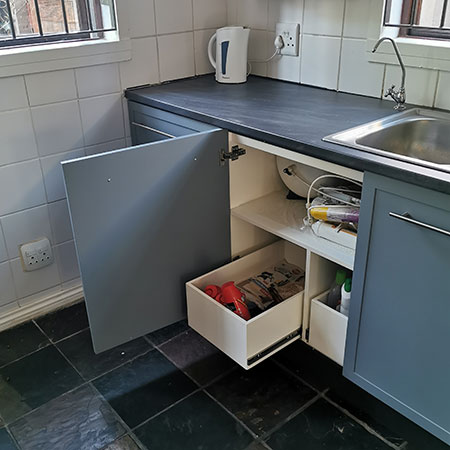
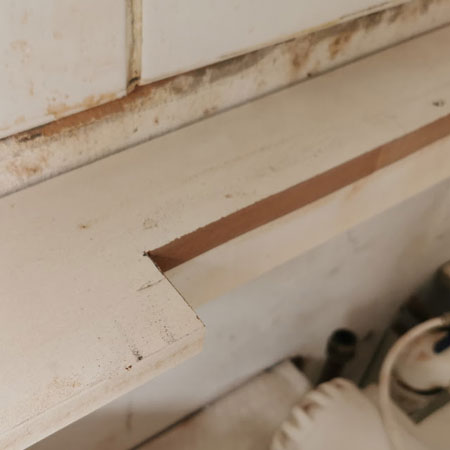
The first step in my kitchen renovation is the row of cupboards underneath the sink. The Formica countertop that I installed about 5 years ago has already started to swell in certain places. Along the edge of the Formica you can quite clearly see where the chipboard underneath is now showing.
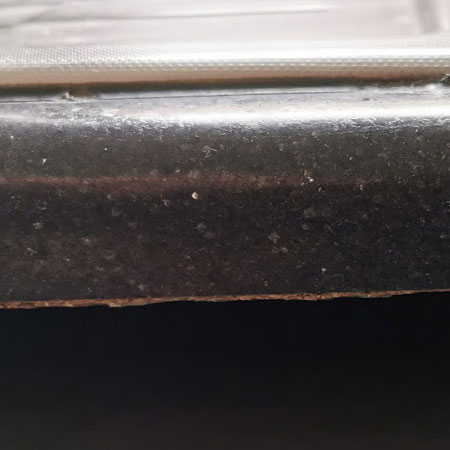
This particular problem is a common one on Formica countertops around the sink, where water from washing dishes overflows from the sink and runs over the edge of the countertop - being absorbed in the chipboard below.
I'm very glad to see that this problem has now been addressed with the latest range of Formica countertops, with the Formica laminate flowing over and under the edge of the countertop. This will most definitely reduce the swelling that tends to occur.
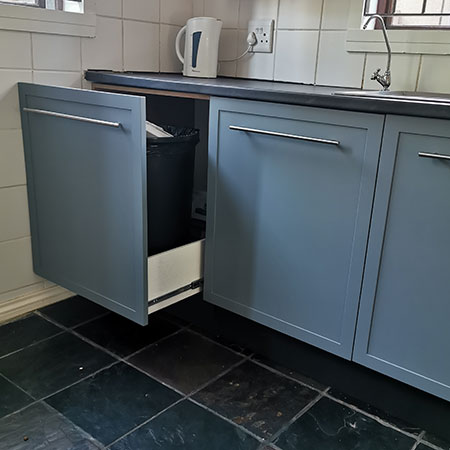
The upper shelf of the undersink cupboard is dedicated to the RO water filtration system, leaving only the bottom section of the cupboard for storage.
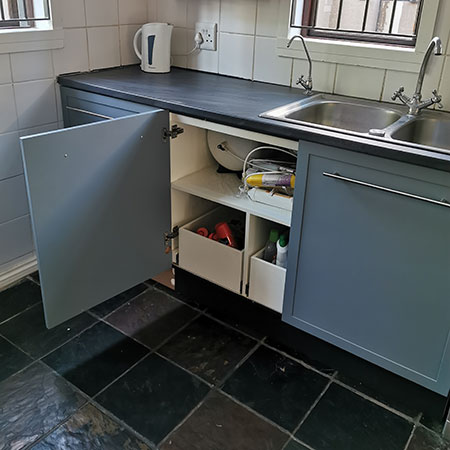
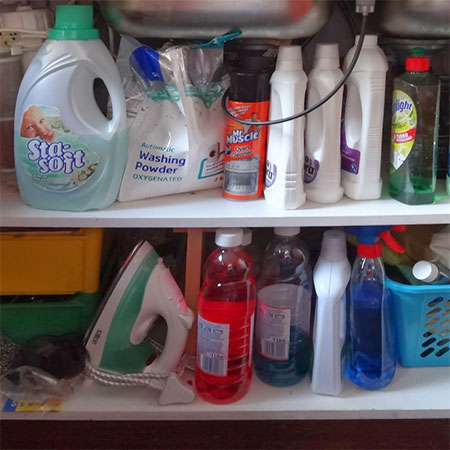
What is of more value than just the extra cupboard is the fact that there are now storage drawers fitted into the bottom section of the cupboard below the sink. The pullout drawers are filled with cleaning products and accessories that are now easy to find and easy to keep organised.
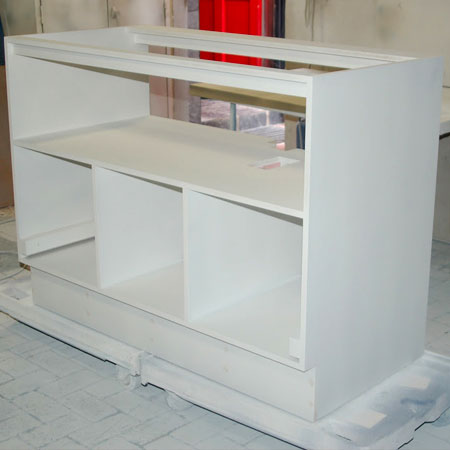
1. Assemble New Cupboards
The first step in removing and replacing the sink unit was to assemble the cupboards to fit into the space. To cut down on inconvenience and switch everything over as quickly as possible, it makes a lot of sense to have everything ready to fit, so that you can quickly rip out and replace. Find detailed instructions and step-by-step here on making the undersink storage cupboard.
2. Rip Out and Replace
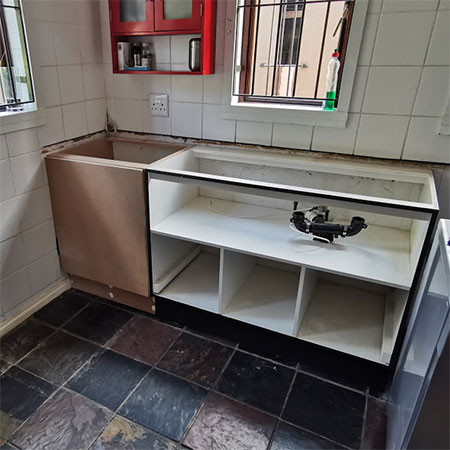
The old cupboard was ripped out and removed and the tumble dryer and washing machine located to a new Laundry Nook that I have already covered. A prime reason for moving these two appliances was first to make space for the addition of a dishwasher, and secondly, to have these two appliances running on a different power circuit. At the moment it isn't possible to run the washing machine or tumble dryer when the dishwasher is on. These appliances use too much power, so it was agreed to split them up and put them on different circuits.
Removing the tumble dryer also freed up additional space for an extra cupboard at the end of the row, and you will see below how this was transformed into a practical (soon-to-be) recycling waste system.
GOOD TO KNOW: When removing the cupboard, you will need to disconnect the water supply at the main stopcock. Also, have a bucket handy to catch any remaining water in the pipes or drain. Once the water is off you can remove the taps and any other fittings that are connected.
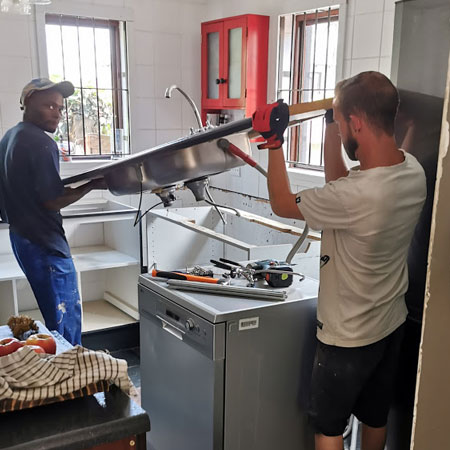
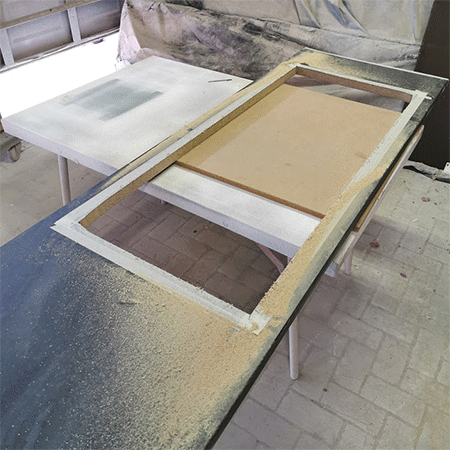
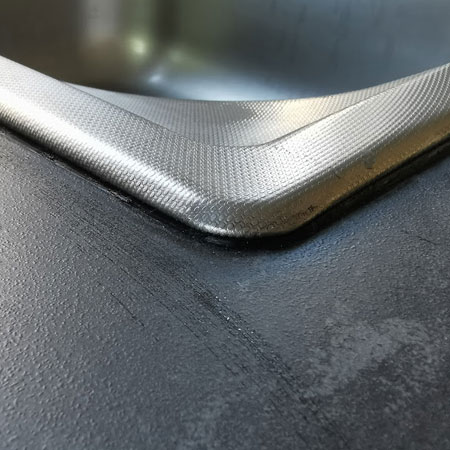
3. Installing Drop-In Sink
In order to fit the drop-in sink, it was necessary to cut out along the top back cross piece / top support.
Using a jigsaw with a laminate-cutting blade, transfer the measurements from the removed countertop to the new countertop to cut out the opening for the drop-in sink.
I always place a strip of masking tape around the drawn line as it helps to reduce chipping when cutting the laminate. Alternatively, turn the countertop upside down (with the top face facing down) and cut with a clean-cut blade. Since a jigsaw cuts on the up-stroke, this also helps reduce ripping along the cut line.
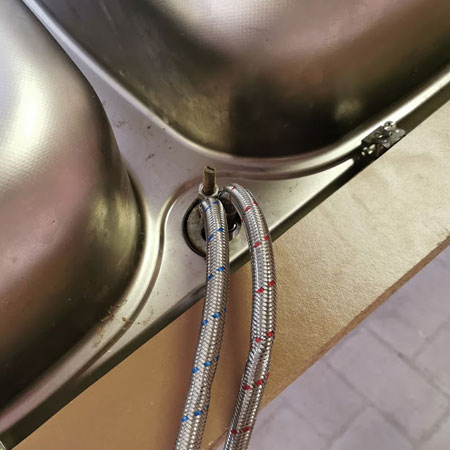
A seam of black silicone sealer is applied around the edge of the drop-in sink. This will prevent any water from damaging the countertop.
4. Finishing Touches
The fitted cupboard is now ready for the finishing touches. First, the pullout drawers are secured in place with ballbearing drawer runners.
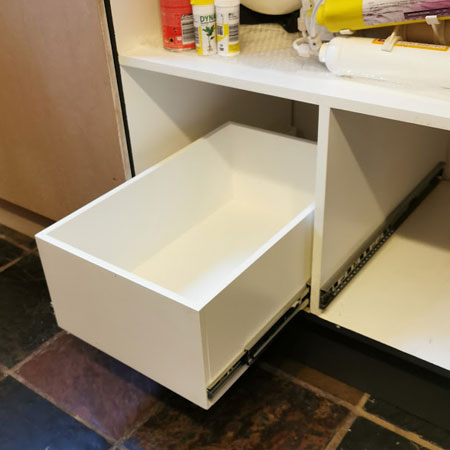
Drawer runners were also added to the pullout drawer for the recycling waste system. This is not quite finished as I still have to buy the bins to fit into the drawer.
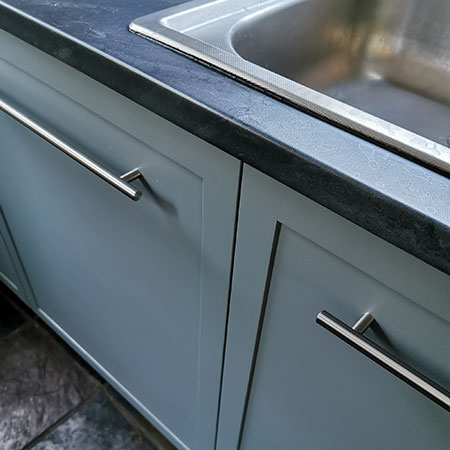
Finally, the doors were made and painted. I decided to go with a 2-tone kitchen this time, with white cabinets on the walls and grey for the floor units. I also applied a flat matt sealer on all the doors.
The absolutely flat matte finish on kitchen cupboard doors with Rust-Oleum Ultimate Polyurethane Natural Matte. It works out a bit pricey but oh so worth it when you see the finished result.
The next stage will be to make and install the wall cupboards above the stove, as well as tiling the backsplash.