
Make your own Kitchen Cabinets
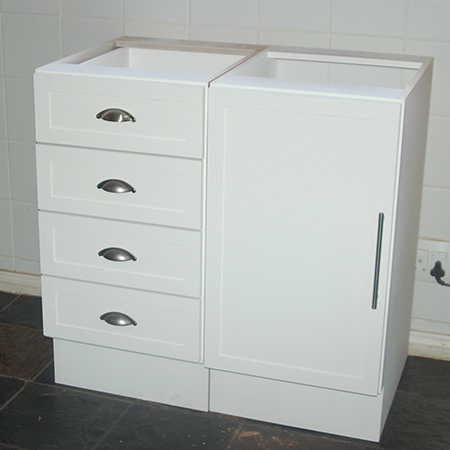
In this article we show you how to make your own kitchen cabinets - a door unit and a 4-drawer unit.
31/05/2018
Being able to make your own kitchen cabinets allows you the freedom to design a do-it-yourself kitchen that fits in with your budget. Making your own kitchen cabinets also saves you a bundle when you look at the cost of having a kitchen fitted. For this project we used a basic Shaker style design using 16mm SupaWood, that is easy to paint either with acrylic PVA, water based enamel, or chalk paint.
Build a basic Cupboard

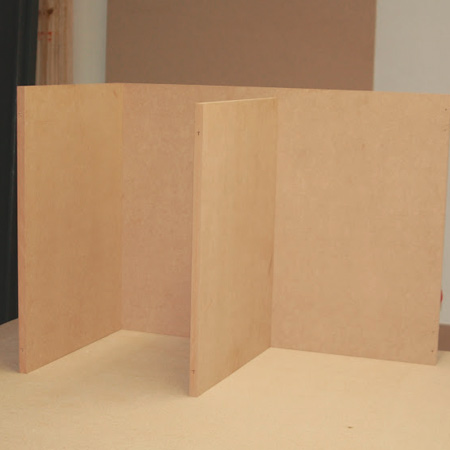
The first project we start with is a basic kitchen cabinet with a door. Our cabinet is 450mm wide, but you can easily adjust the width for a narrower or wider cupboard, depending on the floor plan for your kitchen.
YOU WILL NEED:
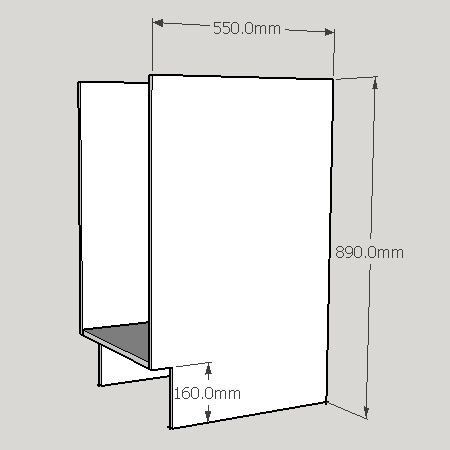
2 of 550 x 890mm 16mm SupaWood - sides
1 of 418 x 500mm 16mm SupaWood - base
1 of 418 x 530mm 16mm SupaWood - shelf
2 of 100 x 418mm 16mm SupaWood - top supports
3mm Masonite or SupaWood strips - cut to fit
Note: WE have added a kickplate to our cupboard, but if you are fitting an entire kitchen, this will be cut to fit along the bottom of all the cupboards.
4 x 40mm cut screws
No More Nails adhesive
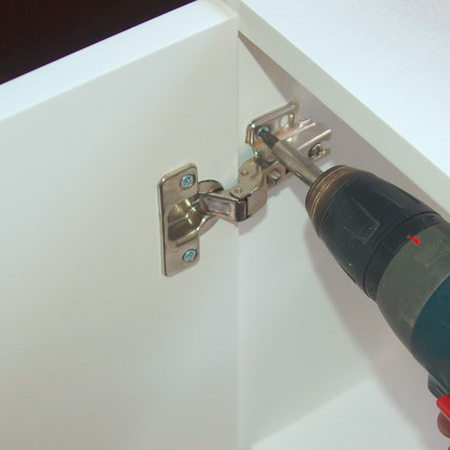
2 of concealed hinges and 16mm screws
240-grit sandpaper
Paint and equipment to finish - see below
TOOLS:
Drill / Driver plus assorted bits
Jigsaw
35mm Forstner bit
Orbital Sander plus 240-grit sanding pads
Tape Measure and Pencil
Not responsible for errors or omissions
HERE'S HOW:
Before you start to assemble the cupboard, mark and cut out for the kickplate. Our cut out measure 60mm deep by 160mm high. This can be modified if you want a kickplate that is not as deep or you want it lower.
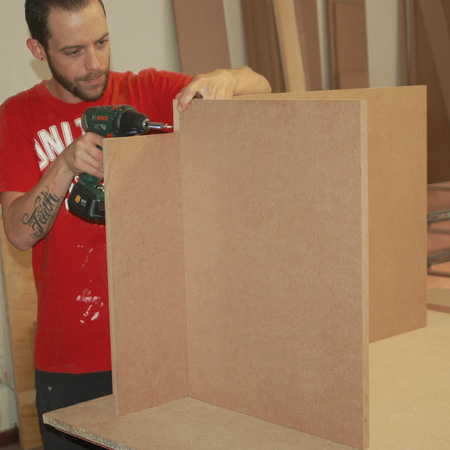
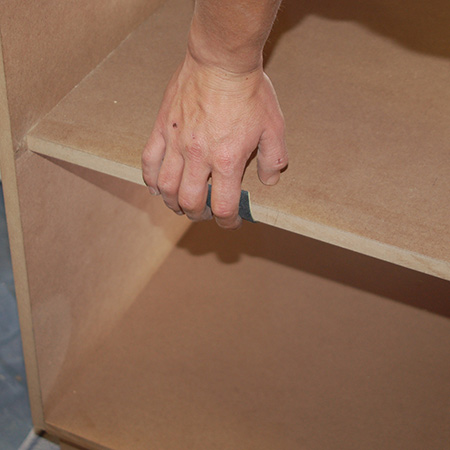
1. Once you have cut out for the kickplate, insert the base and secure through the sides using 4 x 40mm cut screws. Do drill a countersink for all screws.
GOOD TO KNOW
Lay one side on the back edge to make it easier to attach the base to one side.
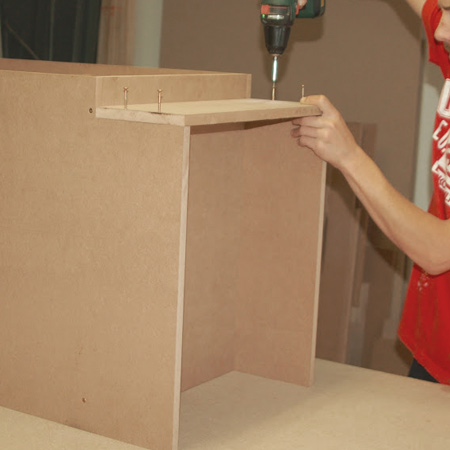
2. Measure and mark where you want to position the shelf - this is up to you or can be adjustable - and secure through the side. You can raise or lower the position of the shelf to allow for specific items that you want to store in your cupboards.
3. Now you can add the top supports - one at the front and one at the back. The supports not only strengthen the frame, but also provide support for the countertop. If you plan on installing a concrete countertop, or heavy material, it is recommended that you add extra support - possibly using 32mm thick pine.
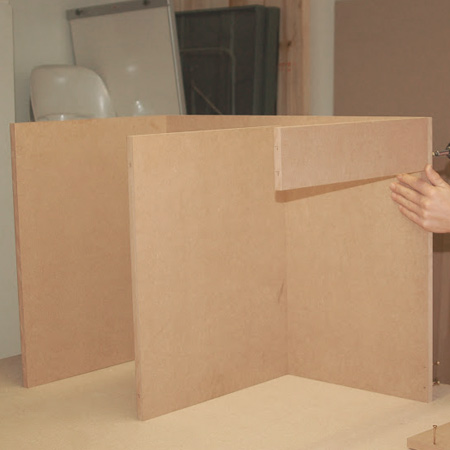
4. With all the inside sections added it's time to fit the remaining side piece. Again, use a countersink bit to ensure that all screw heads are out of the way, especially if you are joining cabinets together.
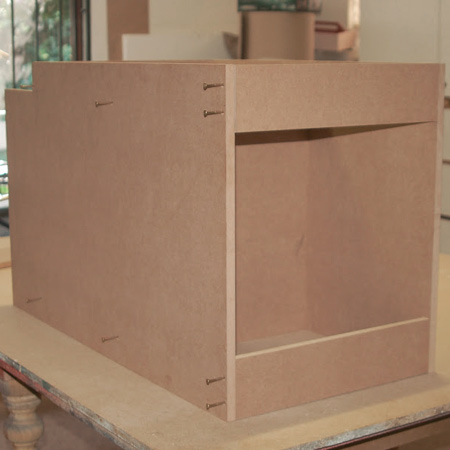
OPTIONAL: We added a kickplate to our kitchen cupboard. You will add this now if your kitchen design is for freestanding units that will not be joined together.
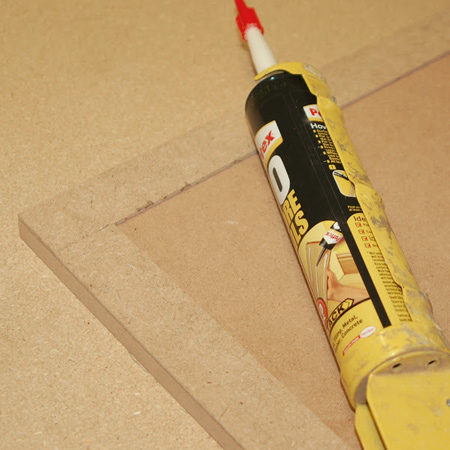
5. Measure up the door for adding the strip around the edge. Our strips are 30mm wide strips of 3mm Masonite or SupaWood glued around the edge of the cupboard door.
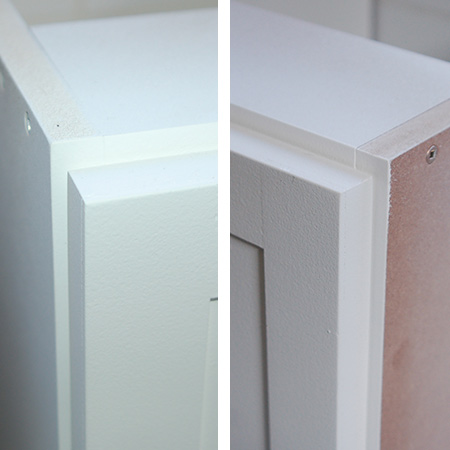
BELOW: Shown after painting, the concealed hinges are half-overlay, to allow for a gap from the door to the edge of the cupboard, and the same on the other side of the cupboard edge.
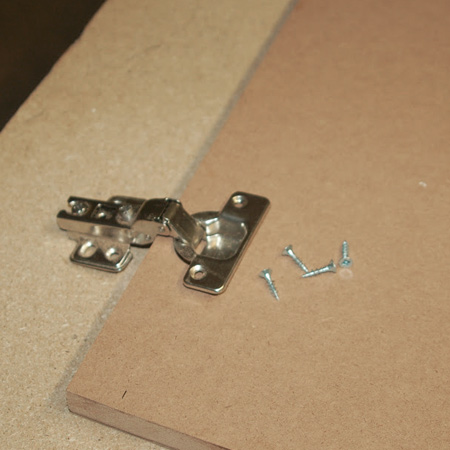
6. For drilling the holes for our concealed hinges we used a 35mm Forstner bit. Mark and measure 21.5mm in from the edge of the door and align the tip of the Forstner bit on this mark for drilling out the holes to an 11mm depth. After painting, the hinges are secured to the back of the door with 16mm screws.
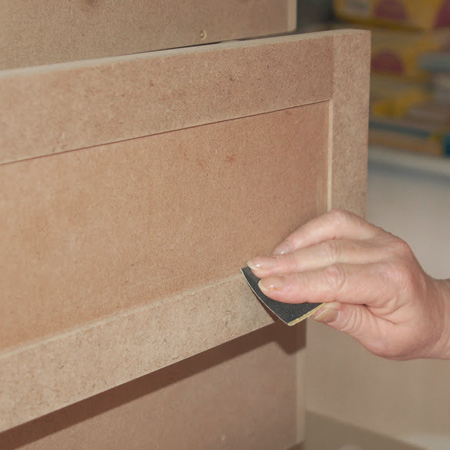
7. The assembled cupboard needs to be sanded on all edges for a smooth finish. Use 240-grit sandpaper to sand/polish all the rough edges to prepare them for painting.
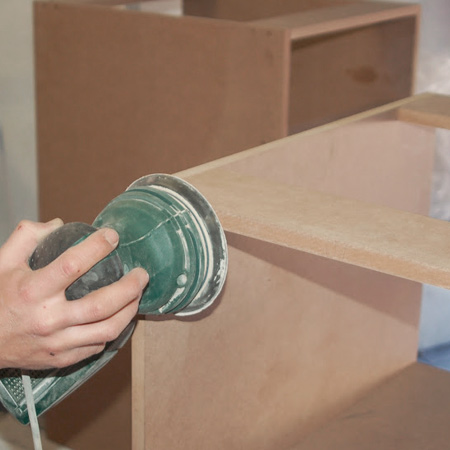
8. Fold a piece of 240-grit sandpaper in half and smooth over all the edges, including the shelf and base.
9. Also sand the sharp edges on the strips by hand using 240-grit sandpaper.
TOP TIP
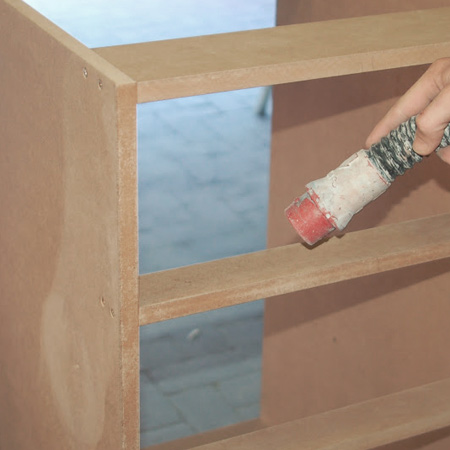
You can use the spray system to blow away excess dust. Remove the paint sprayer, switch on and get rid of any dust before painting.
Painting the finished cupboard
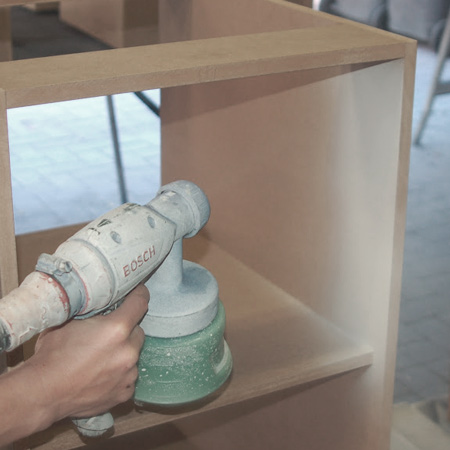
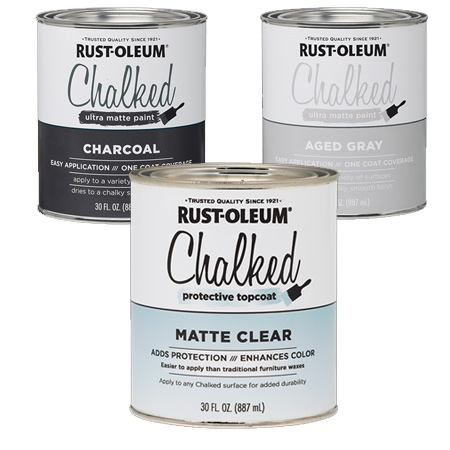
For our kitchen cupboard we used a Bosch PFS 200 spray system to paint the cupboards. This is the easiest method and one that gives excellent results. For this project we used Plascon Polvin in white and once the cupboards are installed, they will be given a couple of coats of Rust-Oleum Chalked ultra matte paint.
In line with modern trends - and also because I like it - once installed the kitchen cupboards will be done in a two-tone finish using Rust-Oleum Chalked Ultra Matte Paint in Charcoal Grey for the floor units and Aged Grey for the wall cabinets. I will share this with you once we are done with the installation. It is important to apply a Top Coat sealer after painting to protect your new kitchen cupboards from spills and allow for easy cleaning.
Find the full range of Rust-Oleum products at Builders Warehouse.
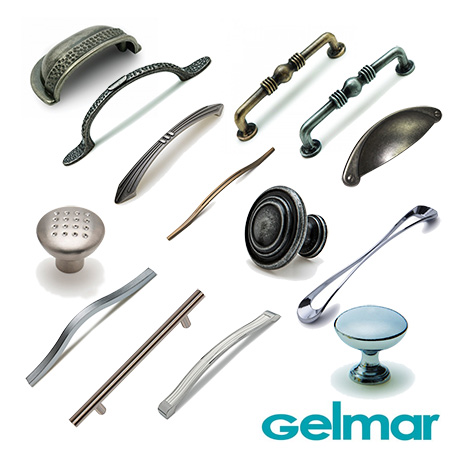
10. Now all that's left to do is to attach the door and add our choice of handle.
If you want to start making a 4-drawer kitchen unit you will find instructions here.