
Make your own Kitchen 4-Drawer Unit
In this article we show you how to make your own kitchen cabinets to install a DIY kitchen from scratch.
31/05/2018
If you have to know how to make your own kitchen cabinets you can design and install a do-it-yourself kitchen that fits in with your budget and that can be customised any style - in any colour. A DIY kitchen will also save you a bundle over having a ready made kitchen installed.
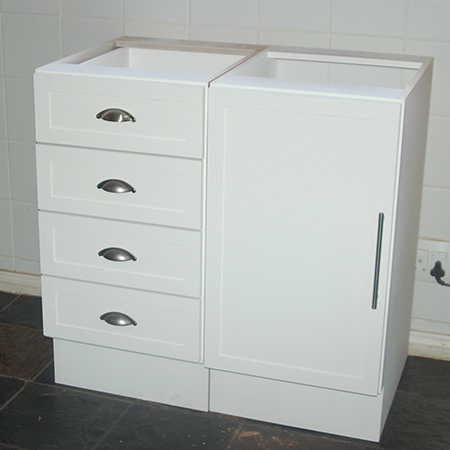
In this project we used a basic Shaker style design using 16mm SupaWood, that is easy to paint either with acrylic PVA, water based enamel, or chalk paint. We show you how to make a basic kitchen cupboard with a door, and a 4-drawer unit. It's easy to modify these designs to make cupboards and drawer units in any size.
Build a 4-Drawer Cupboard
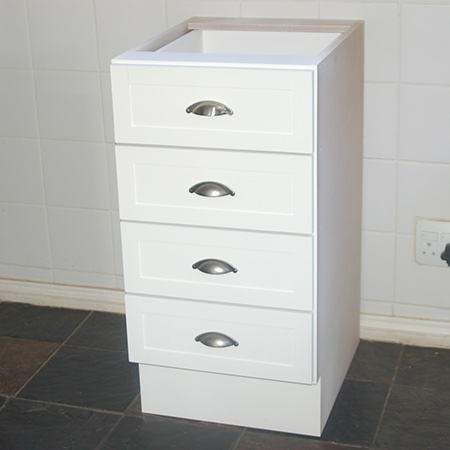
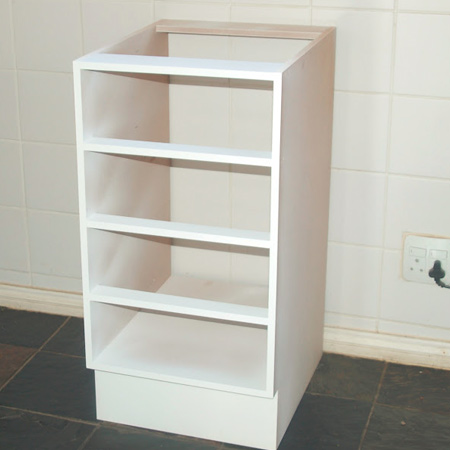
The second project is a 4-drawer kitchen unit. As with the kitchen cupboard, the drawer unit is 450mm wide and you can easily adjust the width for a narrower or wider cupboard - perfect if you need to fit the drawer unit into a space that isn't a custom size.
Click here for instructions for the basic kitchen cupboard with door.
YOU WILL NEED:
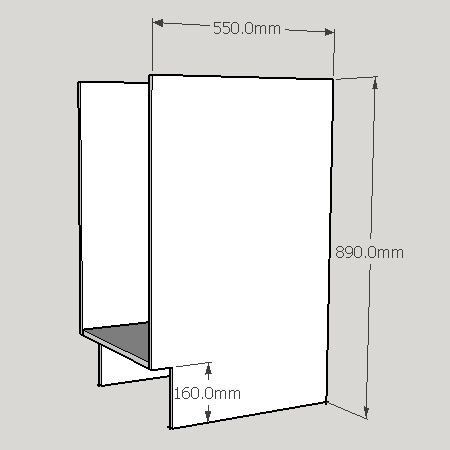
2 of 550 x 890mm 16mm SupaWood - sides
1 of 418 x 500mm 16mm SupaWood - base
2 of 100 x 418mm 16mm SupaWood - top supports
3 of 50 x 418mm 16mm SupaWood - drawer dividers
8 of 156 x 500mm 12mm SupaWood - drawer sides
4 of 156 x 392mm 12mm SupaWood - drawer back
4 of 368 x 400mm 12mm SupaWood - drawer base
4 of 173 x 400mm 16mm SupaWood - drawer front
3mm Masonite or SupaWood strips - cut to fit
Note: We have added a kickplate to our cupboard, but if you are fitting an entire kitchen, this will be cut to fit along the bottom of all the cupboards.
4 x 40mm cut screws
No More Nails adhesive
2 of concealed hinges and 16mm screws
240-grit sandpaper
4 sets 400mm ball bearing drawer runners plus 16mm screws
Paint to finish - see below
TOOLS:
Drill / Driver plus assorted bits
Jigsaw
35mm Forstner bit
Orbital Sander plus 240-grit sanding pads
Tape Measure and Pencil
OPTIONAL: Kreg Cabinet Hardware Jigs - see details below
Not responsible for errors or omissions
GOOD TO KNOW
You can have all the 16mm SupaWood cut to size at your local Builders Warehouse to save time on cutting.
HERE'S HOW:
Before you start to assemble the cupboard, mark and cut out for the kickplate. Our cut out measure 60mm deep by 160mm high. This can be modified if you want a kickplate that is not as deep or you want it lower.
GOOD TO KNOW
Lay one side on the back edge to make it easier to attach the base to one side.
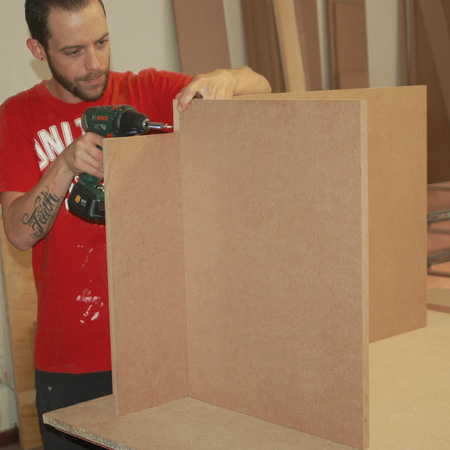
1. Once you have cut out for the kickplate, insert the base and secure through the sides using 4 x 40mm cut screws. Do drill countersinks for all screws.
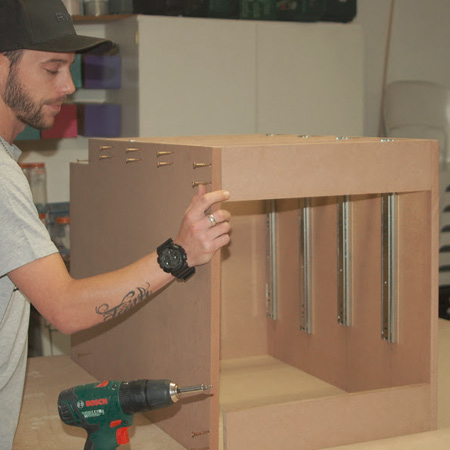
2. Add the [2] top supports and then continue to add the drawer dividers to the front edge at the intervals shown in the diagram below, measuring up from the base shelf.
GOOD TO KNOW
If you plan on installing a concrete countertop, or heavy material, it is recommended that you add extra support - possibly fitting 32mm thick pine top supports in the place of 16mm SupaWood.
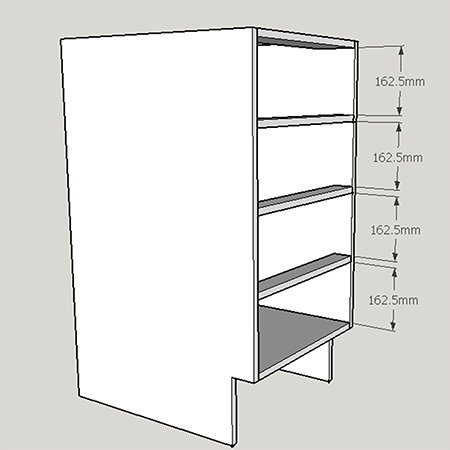
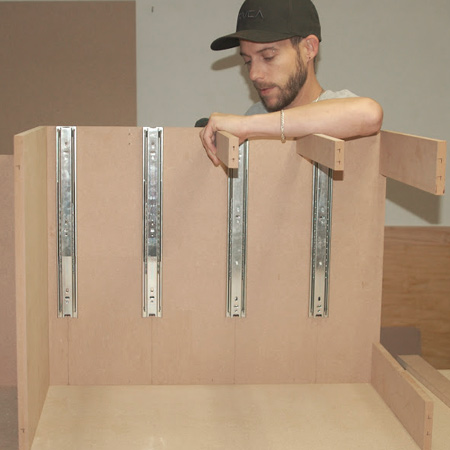
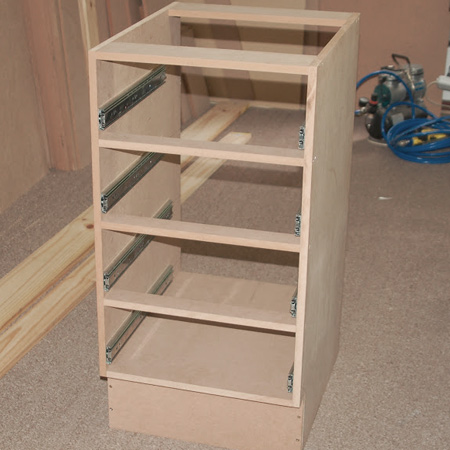
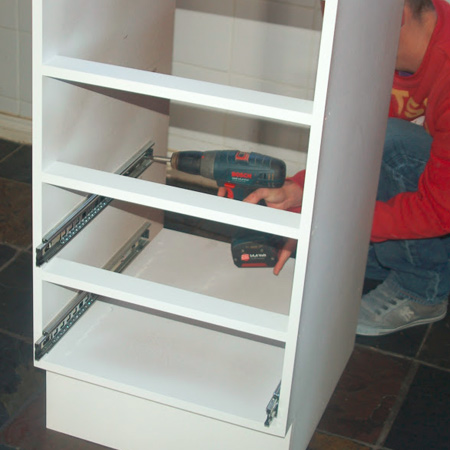
3. To fit the drawer runners to the sides, measure up 40mm from the base shelf and each of the [3] drawer dividers and draw a line. Align the bottom of each drawer runners on this line and secure to the sides with 16mm screws.
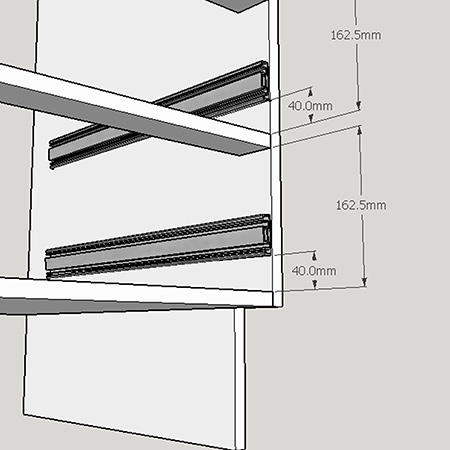
BELOW: Attaching the drawer dividers and ball bearing drawer runners.
DID YOU KNOW
You can now buy all your Kreg supplies at your local Gelmar store. Gelmar also stock the Kreg Pocket Hole K4 Jig, as well as Cabinet Hardware Jig, Concealed Hinge Jig and Drawer Slide Jig.
4. With all the inside sections added it's time to fit the remaining side piece. Again, use a countersink bit to ensure that all screw heads are out of the way, especially if you will be placing cabinets side by side.
OPTIONAL: We added a kickplate to our kitchen cupboard (see below). You will add this now if your kitchen design is for freestanding units that will not be joined together.
5. Assemble the drawer using the diagram below as a guide. The sides and back are placed around the base and the drawer front is added last. The screws is the drawer front will be covered up by the strips added in the next step.
GOOD TO KNOW
The drawer fronts allow for a 5mm gap on either side to tie in with the design of our basic cupboard shown here.

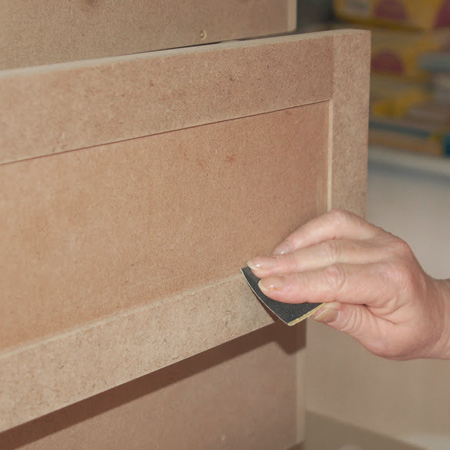
6. Measure up the drawer fronts for adding the strip around the edge. Our strips are 30mm wide strips of 3mm Masonite or SupaWood glued around the edge of each drawer front.

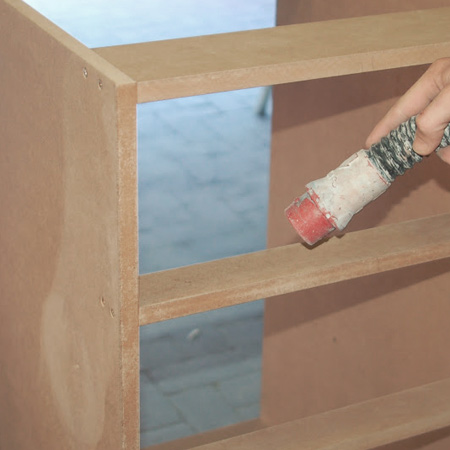
7. Before painting the assembled cupboard needs to be sanded on all edges for a smooth finish. Use 240-grit sandpaper to sand/polish all the rough edges to prepare them for painting.
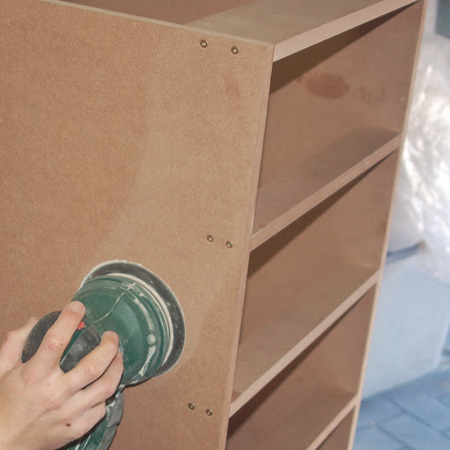
8. Use a piece of sandpaper folded in half to slightly round off all the sharp edges, and also sand the sharp edges on the strips on the drawer fronts.
TOP TIP
Remove the sprayer from the spray gun and switch on the use as a blower to get rid of any remaining dust.
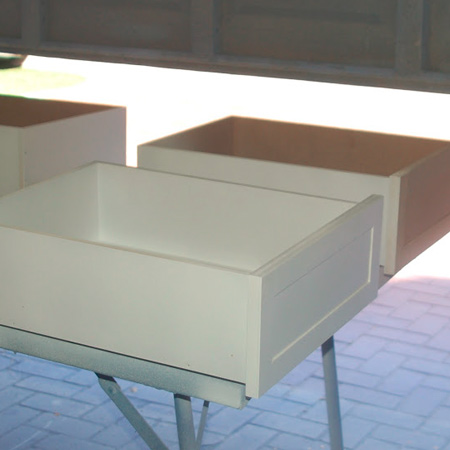
Painting the finished cupboard
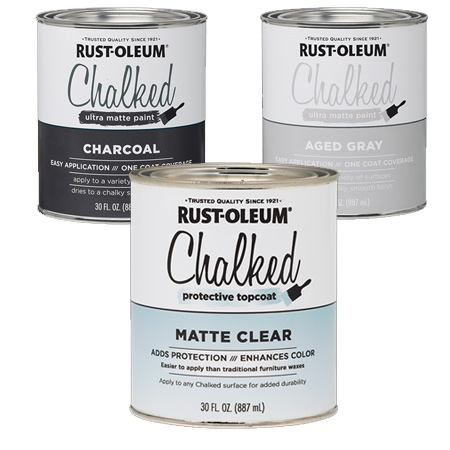
For the drawer frame and drawers we used a Bosch PFS 200 spray system to paint them. This is the easiest method and one that gives excellent results. For this project we used Plascon Polvin in white and once the units are installed, they will be given a couple of coats of Rust-Oleum Chalked ultra matte paint.
In line with modern trends - and also because I like it - once installed the kitchen cupboards will be done in a two-tone finish using Rust-Oleum Chalked Ultra Matte Paint in Charcoal Grey for the floor units and Aged Grey for the wall cabinets. I will share this with you once we are done with the installation.
GOOD TO KNOW
If you do decide to paint kitchen cupboards and cabinets with chalk paint, do apply at least 3 coats of sealer over the top to protect the cabinets from spills.
Find the full range of Rust-Oleum products at Builders Warehouse.
GOOD TO KNOW
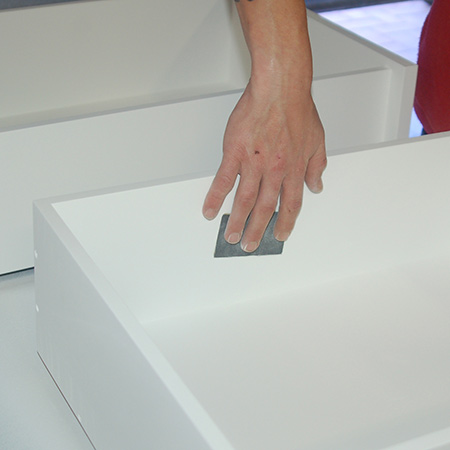
You can see that the sides and top of the frame were not painted. However, if a side will be visible cover the screw heads with wood filler, sand smooth and paint the side in the same way as the frame.
After painting you can re-install the drawers runners, and since all the holes will be visible it's an easy task to do.
Lastly, fit the drawer runners to the sides of the drawers. Measure and mark 37mm up from the bottom of the drawer for attaching the runners and align the bottom of the runners on this mark. Secure the drawer runners with 16mm screws.
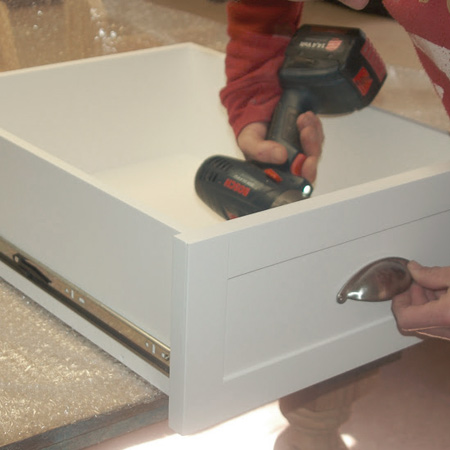
Now you can add your choice of handles or knobs to finish off the assembly. For the widest selection of knobs and handles at affordable prices, visit your local Gelmar store or website www.Gelmar.co.za
Click here for instructions for the basic kitchen cupboard with door.