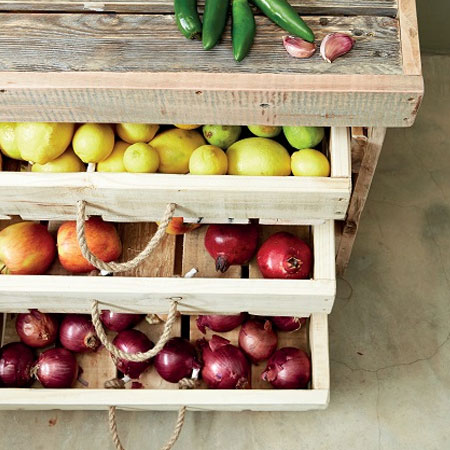
Veggie rack using pallet wood
This vegetable rack is made from reclaimed wood pallets and is a great way to store your fresh veggies.
19/08/2018
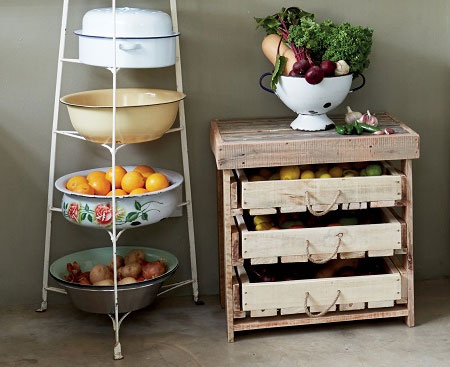
This rustic vegetable rack can be made using reclaimed wood pallets, or PAR pine that you can buy at you local Builders Warehouse. After you've made it, apply a natural matte sealer such as Rust-Oleum Ultimate Natural Matte or furniture wax to protect.
YOU WILL NEED:
Reclaimed pallet wood (approx. 20 x 80mm), cut to:
10 of 400mm - drawer runners
4 of 600mm - legs
2 of 550mm - bottom spacers
2 of 530mm - drawer stops
5 of 590mm - top
1 of 625mm - top front
2 of 420mm - top sides
6 of 500mm, 6 of 350mm plus 15 of 390mm - drawers
4 x 40mm cut screws
Wood glue
Natural rope, 8mm x 1.5m
TOOLS:
Drill/Driver plus assorted bits
Sander plus 120-grit sanding pads
Jigsaw and clean-cut blade
Tape measure and pencil
Find all the tools and accessories for this project at your local Builders.
HERE'S HOW:
GOOD TO KNOW: Sanding the pallet wood beforehand will make the project so much easier.

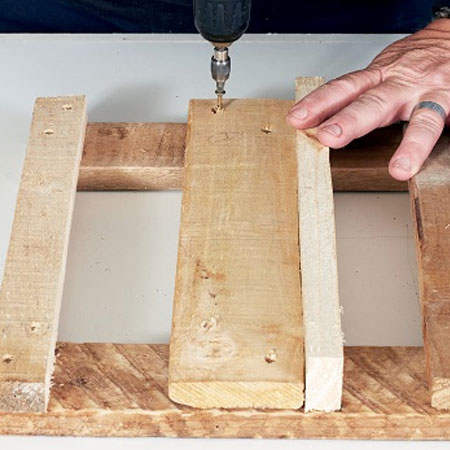
1. Use a jigsaw to cut [4] 400 x 80mm lengths in half length-wise so that you have [8] lengths of 400 x 40mm. Use wood glue and screws to join six of them at right angles to the six uncut 400 x 80mm planks to form the drawer runners.
GOOD TO KNOW: Using cut screws means that you don't need to drill pilot holes.
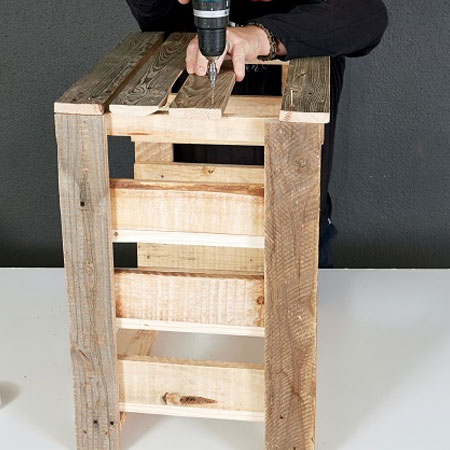
2. Place a single 400 x 40mm plank at a right angle across two 600mm legs and screw together.
3. Measure and mark points at 210mm, 365mm and 525mm down from the top of each leg. Screw three of the drawer runners above these points to form one side of the cupboard. Repeat the process to make the other side.
4. Measuring from the base of each leg, mark at 35mm and screw [1] 550mm length between the two sides. Now attach one of the 590mm planks (for the top) on top of the sides, flush with the front. Repeat the process at the rear of the cupboard, but allow for a 20mm overhang.
5. Position the remaining [3] 590mm lengths evenly in-between and attach with screws.
6. Place the cupboard to face upwards and screw [2] 530mm lengths across the back of the legs and runners to prevent the drawers from sliding in too far.
7. Finish off the top with [1] 420mm length on each side and [1] 625mm length in front

8. Join [2] 350mm lengths between the ends of two 500mm lengths. Space five 390mm lengths on top of the frame and screw together to form a drawer. Make two more drawers in the same fashion.
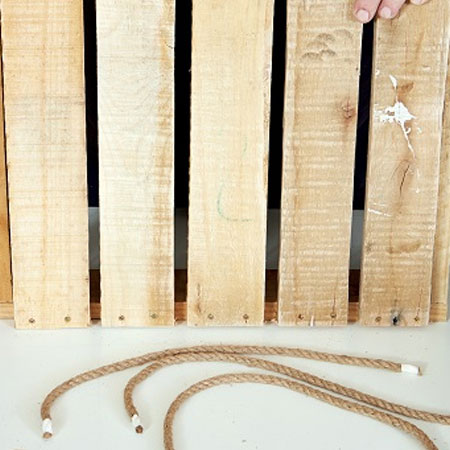
9. Measure and mark 200mm from each end on the front of the drawers and drill 10mm holes for the rope handles. Divide the rope into 3 pieces of 500mm, thread the ends through the holes from the front and make knots on the inside of the drawers.
GOOD TO KNOW: Wrap the ends of the rope with masking tape to prevent fraying and make it easier to insert through the holes.