Make And Fit Pullout Drawers Under The Sink
Pullout storage drawers are a great addition to the kitchen cupboard under the sink and make for more storage space.
20/03/2021
sawdust2stitches.com sponsored by Kreg
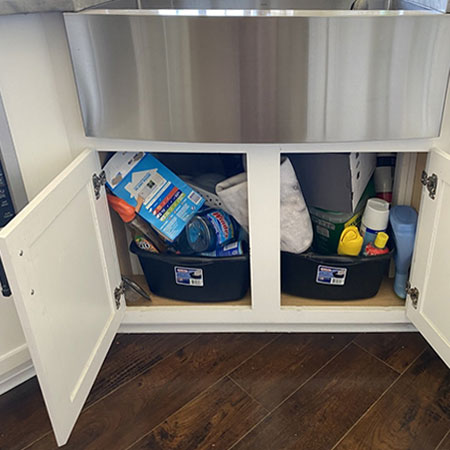
Installing pullout drawers in the cupboard under the sink is a great way to give yourself organised storage space for cleaning products and supplies or whatever else you normally pile under the sink. Making pullout drawers is an easy project if you own a Kreg Pocket-Hole Jig, and in this article, we show you just how easy it is.
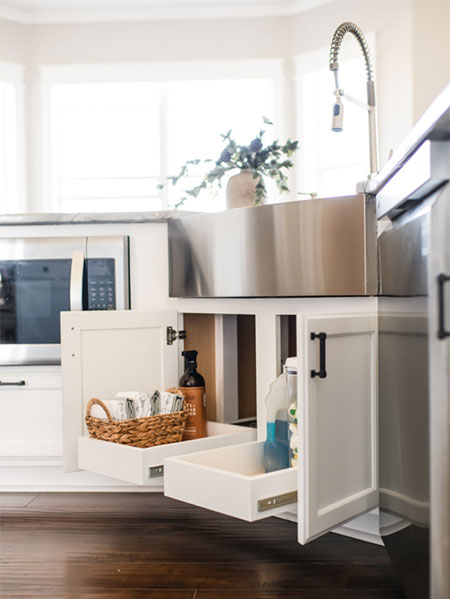
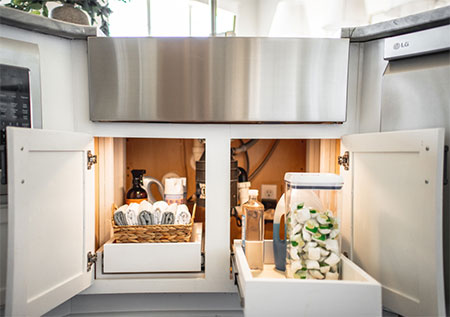
A few months back, I posted on making pullout drawers for my undersink cupboard. Since then, it has been filled with cleaning supplies and it's great to be able to pullout a drawer and find what I need immediately. The drawers are filled with cleaning products, cleaning materials and supplies and anything else I can fit underneath the sink. It is a great addition to my new kitchen, which is almost done and I just can't wait to share it with you.
It has only taken me 3 years to complete (!) but that's because I have been doing it in any spare time I can find to not only save on the cost but also to make sure I do it right. There's nothing worse than doing a kitchen renovation and then standing back and saying... "Why didn't I add a ....." Or I should have done this instead of that. Done that before the last time I did a kitchen renovation and this time I made sure that everything was just as I wanted it. And I promise that I will share soon :)
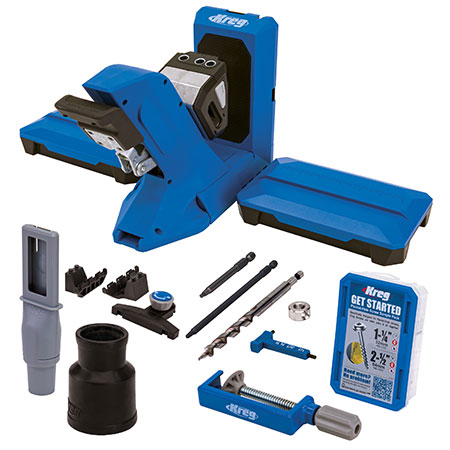
In this project, Corey of Sawdust2Stitches takes you step-by-step of making pullout drawers using a Kreg Pocket-Hole Jig 720PRO, one of the new models recently launched by Kreg and we recently featured on Home-Dzine.co.za.
YOU WILL NEED:
Pine, Plywood or SupaWood cut to your required sizes
32mm pocket-hole screws
16mm screws
Wood glue
Ball-bearing drawer runners
TOOLS:
Drill / Driver plus assorted bits
Kreg pocket-hole jig
Tape measure and pencil
Safety gear
CLICK HERE TO CHECK OUT THE NEW KREG JIGS COMING SOON!
HERE'S HOW:
Step 1
Before you can order your choice of material to be cut to size, you need to take measurements. Not every undersink cupboard will be the same, so make sure to measure the length, width and depth of your cupboard accurately. You also need to determine if any additional support will be needed inside the cupboard to support the drawer runners. This is not included in the supplies list above so be sure to include this when you go to Builders or hardware store.
Having all the pieces cut to the exact sizes you need makes for quick and easy assembly and you will be finished with this project in no time at all.
Step 2
For this project, Corey made a support for the drawers as can be seen below. This is the carrier that holds the drawer in place and onto which the drawer runners are mounted and the drawer itself. Make up the carrier using [2] sides and [2] crosspieces assembled using wood glue and 32mm pocket-hole screws.
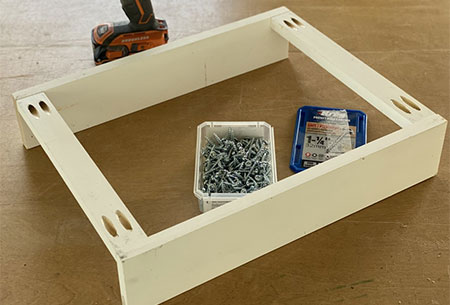
GOOD TO KNOW:
The next step is to assemble the drawers themselves. From a personal view, I would make the drawer sides, front and back a lot higher than the ones shown below. Since the drawers are going to be used for the storage of cleaning products and materials, having higher sides means more storage. It's up to you but I would recommend the sides, front and back be higher for practical reasons.
When putting together a diagram and cutting list, don't forget to allow for the thickness of the ball-bearing drawer runners that will be fitted between the carrier and drawer. This is usually about 13 to 14mm and needs to be factored into your measurements.
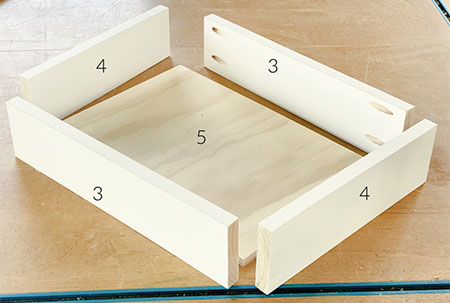
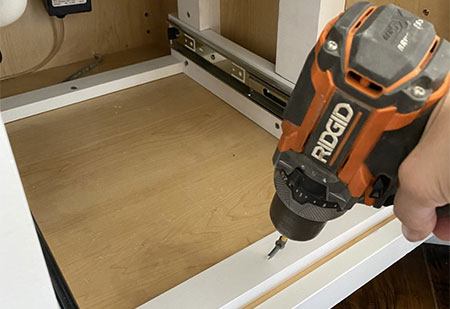
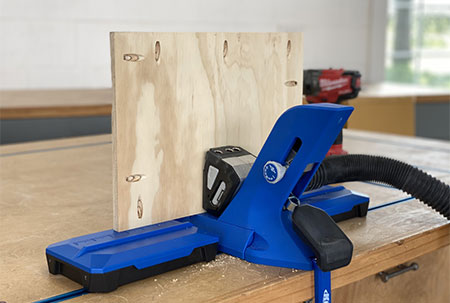
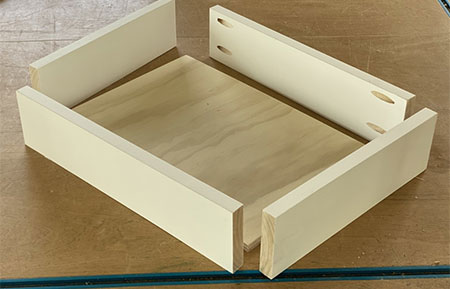
Step 3
Drill the necessary pocket-holes in the base and sides, as shown in the next two images below.
Step 4
Assemble the drawer using wood glue and 32mm pocket-hole screws. Make sure that the pocket-holes drilled into the base section are underneath and not visible.
Step 5
Separate the ball-bearing drawer runners so that you can attach one side to the carrier and the other side to the drawer, as can be seen in the image below.
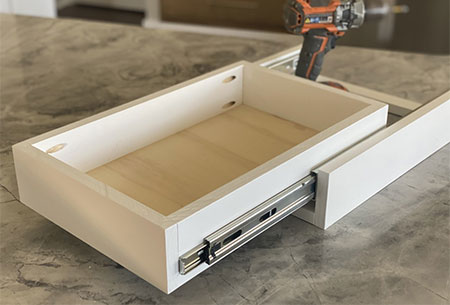
Step 6
Now you can fit the carrier into the cupboard, along with any additional supports required if there are gaps inside the cupboard. Test fit that everything works as it should, keeping in mind that the ball-bearing drawer runners might be a bit stiff in the beginning but will loosen up the more you use them.
Now you can grab all your cleaning supplies and materials and get organised!