
Apply mosaic tile to kitchen countertops
In an issue of Home-Dzine Online I gave my kitchen countertop a makeover. After a couple of weeks of living with it, I decided I wasn't happy and wanted to consider another option - applying mosaic tile to a kitchen countertop.
An option that I had in mind was to tile the countertop with mosaic tile and I just wanted to work out the details before tackling the project. For starters you can't use tile adhesive because it will not adhere properly to the countertop, and then there is the question of edging around the tiles.
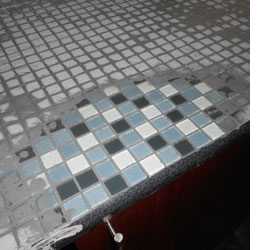
Here is the finished result, and I just LOVE IT. So much so, that I am now going to tile the remaining countertops!
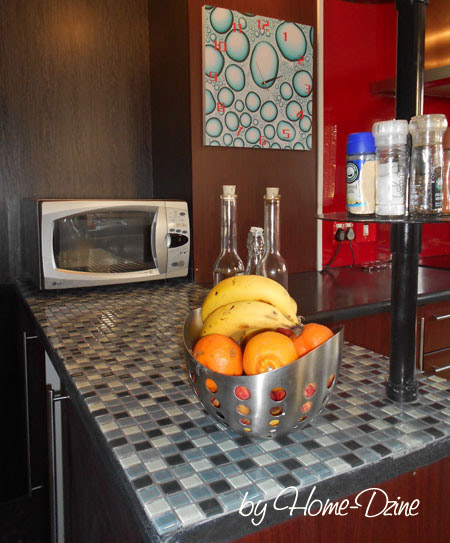
I discovered these beautiful glass mosaic tiles at Builders Warehouse in Strubens Valley and they are perfect for my kitchen.
The project was completed in just over a day, allowing drying time for adhesive and grout. So how did I tile the countertop?
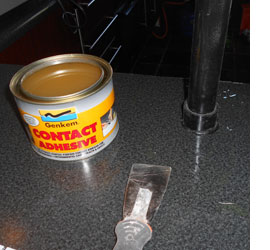
I glued the mosaic tile onto the countertop with contact adhesive. That's right... contact adhesive and it worked like a dream. Because the mosaic tiles are glass and the countertop is laminate, you have to be careful what you use as an adhesive. Ordinary tile adhesive just won't work as it doesn't have anything to bond to. My next thought was No More Nails adhesive, but that won't work either. One surface has to be porous for No More Nails, and both the countertop and tiles are non-porous.
There had to be something that would work to attach the mosaic tiles to the kitchen countertop, and it was then that I came up with the brainwave to use contact adhesive. This stuff sticks to anything and is a nightmare to get off, so why not use it to stick tiles down.
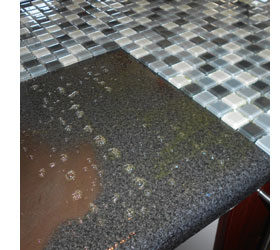
I applied a liberal layer of contact adhesive over a small section of the kitchen countertop, just enough for two tile sections.
Applying the adhesive to the back of the tiles is a bit tricky but can be done. You don't want too much adhesive on the back or it will seep through to the front and you will have a big mess on your hands. Ask me, I did it with the first tile!
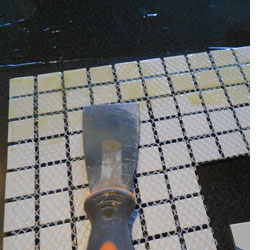
Use a paint scraper to apply a small amount of contact adhesive at one time and after doing the whole tile, start again and apply a little more.
Let the countertop and tile sit for about 10 minutes, or until tacky to the touch, and then carefully place one corner in the right spot before lowering the remaining onto the surface. It might seem tricky at the first go, but you get it right quickly.
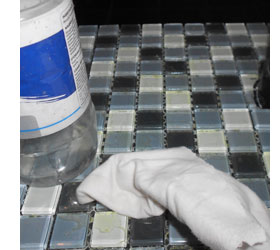
Once all the tiles are down you need to work quickly to remove any contact adhesive that has seeped through to the surface. A clean cloth and mineral turpentine do the job fast and efficiently. Plus you can use this to unglue your fingers as well !!
Let the contact adhesive cure overnight.
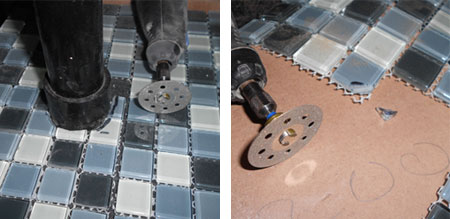
CUTTING TILES
Sometimes you might have to cut tiles, and I did because of my herb and spice stand. After trying numerous different attachments in my Dremel MultiTool, I hit paydirt with the diamond cutting disk. These glass tiles are very, very hard and it was the only thing I could cut them with, bar getting out my angle grinder.

Now it's time to add the grout. I started off with a sponge to squeeze the grout into the gaps, but decided this was too much effort and used my hands instead. Not a good idea if the tiles have sharp edges, but the glass tiles are smooth and it was actually good fun.
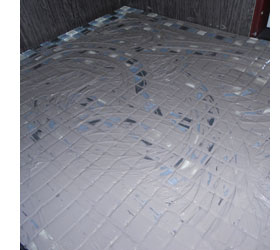
Make sure that you get the grout into every single gap. I put on a fairly thick layer of grout and then spread is thinly across the surface, and then added more just to be sure.
This was a very 'hands on' project and I was covered in grout by the time I finished, but it's easy to wash off and my hands seem none the worse for the experience!
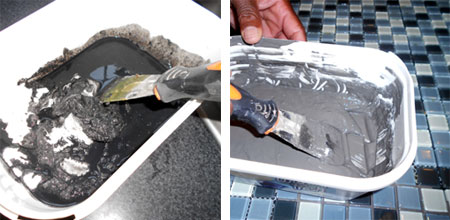
COLOURING GROUT
Isn't it amazing that when you want a specific colour for your grout no one has it in stock. White grout would have looked silly with the mosaic tiles and I wanted a dark grey colour. Could I find a dark grey - not on your nelly!
So what to do? The simple solution is to add watered down craft paint to the mix. I used black acrylic craft paint, to which I added water and then poured the watered down paint into the grout mixture. Ta Da !!
Want red grout? Blue grout? What about pink grout? No problem - add some craft paint and there you have it.
After letting the grout dry for a hour or two, it was time to get down to the dirty deed - washing the tiles. A sponge and bucket of water are all you need and you will need to keep replacing the water.
Finally, I sprayed the entire surface with grout sealer. I'm not taking any chances here. This is the final attempt at giving my kitchen countertops a makeover and I so love how it looks.