The Essential Pullout Pantry for a Kitchen
This pullout pantry is a great addition to any kitchen and the pullout drawers make it easy to find and access what you need.
28/01/2019

After making my pantry-in-a-cupboard, and while it's still a great idea, I found that I couldn't really access what was in the drawers, mainly due to the fact that the unit had to be mounted close to one wall. This blocked access from one side, and with me being such a shorty - with short arms - I found it difficult to reach to the back of the drawers.
I will be using the pantry-in-a-cupboard for something else and decided to make an easier version of this by assembling a pantry with pullout drawers.
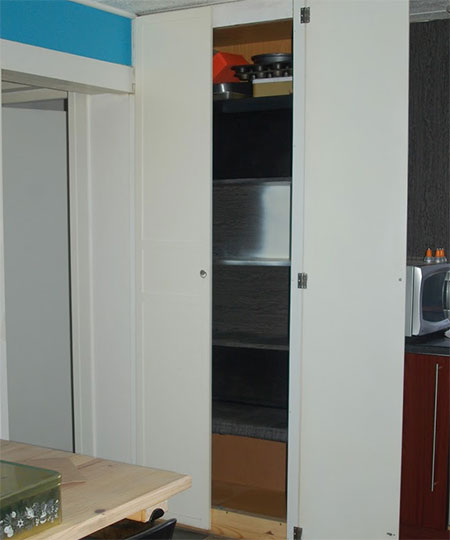
The new pullout pantry is going to replace an existing cupboard that has fixed shelves and is only 400mm deep. The pullout pantry will have pullout shelves and be 500mm deep. The current cupboard actually fits into a space and closes off one room that I use as an office.
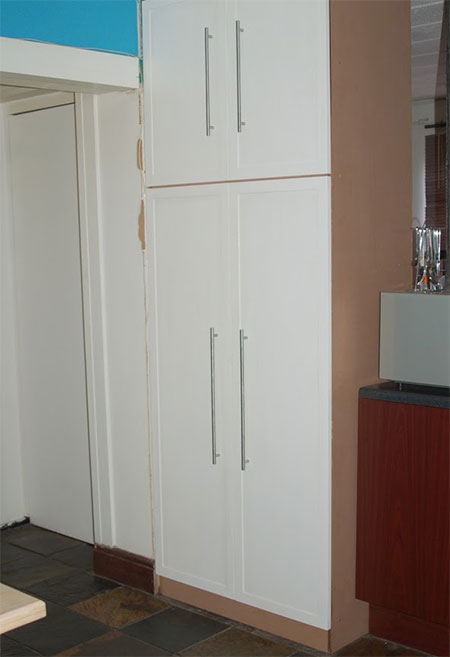
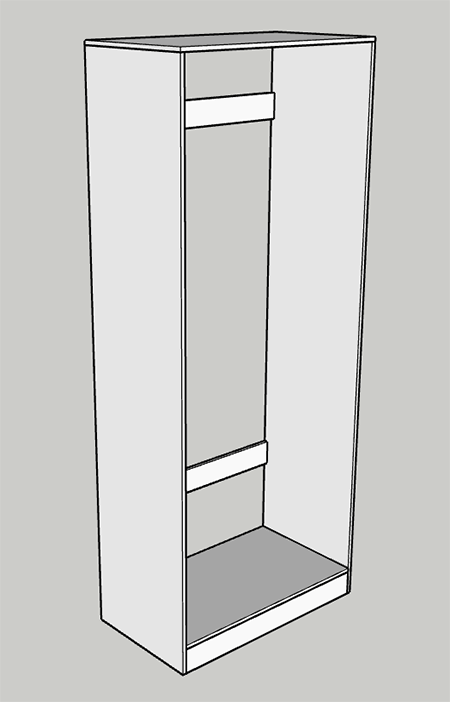
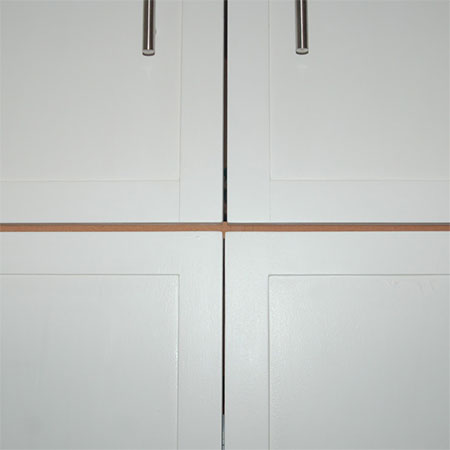
The new pullout pantry goes from floor to ceiling and is 900mm wide. The original cupboard has doors that went from floor to full height, but I did notice that there was a bit of bowing due to the length of these doors. The new pullout pantry will have 4 doors - 2 at the bottom and 2 at the top.
HERE'S HOW:
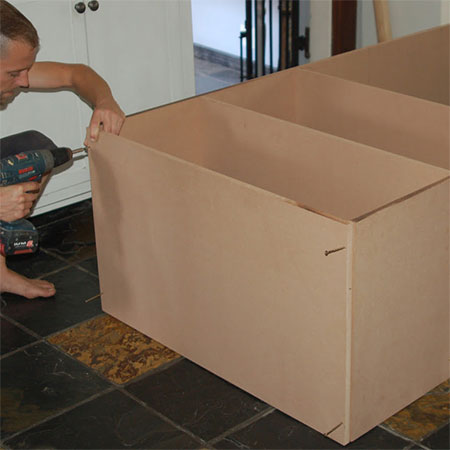
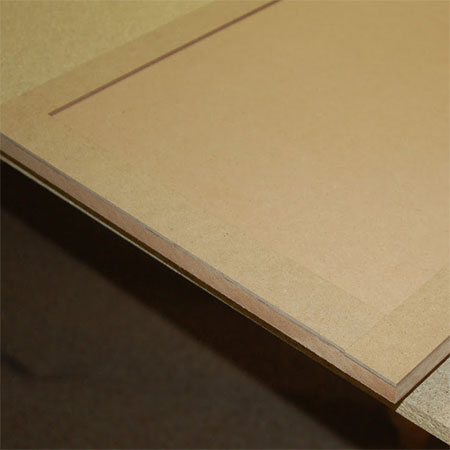
1. Measure up the available space that you have so that you can order the 16mm SupaWood and have it cut to size at your local Builders Warehouse.
GOOD TO KNOW: When collecting your cut pieces, take along a tape measure to check that the pieces are cut to the right size! There have been times when they forget to allow for the thickness of the cutting blade and pieces have been either just too small or too big, so it's always better to check before you take cut pieces home.
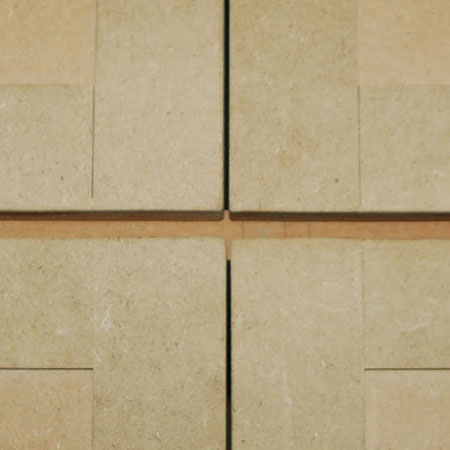
2. Use the image above to assemble the cupboard. Start with the frame and supports and then add the fixed shelves.
3. To make it easier, I hand painted all the drawer components before assembly. To provide a durable finish that will be easy to clean I applied two coats of Fired Earth Non-Drip Enamel.

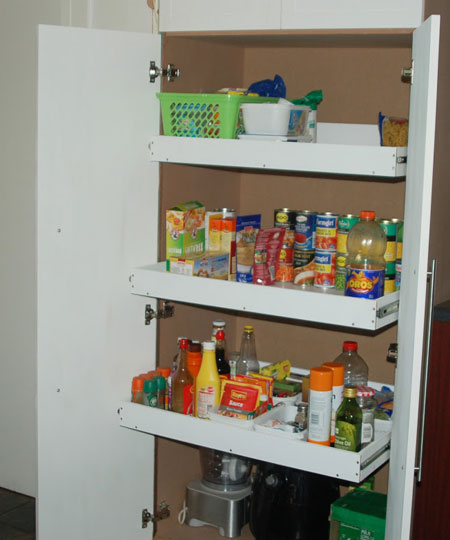
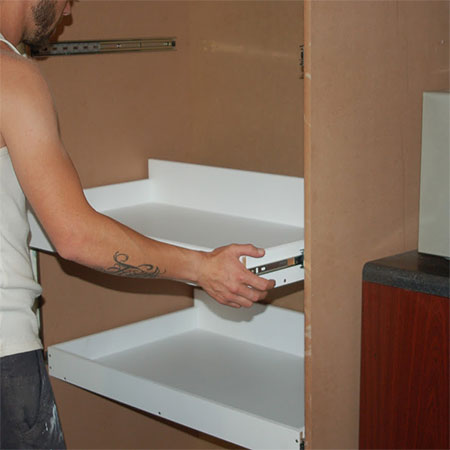
4. Assemble the drawer as shown below. When working out the size of the drawer, remember to bear in mind the width of the drawer runners you will be using. The drawers are constructed out of 12mm SupaWood for a more lightweight assembly. The drawers are also assembled around a solid 12mm SupaWood base to give the drawer strength and be able to support plenty of weight.
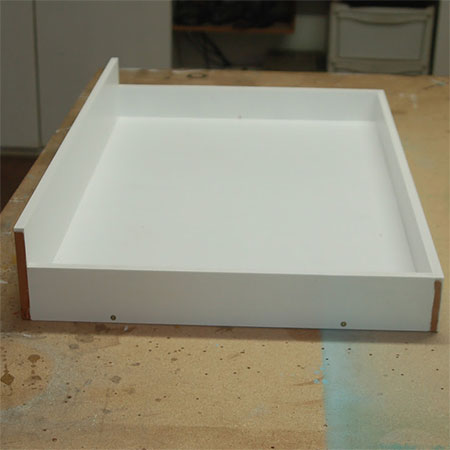
GOOD TO KNOW: The back of the drawer is higher than the front. This will allow me to stack cans at the back of the pullout drawer without worrying that they will fall over.
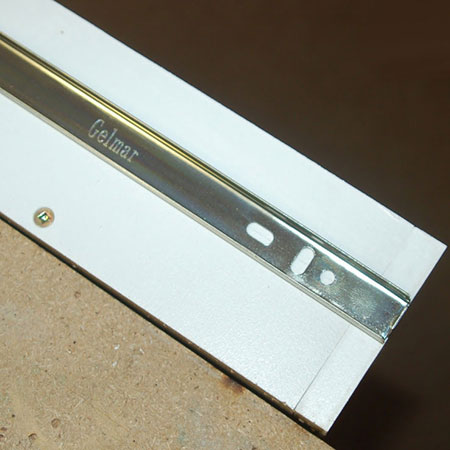
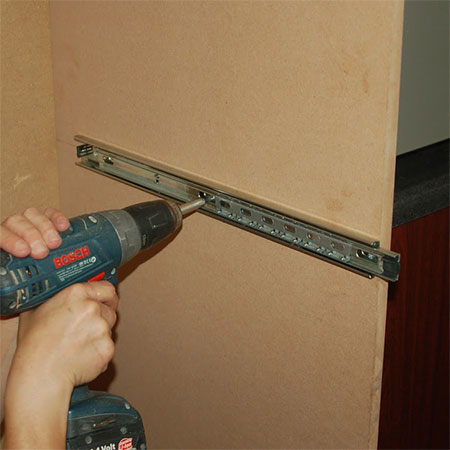
5. Gelmar ball-bearing drawer runners (450mm length) were used for the pullout drawers. Gelmar also have the soft-close drawer runners if you want to fit these.
GOOD TO KNOW: separate the drawer runners in order to attach one section to the side of the drawers and the other to the sides of the cabinet. Double check your measurements for accurate fitting and mounting.
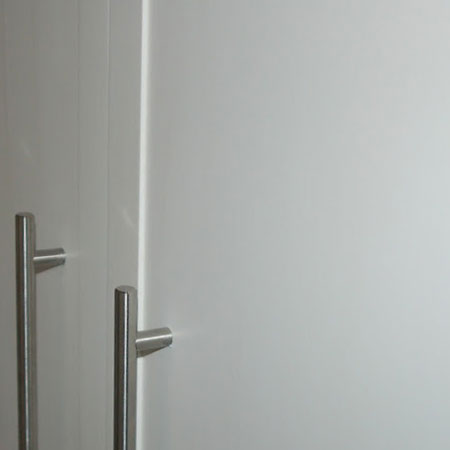
6. To give the doors a Shaker look, 40mm wide frames of 3mm SupaWood were glued onto the doors.
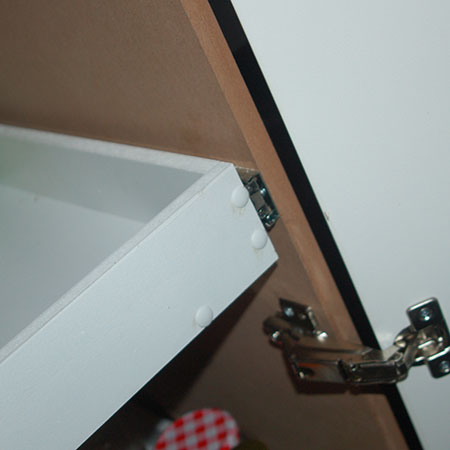
7. Before painting the doors, the holes for the hinges were drilled out and the hinges then attached to the doors and cupboard sides. It's better to do this before you do any painting, as it allows you to make any adjustments if the doors don't fit properly.
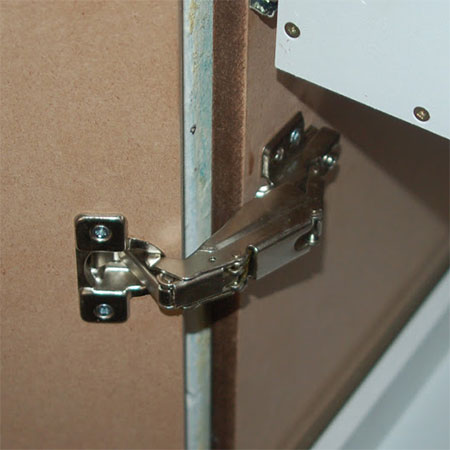
The hinges used were Gelmar 165-degree concealed hinges. You need to use a 165-degree hinge so that the doors open wide enough to allow for you to pull out the drawers.
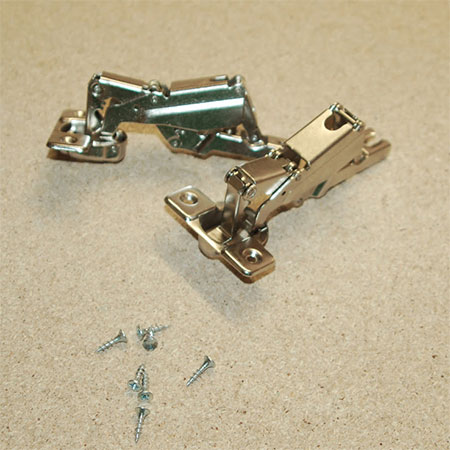
You can also easily adjust these hinges to make minor adjustments to front/back - in/out - and side-to-side. This is great when fitting doors, as you can align the doors perfectly all round.

8. Also before painting, marks and holes were made for mounting the modern handles. Once again we shopped at Gelmar for the handles - they have such a wide range to choose from and their prices are extremely affordable.

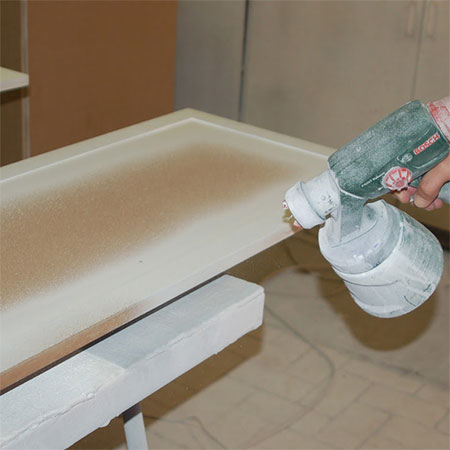
9. After double checking that the doors were a perfect fit, these were removed for painting. If you want a perfect, professional finish you should use a spray gun. We always use the Bosch PFS 2000 for all our painting projects. At a price of around R1200, you can affordable to spray all your furniture projects.
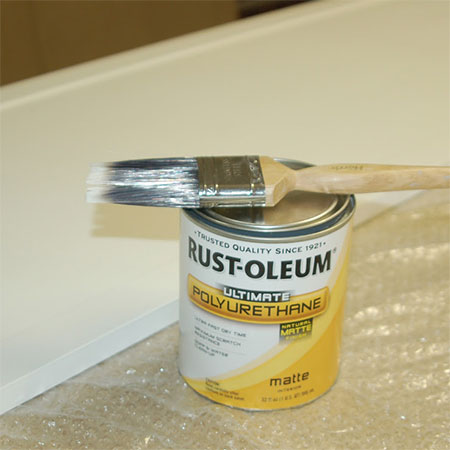
10. The doors were painted with Plascon Polvin, which is a matt paint, and using a matt paint allows you to sand the doors between coats for an ultra smooth, matt finish. I'm going for a Shaker design for the kitchen, so don't want glossy or shiny doors. To seal the painted finish I applied 3 coats of Rust-Oleum Ultimate Polyurethane - natural matte. Once the paint and sealer were dry, the doors were re-mounted onto the cupboard and the hardware attached.
Finishing Touches
Cover up screw heads with clip-on plastic screw caps or self-adhesive screw covers - both can be found at Gelmar.