
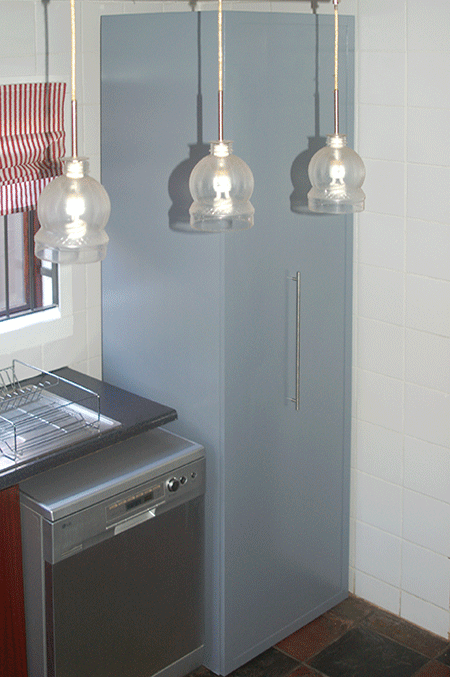
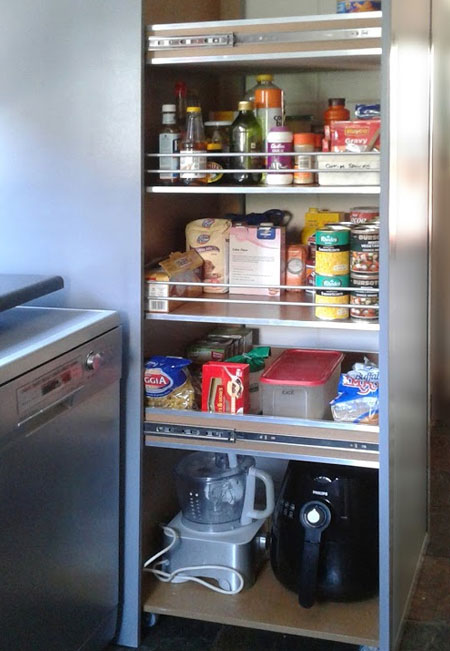
This pullout pantry is a pantry-in-a-cupboard
This pullout pantry is a pantry-in-a-cupboard that gives you a huge amount of storage space in a kitchen, and you can easily fit it into an empty corner, or replace an existing floor unit.
16/11/2018
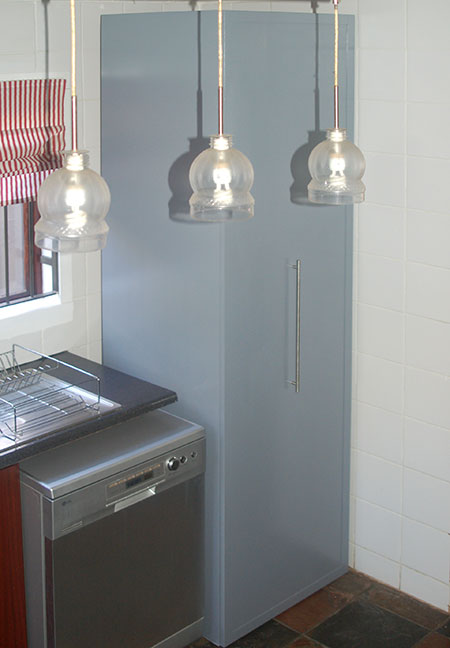
I am finally in the process of ripping out and re-doing my kitchen - and about time too! One major change that I made to the kitchen was to put my washing machine and tumble dryer into the small hoekie that used to be my pantry - more on this project later on. Having done that, I needed to replace the pantry that became a laundry, and I designed this pullout pantry - or pantry-in-a-cupboard - to fit in the empty space where the washing machine used to be.
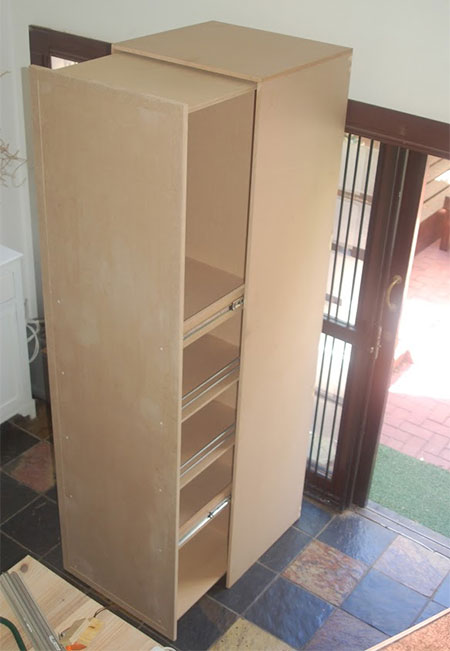
I needed a very large cupboard to be able to take everything that was previously in the small pantry and made a cupboard that goes from floor to ceiling. While the measurements are given below for this pantry project, you can easily modify these to make a pullout pantry to fit into a specific space in your kitchen.
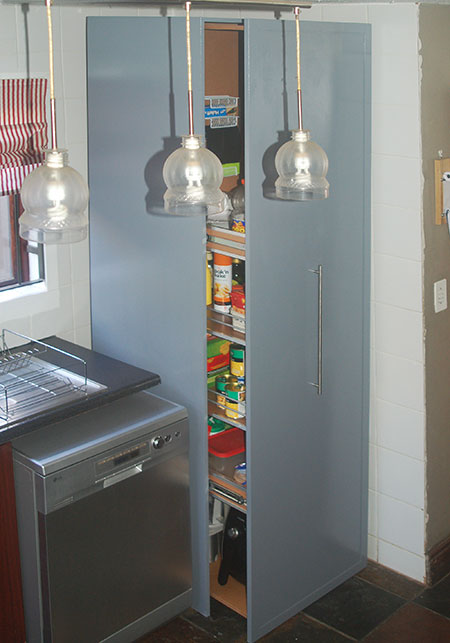
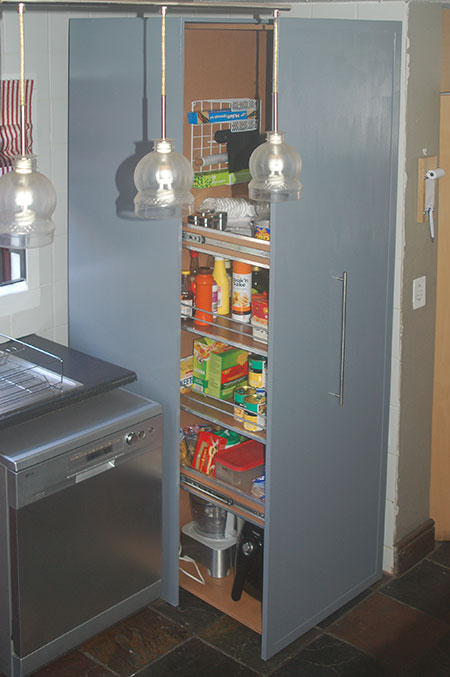
The pullout pantry is mounted inside a basic frame that will be fixed to the wall once the kitchen revamp is done. It is very easy to pull out the pantry section thanks to the two sets of Gelmar drawer runners and castor wheels under the base. The castor wheels are suitable for up to 40kgs weight and the addition of the drawer runners allows for smooth pulling out and in of the pantry shelf unit.
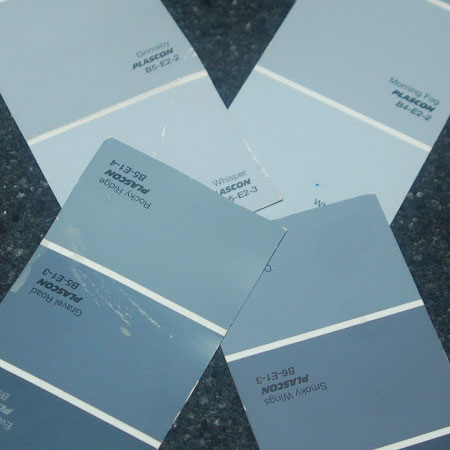
Since this pullout pantry is part of the entire kitchen revamp, I selected colours that I will be using for the new kitchen cabinets. A light grey will be used for the top cabinets and a darker grey for the floor units. I really like the idea of a 2-tone kitchen in two shades of grey.
YOU WILL NEED:
1 of 650 x 2290mm 16mm SupaWood - pullout section, front
1 of 592 x 2264mm 16mm SupaWood - pullout section, back
2 of 600 x 2284mm 16mm SupaWood - cabinet frame, sides
1 of 600 x 650mm 16mm SupaWood - cabinet frame, top
4 of 80 x 618mm 16mm SupaWood - cabinet frame, frame supports
6 of 568 x 592mm 12mm SupaWood - shelves, top and base
4 x 80 x 568mm 16mm SupaWood - shelf sides (for drawer runners)
3 lengths of pine dowels, 9mm diameter x 1800mm length, cut to fit (578mm)
OPTIONAL: 3 x 40mm SupaWood strips to finish off the door, cut to fit
OPTIONAL: Kedla Aluminium Equal Angle 12mm x 2500mm
4 x 35mm screws
2 sets of Gelmar 550mm drawer runners
4 of Gelmar fixed castor wheels #2896 plus 16mm screws
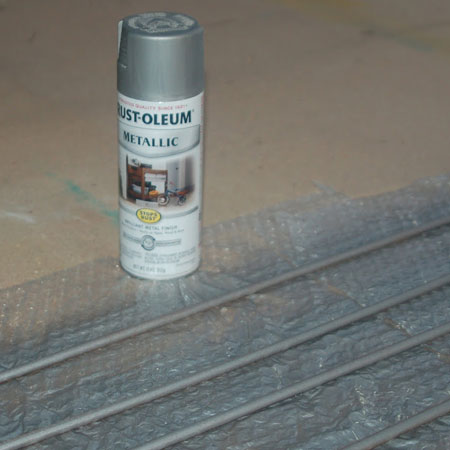
Rust-Oleum Metallic spray paint, silver nickel
Wood filler
120- and 300-grit sandpaper
TOOLS:
Drill / Driver plus 3mm and 10mm bits and countersink bit
Orbital sander plus 220-grit sanding pads
Tape measure and pencil
FINISHING:
Synthetic paintbrush and finishing brush
Foam paint roller and paint tray
Plascon Polvin in your choice of colour
Prominent WoodPro water based sealer, or clear acrylic sealer
HERE'S HOW:
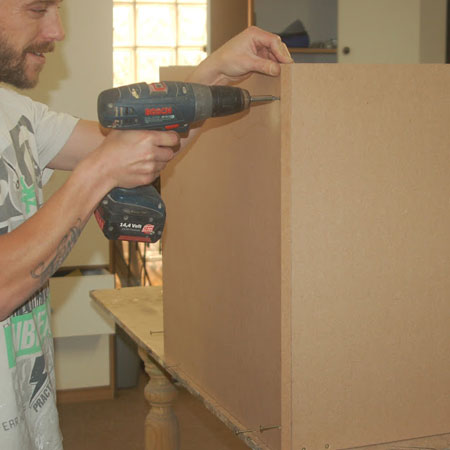
Note: Drill and countersink all screw holes for assembly.
ASSEMBLE SHELF UNIT
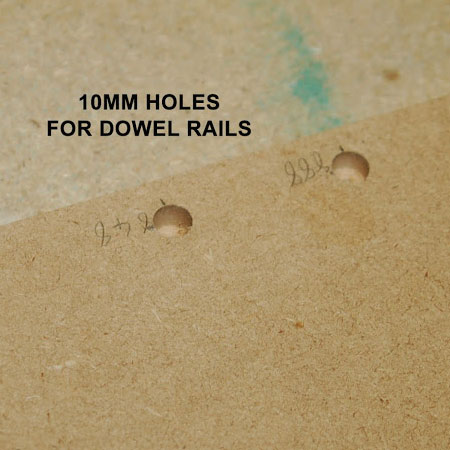
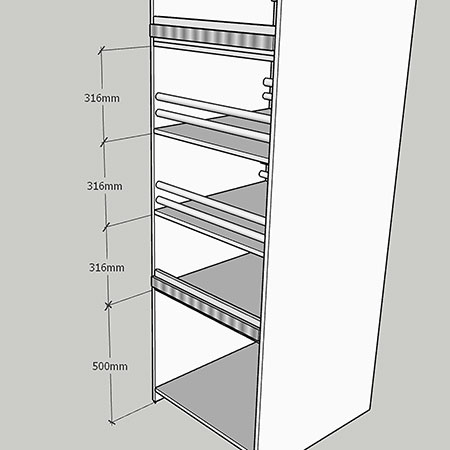
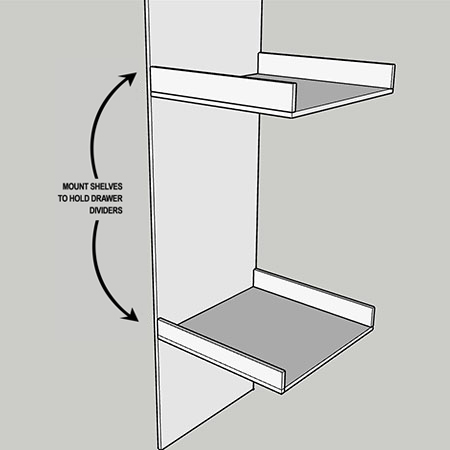
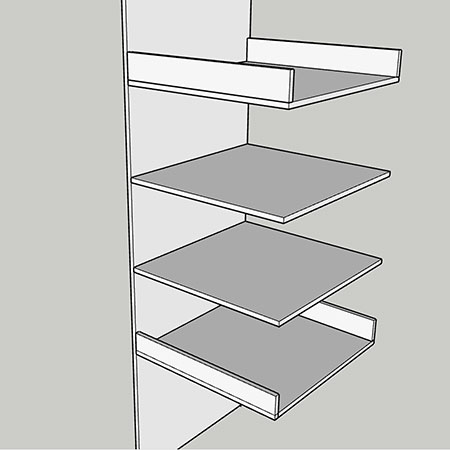
1. To cut down on the total weight of the pullout shelf unit, the shelf bases are 12mm thick SupaWood and there are 9mm pine dowels added for the sides. These dowels will serve as rails for the shelves to prevent anything from falling out. The dowels were painted with Rust-Oleum silver nickel spray paint. Mark the location where you want to mount the dowels and drill 10mm holes to a 5mm depth. Note that the dowels only serve as sides for the shelves that do not have sides fitted to accommodate the drawer runners - see diagram below for placement of shelves.
GOOD TO KNOW: When you cut the dowels to length, cut these to the length of the shelf (568mm) plus 5mm at both ends for mounting (578mm)
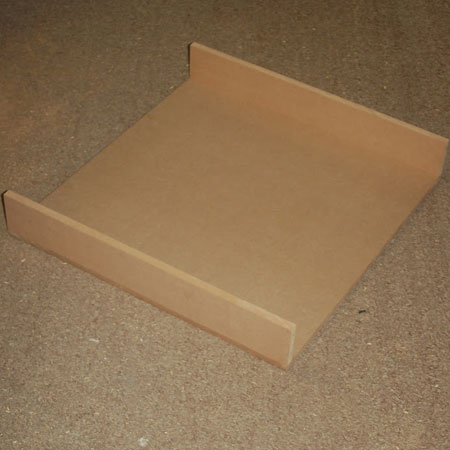
2. Two shelves with sides were assembled to accommodate the Gelmar drawer runners. The shelf bases are 12mm SupaWood, with the sides being 16mm SupaWood. The sides are fitted on top of the base and screwed in place through the base using 4 x 35mm screws.
3. After assembling the shelves for the drawer runners, secure these to the pullout back (see below) using 4 x 50mm screws.
GOOD TO KNOW: See diagram [Placement of Shelves] above for mounting, or determine your own shelf mounting heights.
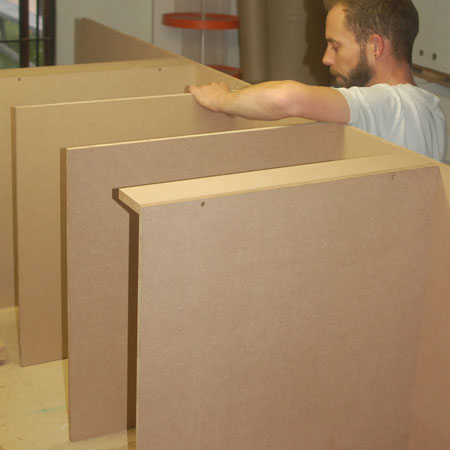
4. Now you can add the remaining shelves, plus the top and base, at your desired locations using 4 x 50mm screws through the pullout back. The base is mounted at a height determined by the total height of the castor wheels you will be adding - 60mm up from the bottom of the front/door and bottom of the back. This allows a 1cm clearance at the bottom of the both the back and the front/door.
GOOD TO KNOW: To make it easier to install the shelves, work with the back on a side edge.
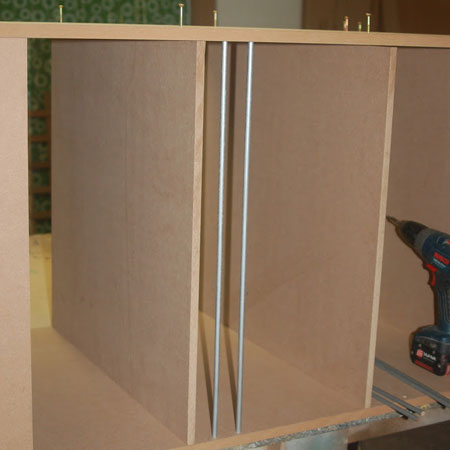
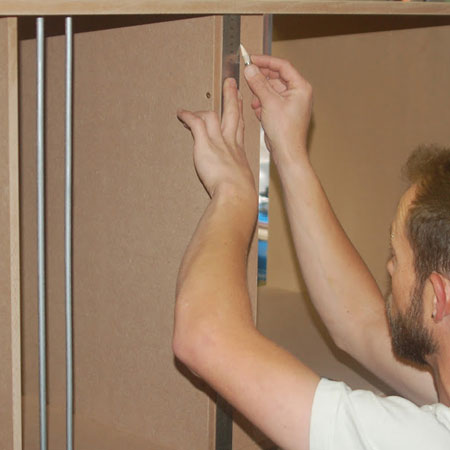
5. Before adding the pullout front, insert the dowels into the pullout back, in the holes previously drilled.
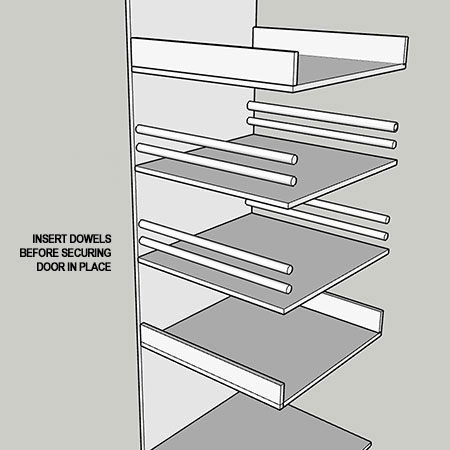
6. Place the assembled shelves onto the back and position the pullout front on top.
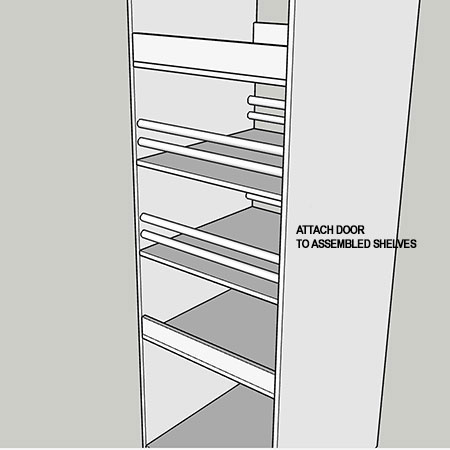
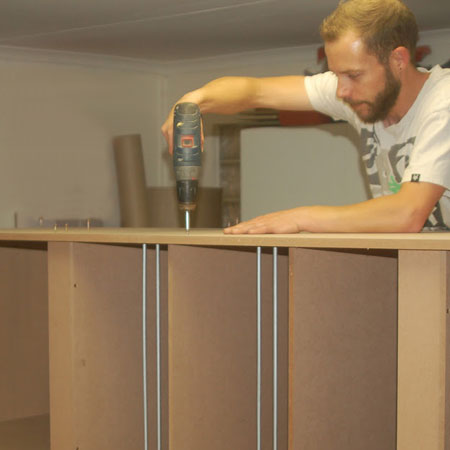
7. Secure pullout front (door) to the shelves using 4 x 50mm screws.
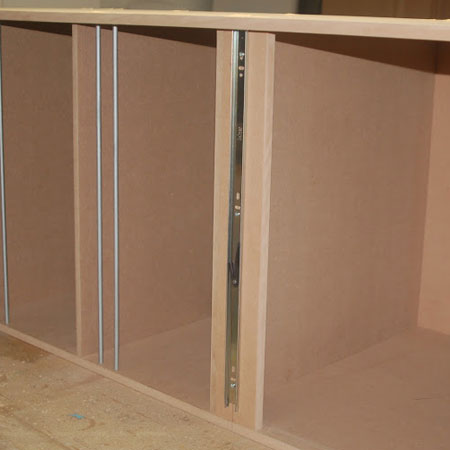
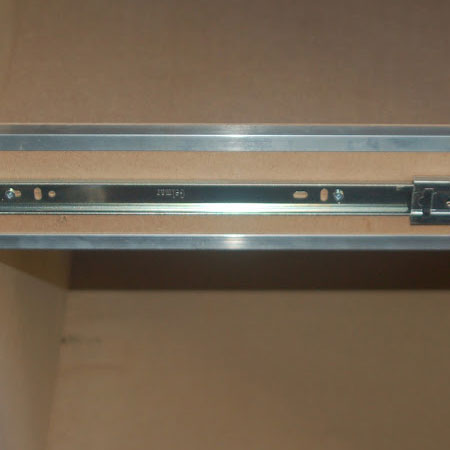
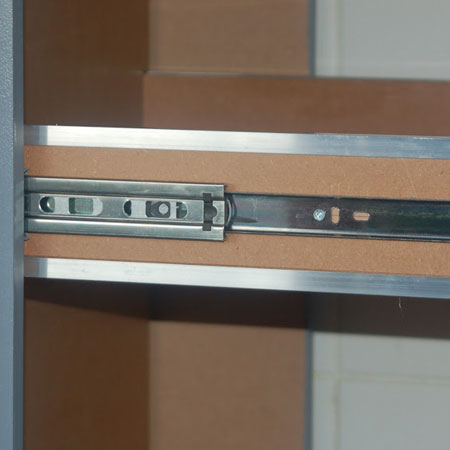
8. On the side of the shelves for the drawer runners, mark at the centre for mounting the drawer runners. Don't forget to transfer this measurement onto the cabinet frame, once this has been assembled.
9. Split the drawer runners into separate components in order to secure one section onto the shelf sides, as shown below.
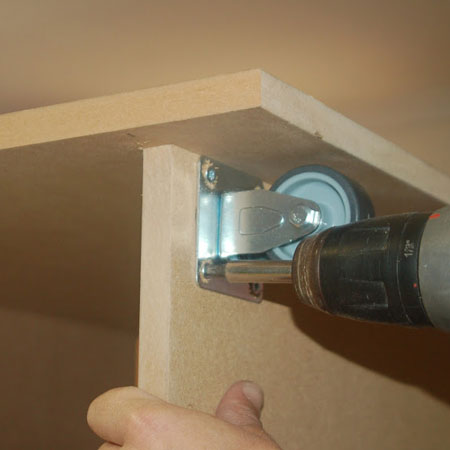
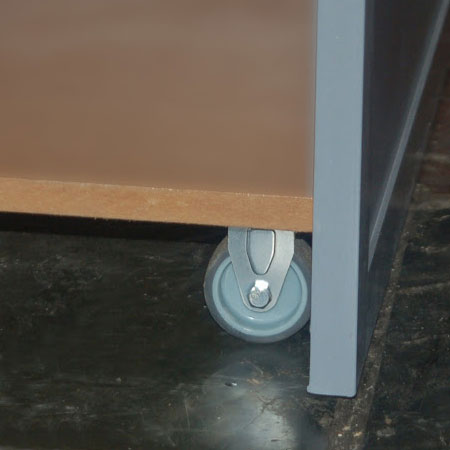
10. Complete the pullout shelf section by adding the castor wheels. These are screwed onto the underside of the base/bottom shelf with 16mm screws.
GOOD TO KNOW: Only fit fixed castor wheels and not swivel, as the latter will make it difficult to slide the pullout shelf unit in and out of the cabinet frame.

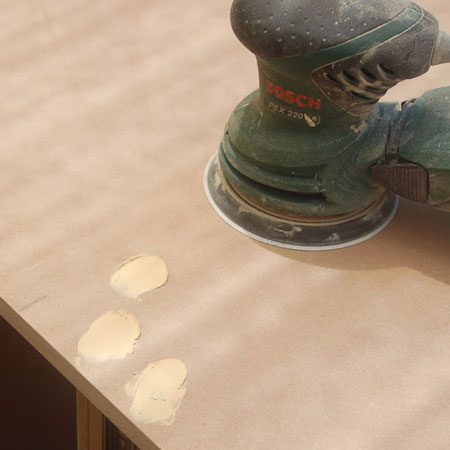
11. Fill all screw holes with wood filler and let this dry. Sand smooth.
ASSEMBLE CABINET FRAME
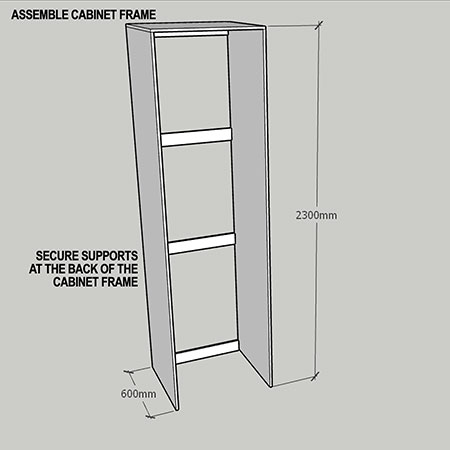
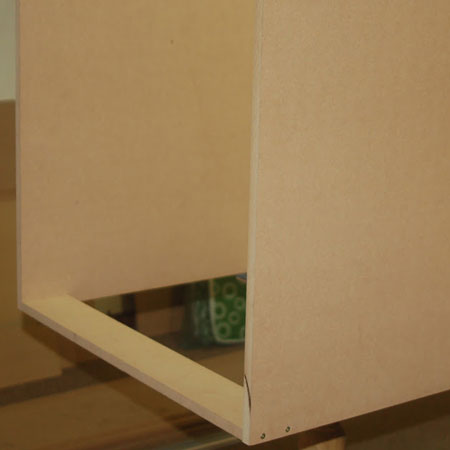
1. The cabinet frame consists of two sides, top and [4] back supports. The frame supports are spaced between the two sides and secured with 4 x 50mm screws at equal distances along the back. These frame supports create a sturdy frame that must be secured to the wall.
2. Place the top on the cabinet frame and secure in place with 4 x 50mm screws, as shown below.
GOOD TO KNOW: Finish off the cabinet frame by marking the location for the drawer runners. Secure these in place but remove them for painting. You can re-install the drawer runners after painting.
FINISHING
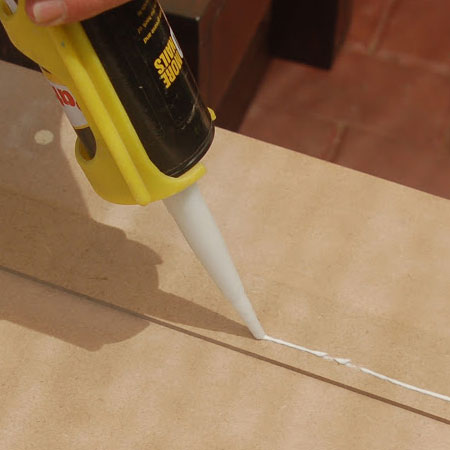
GOOD TO KNOW: I added 3mm thick and 40mm wide SupaWood strips around the perimeter of the shelf unit front/door. This is optional since I am designing Shaker style cabinets for my new kitchen. The strips were glued onto the front/door section after assembly.
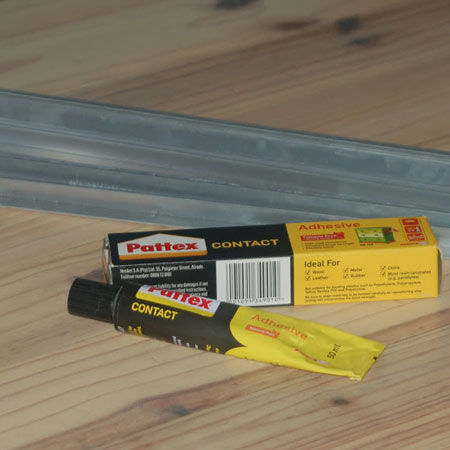
Rather than leave the edges of the shelves unfinished, I opted to add aluminium strips to the edges. These are called Kedla Aluminium Equal Angle and you can buy at Builders Warehouse.
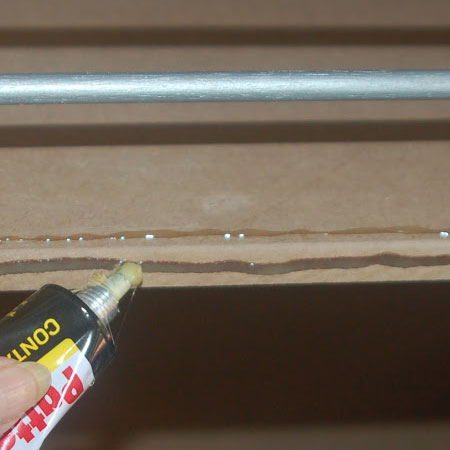
The aluminium strips were cut to size and attached to the shelf edges with contact adhesive.
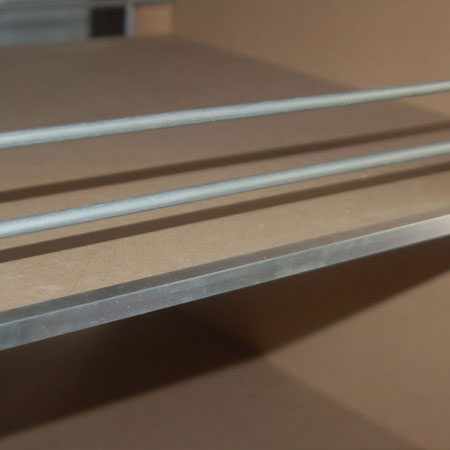
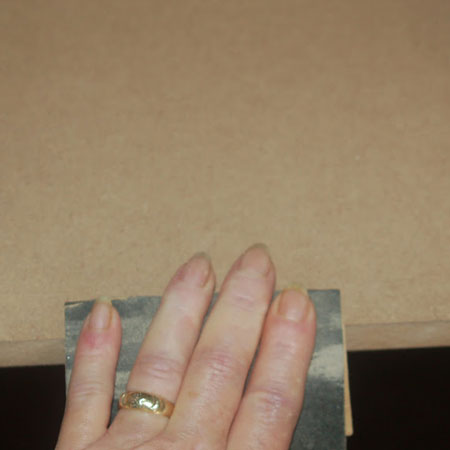
All the sharp edges on the shelf unit and cabinet frame were sanded with 120-grit sandpaper to slightly round them off. Wipe clean to remove all traces of dust before painting.
GOOD TO KNOW: Because of the size of this unit, it had to be painted by hand. It was too tall to fit through the doors. If you are making your own pullout pantry, take this into consideration. I'm not completely happy with the finish and will be making a plan to apply the sealer coat using my Bosch PFS spray system.
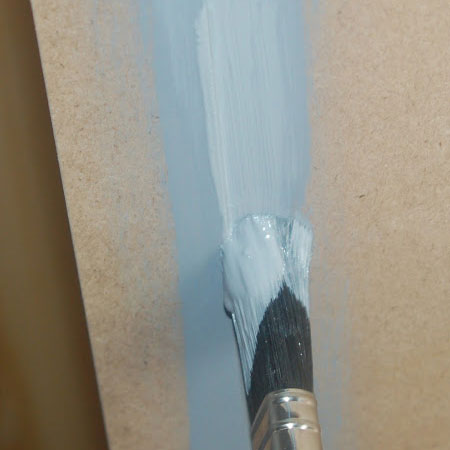
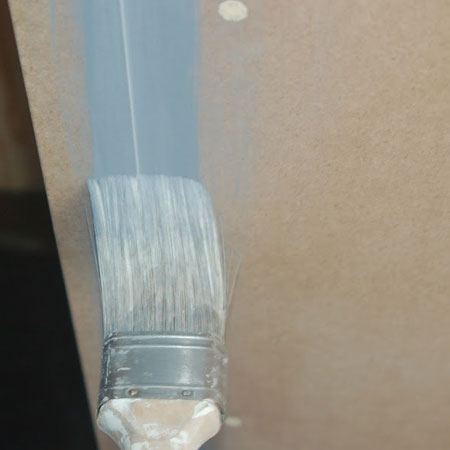
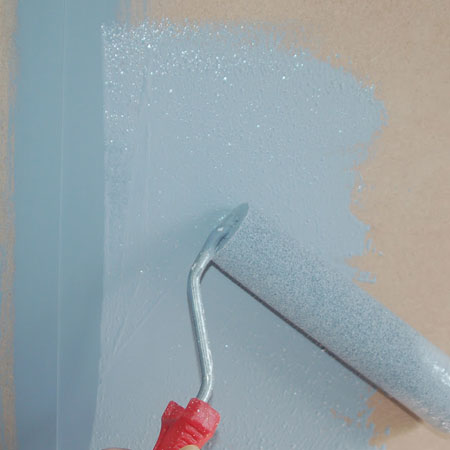
When painting the front/door of the shelf unit and cabinet frame, it is better to first apply paint around the edges of any trim. Apply the paint liberally with the rough brush, making sure to cover the edges and then lightly go over this with a finishing (quality) brush. This removes any excess paint and smooth away the stroke lines. Apply a total of 2 coats in this way.
Once the edges are dry you can use a foam roller to apply paint over the larger surfaces. Again, apply 2 or more coats and allow sufficient drying time between coats.
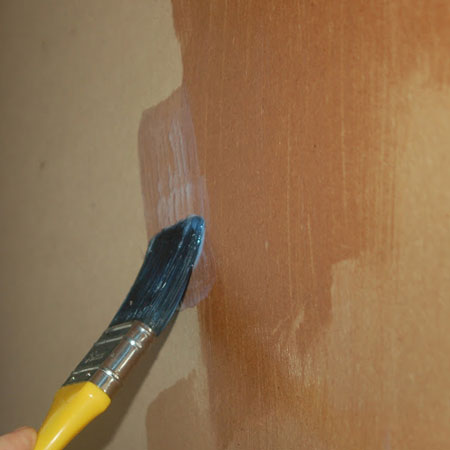
A clear acrylic sealer was applied to both the painted and unpainted sections. The sealer will allow for easy cleaning of the shelves.
Once all the finishing is done, have someone to help you line up the drawer runners and slide them together to complete the pullout pantry and add your choice of handle to the door front.
IMPORTANT: The cabinet frame for the pullout pantry must be secured to the wall at the back. Drill through the frame supports at the back and mount onto the wall using wall plugs and screws.
WE MAKE IT FOR YOU
If anyone is interested in ordering a pullout pantry (pantry-in-a-cupboard), we offer the unfinished (unpainted) unit at:
Drop us a line at homedzine@gmail.com to order.