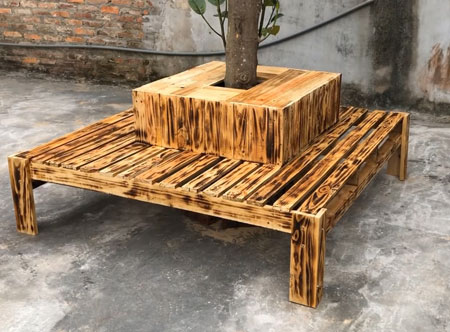
Use Reclaimed Pallets To Make Seating For Outdoors
Make a garden bench this fits around a tree in a garden or courtyard using reclaimed fencing or reclaimed pallets.
25/04/2021
Even if you don't already have some reclaimed fencing or reclaimed pallets lying around at home, this project is going to make you want to go and find them. I have seen more than a few projects using reclaimed wood that are okay and some that are great. This one is a really great one if you have a tree in a garden or courtyard and want to have bench-style seating to dress up the space. Who knows, you might even like this project so much that you decide to plant a tree so that you can go ahead and make it!
If you are looking to source reclaimed pallets, get on to Google and enter 'reclaimed pallets' in the search bar. This will bring up pages of suppliers of secondhand pallets to high-quality pallets. Before you buy, make sure that the pallets are in reasonably good condition - you don't want to have to buy pallets that have planks broken or unusable. Also shopping around for the best price, since this varies greatly from supplier to supplier.
YOU WILL NEED:
Reclaimed fencing planks or reclaimed pallets
TOOLS:
Drill/Driver plus assorted bits
Socket adaptor for drill/driver
Angle Grinder fitted with flap sanding disks
Claw hammer and nails
OPTIONAL: Pneumatic nail gun
M10 100mm coach bolts [12]
5 x 65mm screws [8]
Tape measure and pencil
Safety gear
HERE'S HOW:
Step 1
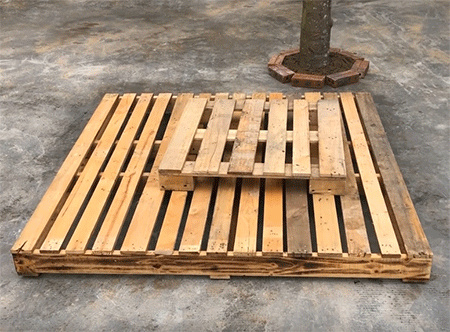
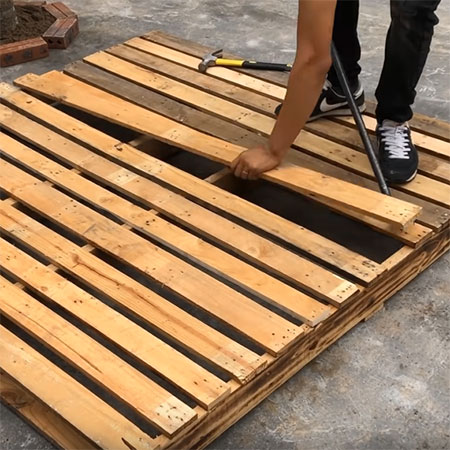
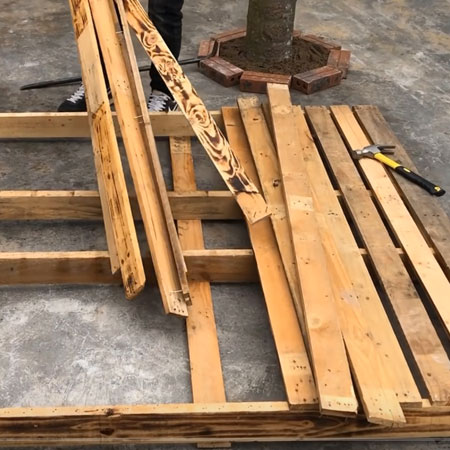
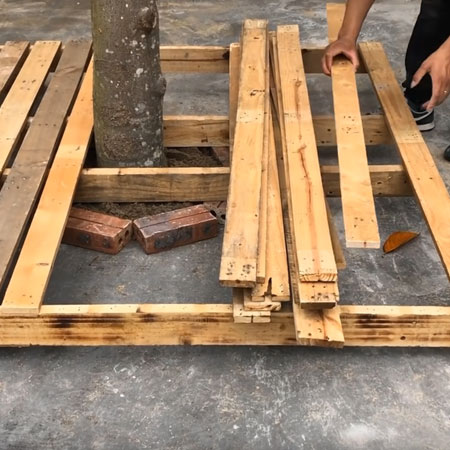
The first step is to break apart the pallets that you have. You want all the usable planks for this project.
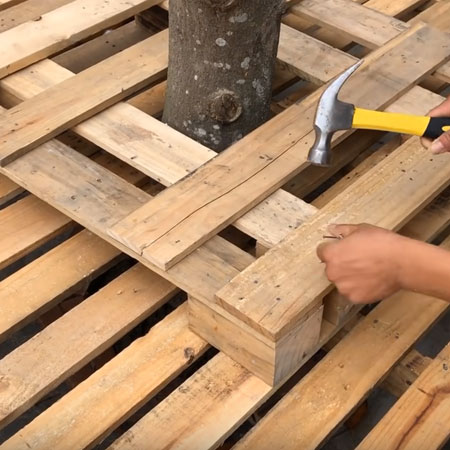
Step 2
Use the claw section of the hammer to remove all the old nails from the planks.

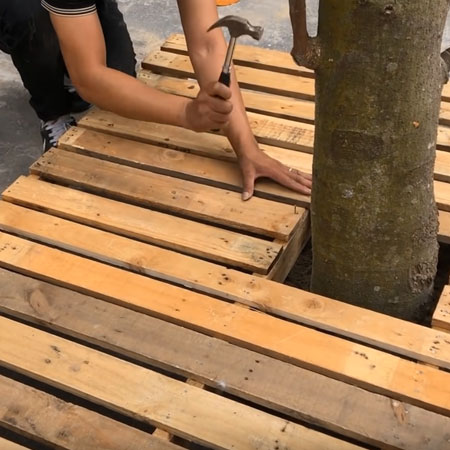
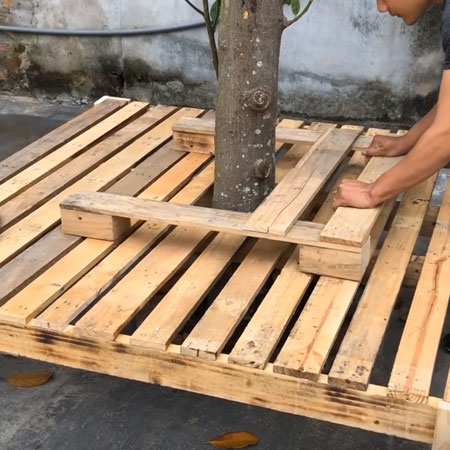
Step 3
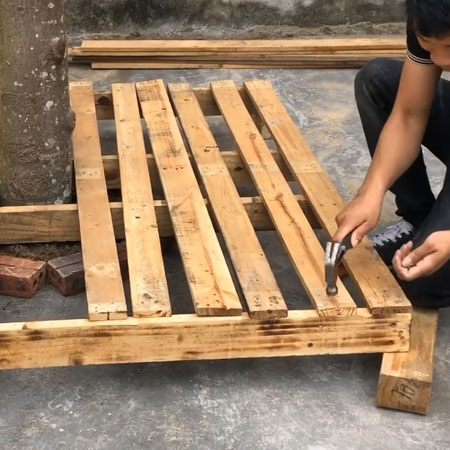
Re-assembly the planks around the tree, using the original frame to support.
Step 4
Secure every plank onto the support using [2] nails per plank end. Make sure that the nails are flush or just under the surface of the wood.
Step 5
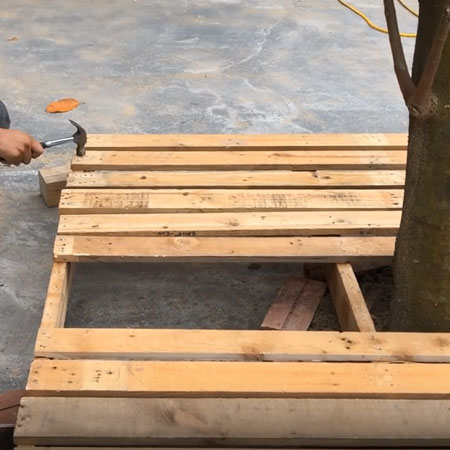
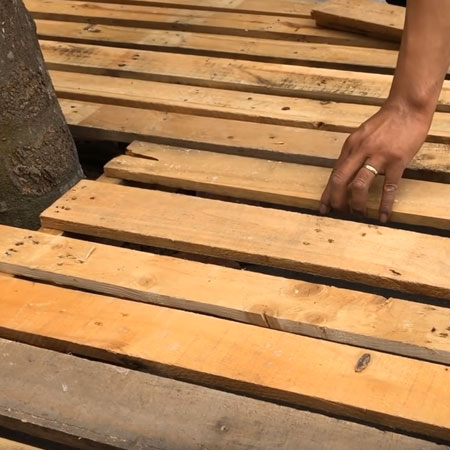
Continue adding planks to the frame in the same way.
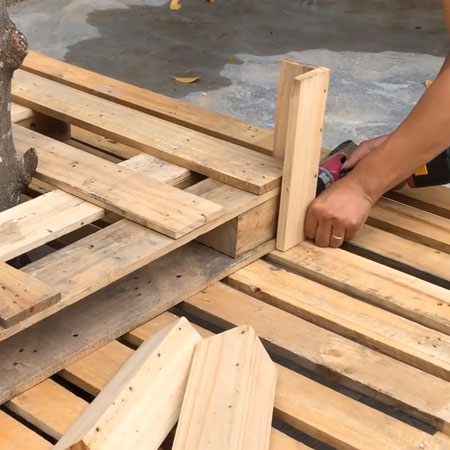
Step 6
Cut shorter lengths to fit into the sides of the frame, as shown below.
SECURE THE PLANKS TO THE FRAME WITH NAILS.
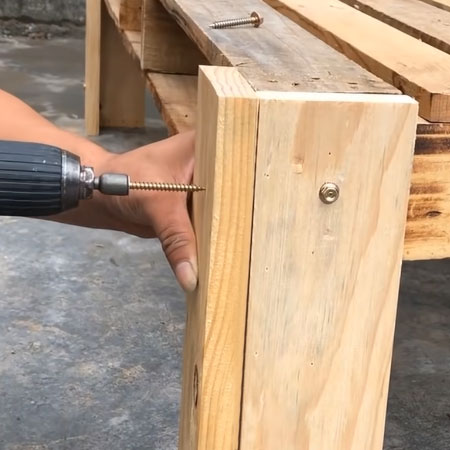
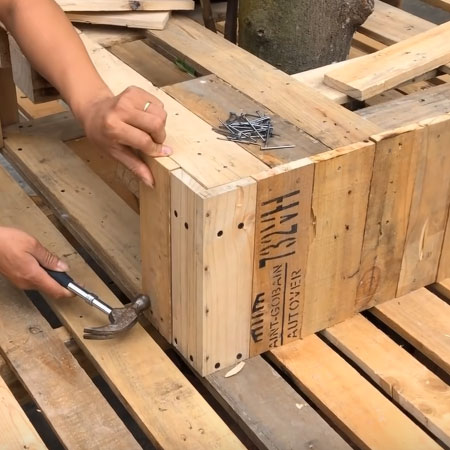
Step 7
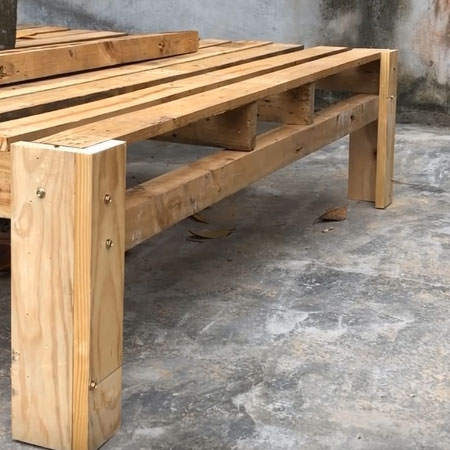
Time to attach the supports to lift the frame off the ground. You can use pallet planks for this or you can purchase a length of 100 x 100mm PAR pine. Secure to the frame using MP10 coach bolts and then secure the two support pieces together along the height with 65mm screws.
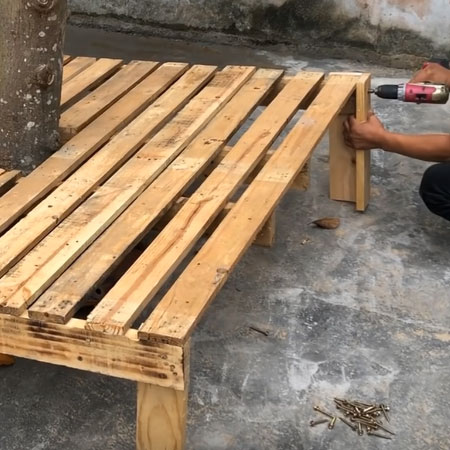
SECURE SUPPORTS TO THE FRAME USING MP10 COACH BOLTS
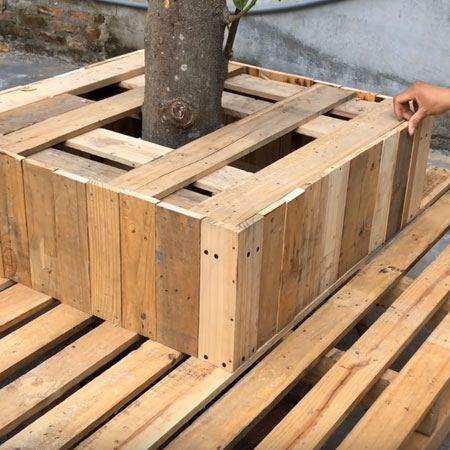
Step 8
To give the structure strength and stability, secure supports along both sides, as can be seen in the image below.
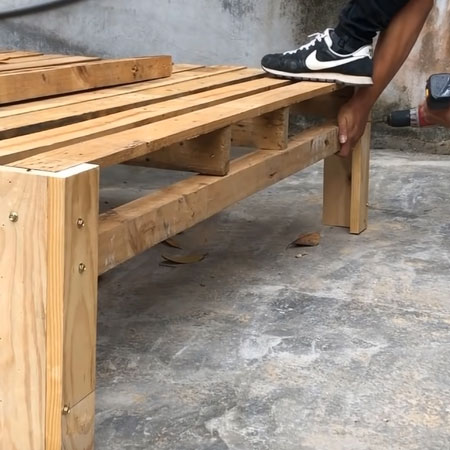
AN EXTRA SUPPORT GIVES THE BENCH STRENGTH AND STABILITY
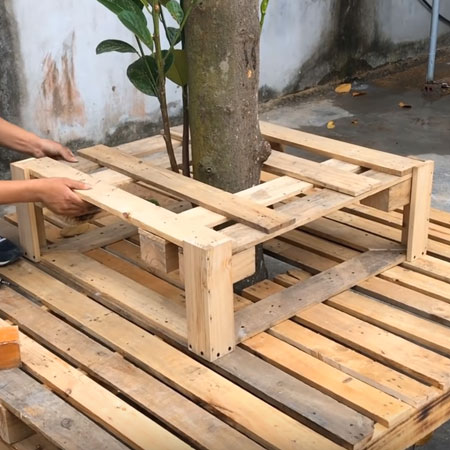
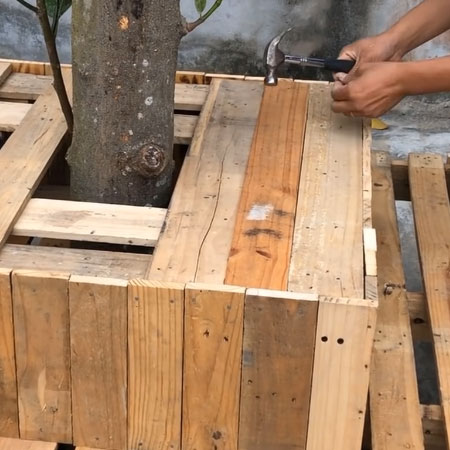
Step 9
Use a smaller pallet for the top section of the bench. Open at one end to allow fitting around the tree.
Step 10
Start layering pallet planks over the top of the top section, securing with nails.
Step 11
Use [4] planks to make a frame that will sit underneath the top section and secure supports to the corners as you did to support the main frame. Screw the supports into the frame that sits underneath the top section - see below.
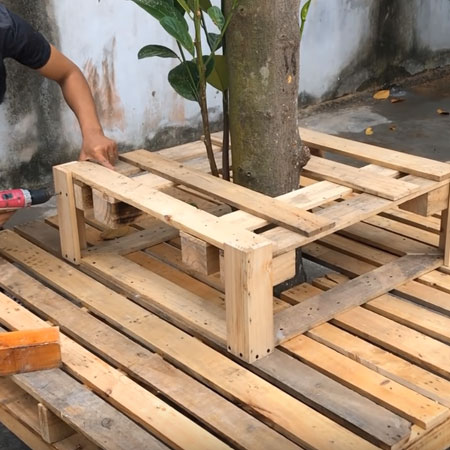
Step 12
Elevate the top section and secure to the top of the [2] supports.
IN THE IMAGE BELOW YOU CAN SEE THE FRAME THAT SITS BELOW THE TOP SECTION
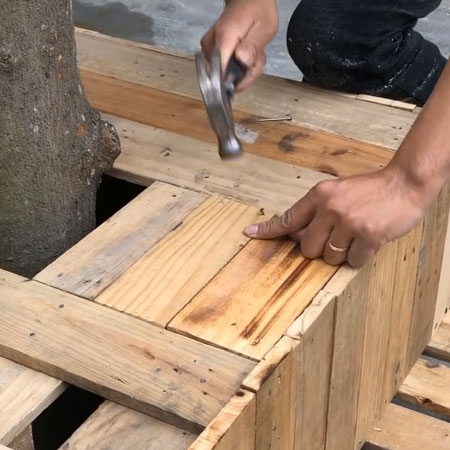
Step 13
Cut pallet planks to length to clad around the top section, securing these onto the frame with nails. Note that the planks should be cut slightly longer than the top section to allow for fitting another layer of planks on top to finish.
CONTINUE ADDING PLANKS TO CLAD THE TOP SECTION UNTIL COMPLETED
Step 14
Cut planks to fit inside the cladding to finish off the top section.
CONTINUE ADDING PLANKS TO FINISH OFF THE TOP SECTION
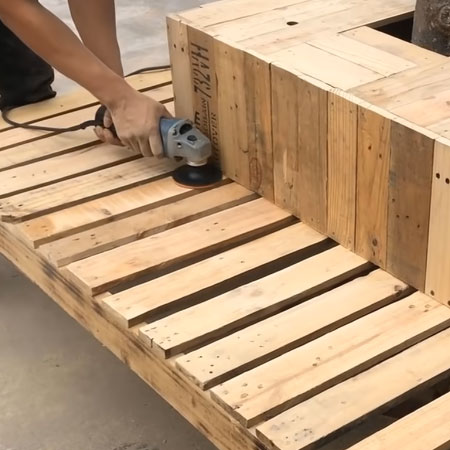
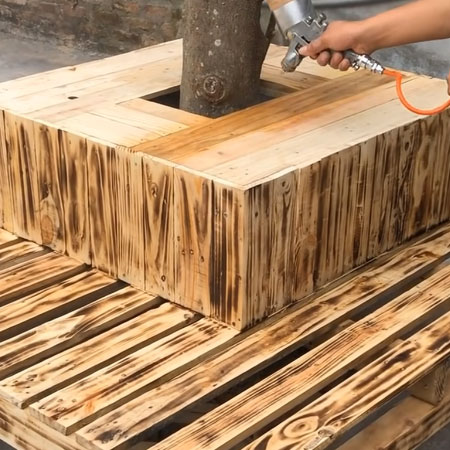
Step 15
Convert an angle grinder into a speedy sander by adding flap disks. See this article for full details.
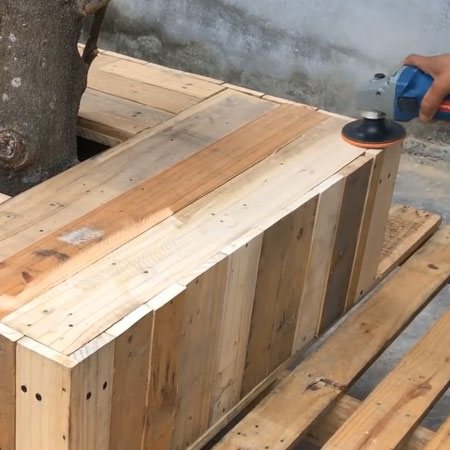
SAND THE ENTIRE PIECE TO REMOVE ALL ROUGH EDGES
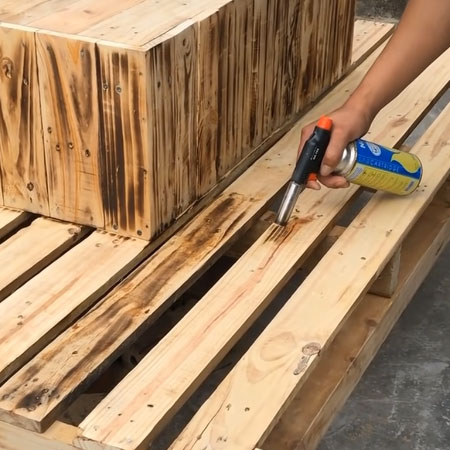
FINISHING
This step is optional but does give an attractive finish to the bench. Use a blowtorch or Dremel VersaFlame to scorch the surface of the wood.
Apply a suitable exterior sealer to protect the completed bench. Remember to re-apply this regularly.
NOW YOU HAVE A UNIQUE - AND AFFORDABLE - SEATING AREA AROUND WHICH YOU CAN DECORATE YOUR GARDEN OR BARE COURTYARD