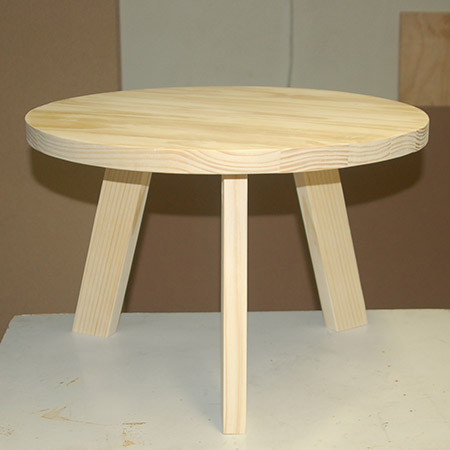
Make a Patio Table
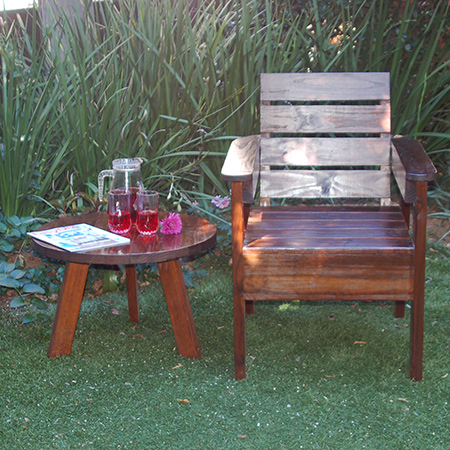
This circular patio table is the perfect for indoors or outdoor, although we made ours to accompany our DIY garden chair.
02/06/2018
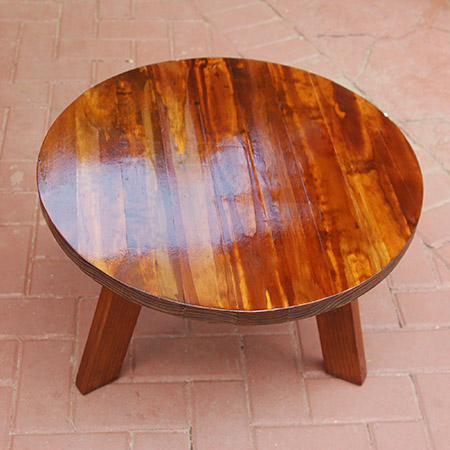
Make this pine patio table from 32 x 69mm PAR pine that you can buy at any Builders Warehouse. We used a homemade wood stain (explained below) and finished off with gloss exterior sealer. The table was made to accompany the garden chair that we made and you will find instructions here.
YOU WILL NEED:
3 of 32 x 69 x 1800mm PAR pine - table top, cut to:
- 3 of 600mm
- 2 of 560mm
- 2 of 500mm
- 2 of 360mm
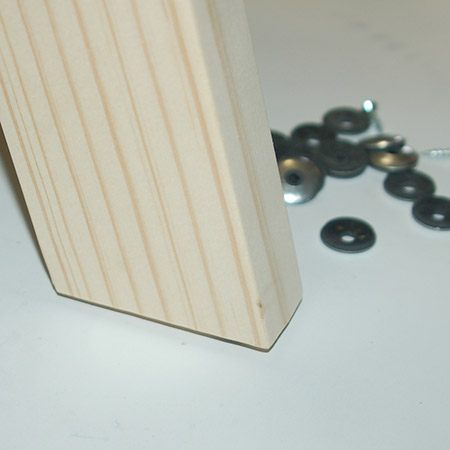
3 of 32 x 69 x 390mm PAR pine - legs - cut 15-degree angle at both ends
Wood glue
32mm coarse-thread pocket-hole screws [6]
Length of chain
Wood stain and Sealer to finish
TOOLS:
Drill / Driver plus assorted bits
Kreg pocket-hole jig
Jigsaw and clean-cut jigsaw blade
Orbital or random orbit sander plus 120- and 240-grit sanding pad
Protractor
Bar clamps
Tape measure and pencil
Not responsible for errors or omissions
HERE'S HOW:
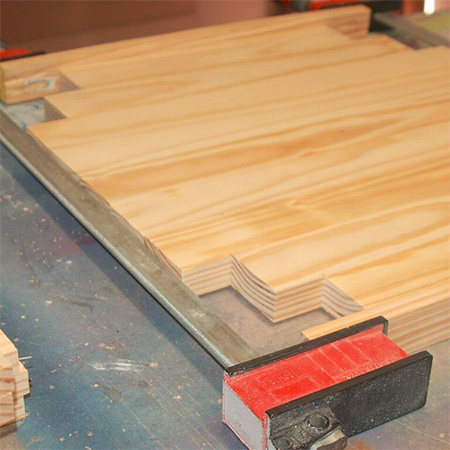
1. The planks for the table top are glued together using waterproof glue. These are then clamped and left overnight.
GOOD TO KNOW: The longest (centre) plank is 600mm long and the others are spaced on either side, with the shortest at the ends.
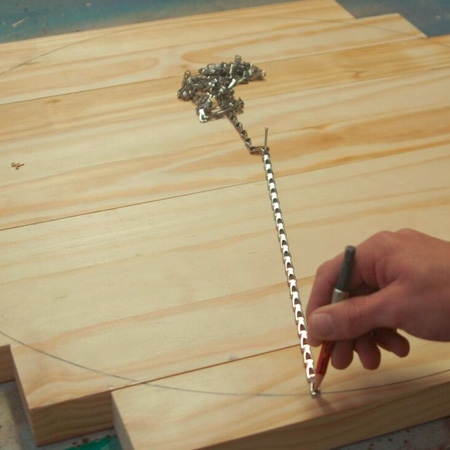
2. To draw a circle for the table top, tap in a panel pin and adjust a length of chain to give you 300mm - or 600mm diameter. Place a sharp pencil in the end of the chain and draw the circle. Remove the pin once you're done. Make sure the hole will be on the underside of your table top.
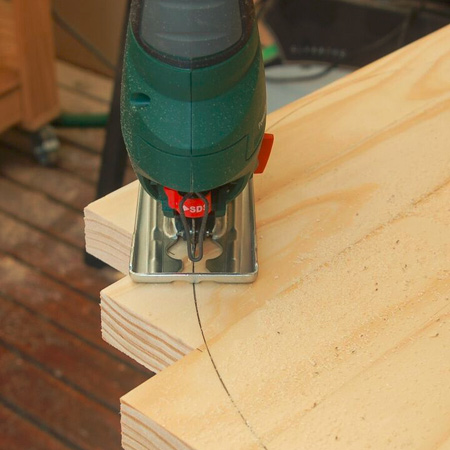
3. Fit a clean-cut blade onto your jigsaw and cut out the circle.
GOOD TO KNOW: Clamp the work piece over the end of your workbench to make it easy to cut around.
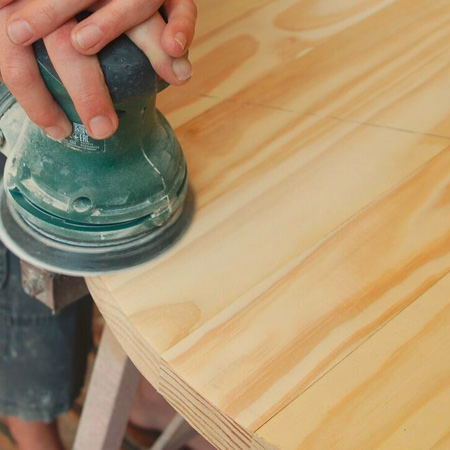
4. Using a 120-grit sanding pad and an Orbital or Random Orbit Sander, sand away any rough edges along the cut edge and across the top. Smooth this with a 240-grit sanding pad.
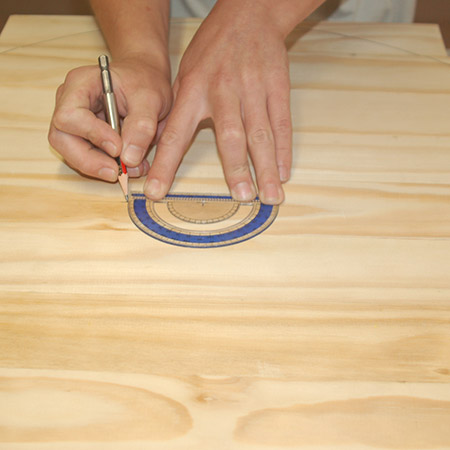
5. Use the protractor to divide the top into 3 sections for the legs. Draw a line as a guide for attaching the legs onto the underside of the table top.
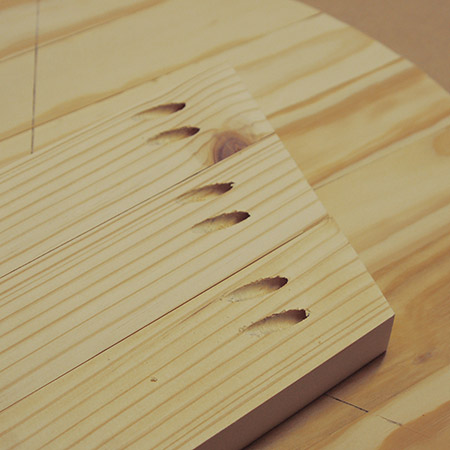
6. The legs are cut at a 15-degree angle at the top and bottom. Drill [2] pocket holes at the top of each leg and then sand the legs smooth.
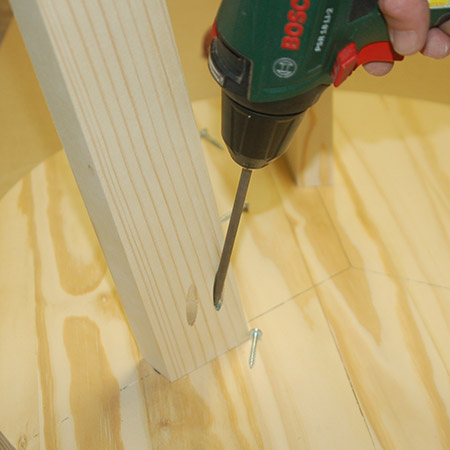
7. Position the legs centrally on the drawn lines about 120mm in from the edge of the table and secure to the underside of the table top with wood glue and 32mm screws.
Finishing
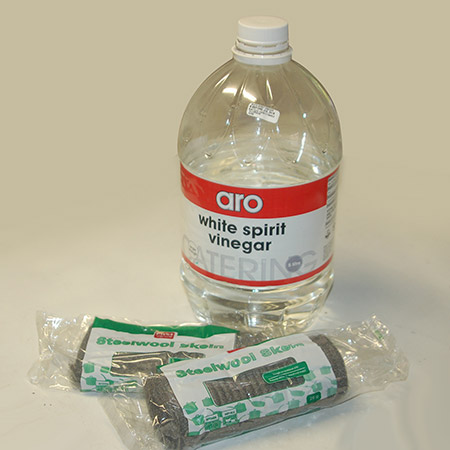
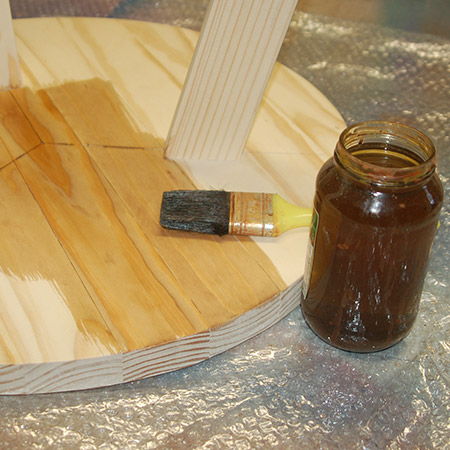
We decided to make our own wood stain for this project using vinegar and steel wool. A glass jar was filled to about one quarter with steel wool and then filled up with white spirit vinegar. This was left overnight and then filtered (through a pair of old stockings) to remove impurities.
For the dark finish on the patio table the wood stain was used undiluted and applied to the table with a paintbrush. It's necessary to let this dry thoroughly for a day or two before applying sealer.
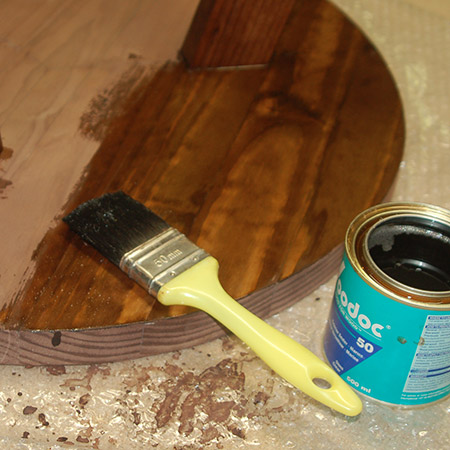
Three coats of exterior sealer were applied to the entire table, allowing drying time between each coat and also rubbing down with steel wool between the first and second coat. It is important to use exterior sealer and to follow the manufacturer's guidelines for application for successful results.
GOOD TO KNOW: Even though exterior sealer was applied, it is recommended that the finished table be kept on a covered patio, or the table is covered when not in use. You will experience some expansion along the joints in wet weather, but this will dry out and revert back to its original shape.
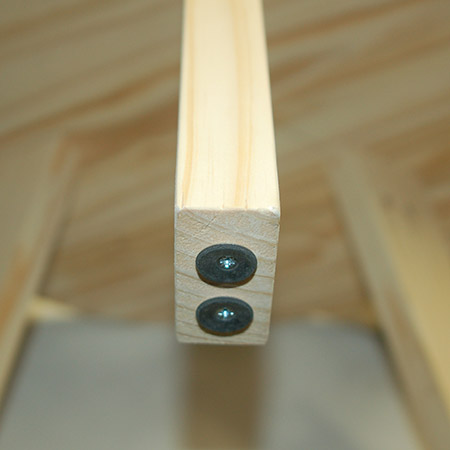
GOOD TO KNOW: Extend the life of your outdoor furniture by adding roofing washers to legs and feet.