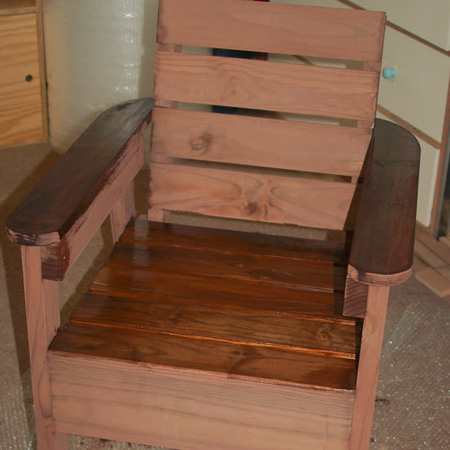
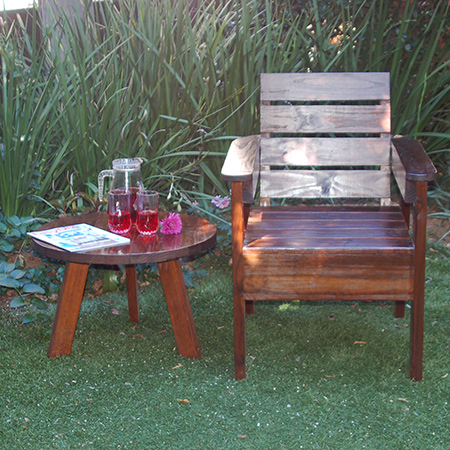
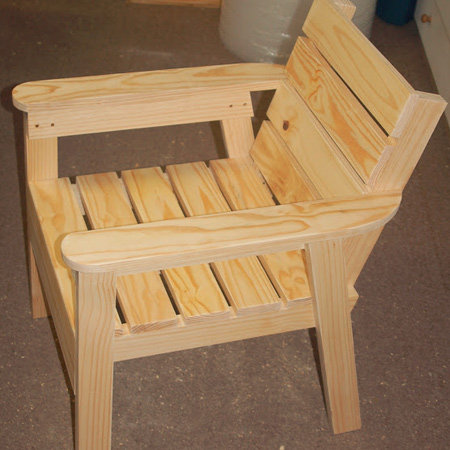
Make a basic Garden Chair
We made a basic garden chair for the patio using PAR pine that you can buy at any Builders Warehouse.
02/06/2018

We wanted to show you that you can make your own garden furniture using affordable pine. Pine might be a softwood, but if you keep the chair on a covered patio there's no reason why you can't use pine to make your own garden furniture, as long as you regularly apply exterior wood sealer as and when required.
The height of our garden chair is set so that you don't need a seat cushion. If you would prefer to have a cushion for extra comfort, lower the height of the legs by the thickness of the cushion you want to use.
YOU WILL NEED:
2 of 32 x 69 x 660mm PAR pine - back legs - cut 15-degree angle at both ends
2 of 32 x 69 x 620mm PAR pine - front legs
2 of 32 x 69 x 514mm PAR pine - arm support - cut 15-degree angle at one end
3 of 32 x 69 x 571mm PAR pine - seat / centre support - cut 15-degree angle at one end
2 of 32 x 69 x 535mm PAR pine - back support - cut 15-degree angle at one end
1 of 32 x 69 x 500mm PAR pine - back crosspiece
1 of 19 x 140 x 400mm PAR pine - seat front (or substitute with 2 of 69mm)
2 of 19 x 94 x 680mm PAR pine - chair arm
9 of 19 x 94 x 500mm PAR pine - seat and back slats
Exterior wood glue
240-grit sandpaper
32mm coarse-thread pocket hole screws
4 x 45mm cut screws
TOOLS:
Drill / Driver plus assorted bits
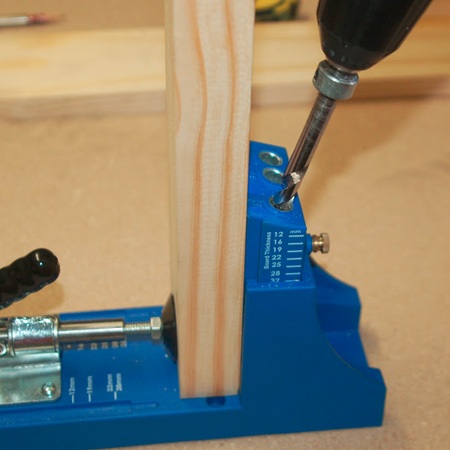
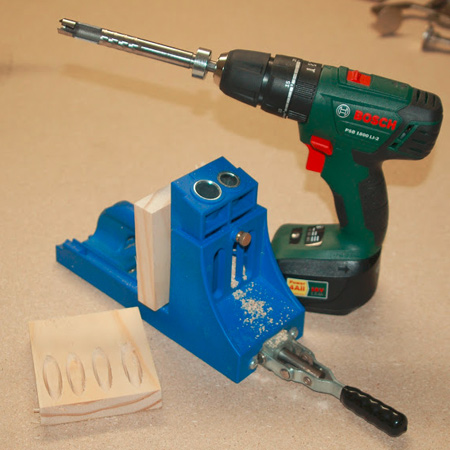
Kreg Pocket Hole Jig
OPTIONAL: Kreg Plug Cutter
Jigsaw and clean-cut blade
OPTIONAL: Router and round-over bit
Orbital sander plus 120- and 240-grit sanding pads
Tape measure and pencil
Not responsible for errors or omissions
HERE'S HOW:
Preparation
Sand all the cut pieces to remove rough or sharp edges before assembly. Once assembled, the entire chair can be hand sanded with 240-grit sandpaper for a smooth finish.
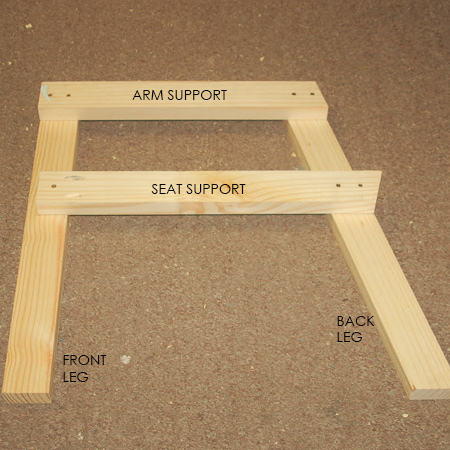
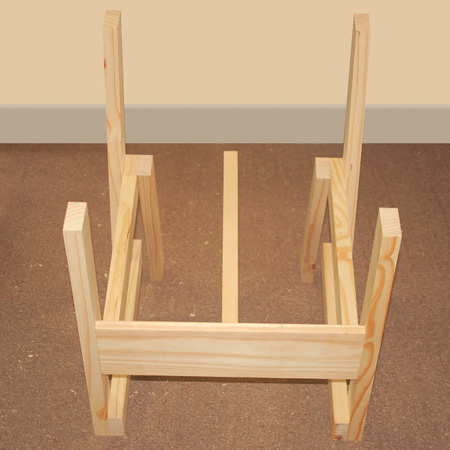
Assemble Leg Frames
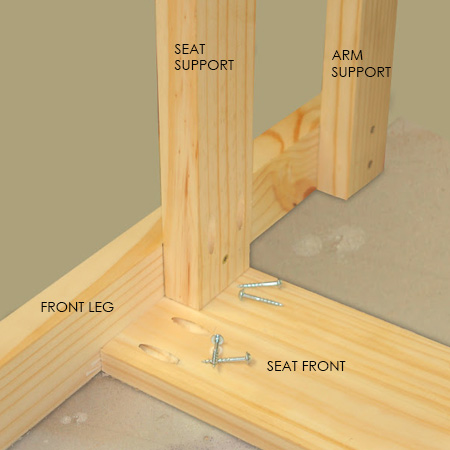
1. Position the Arm Support at the top of the front and back legs, aligning the ends flush with the legs, and secure with 45mm screws. Secure the Seat Support 150mm down from the bottom edge of the arm support and secure with 45mm screws.
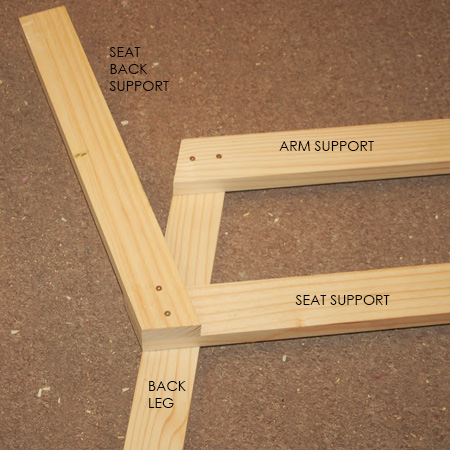
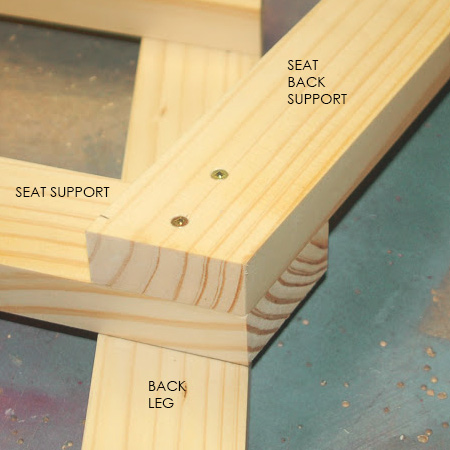
2. Place the Seat Back Support in line with the seat support and secure with [2] 45mm screws into the end of the Seat Support.
Assemble Chair Seat
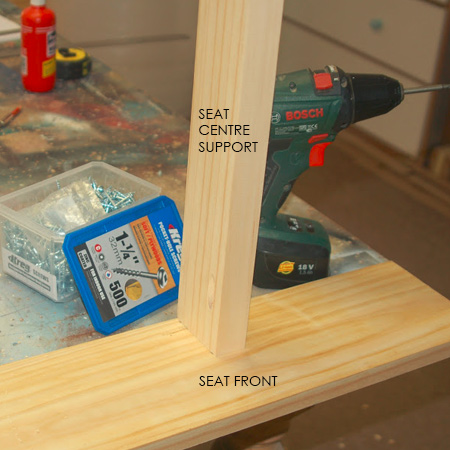
3. Drill a pocket hole at the end of the Seat Centre Support. There should be one hole on either side - one at the top on one side, and at the bottom on the other side. Position the Seat Centre Support in the middle of the Seat Front.
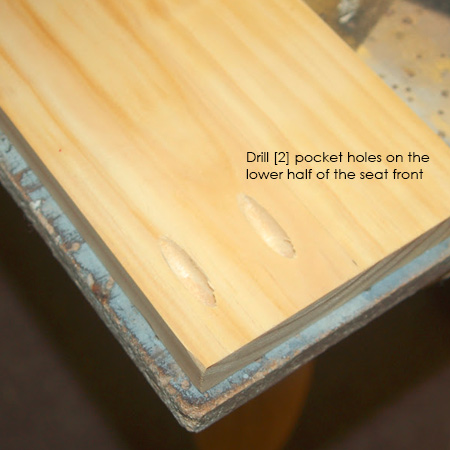
4. Also drill [2] pocket holes at the ends of the Seat Front but only on the lower half of the piece. These pocket holes will be for joining the Seat Front to the Front Legs.
5. Secure the Seat Centre Support to the Seat Front with 32mm pocket hole screws.
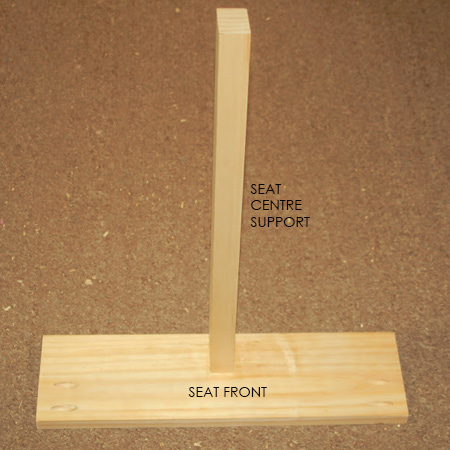
6. Fit the Seat Front inside the Leg Assembly and secure to the Front Leg with 32mm pocket hole screws.
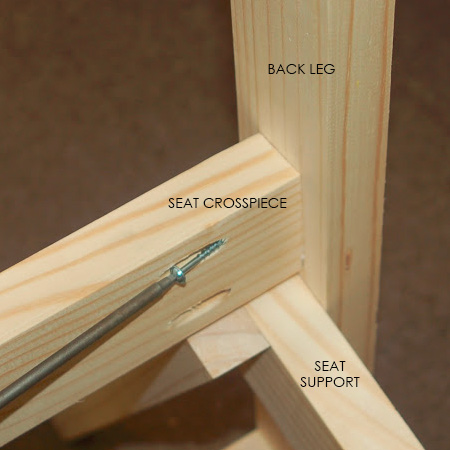
7. Now you can add the Seat Crosspiece to finish off the frame. Drill [2] pocket holes at both ends of the Seat Crosspiece and secure to the Back Legs with 32mm pocket hole screws.
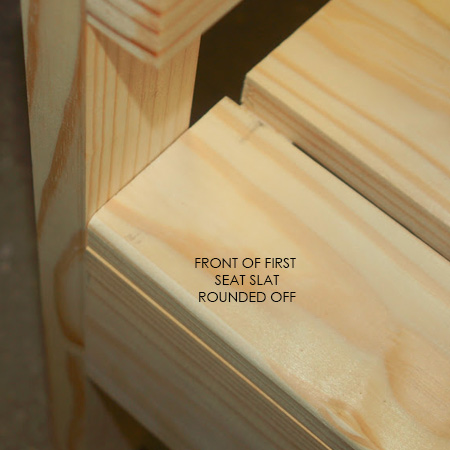
8. Use a router and round-over bit on the front edge of the first Seat Slat. If you wish, you can round-over all the Seat Slats in this way. Alternatively, use an orbital sander and 120-grit sanding pads to round off the edges.
TOP TIP: Position the first and last Seat Slats on the frame and use spacers to space the remaining slats.
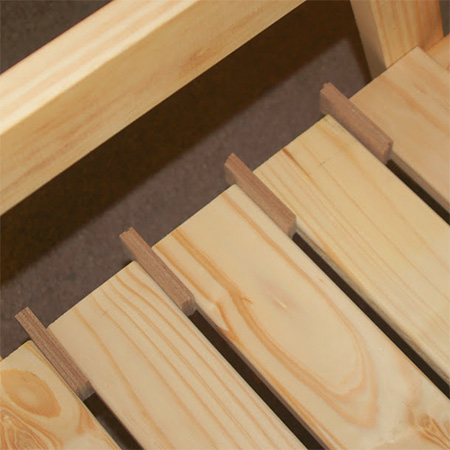
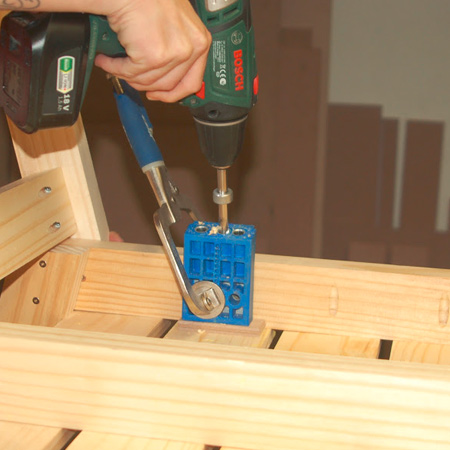
9. Once the position of the Seat Slats is done, drill pocket holes along the length of the Seat Support and secure the slats in place with 32mm pocket hole screws.
GOOD TO KNOW: If you prefer, you can determine where the pocket holes will go and drill these into the Seat Support before assembly.
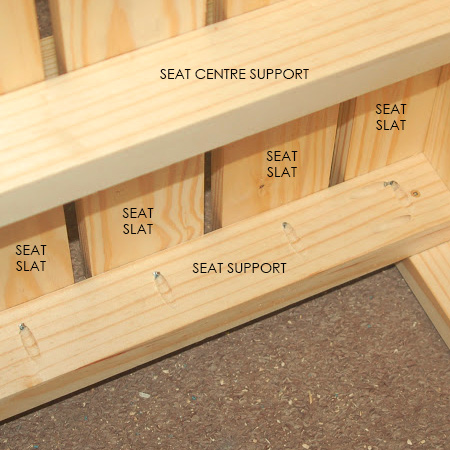
10. As in the previous step, the Seat Slats are attached to the Seat Back Supports with pocket hole screws. Drill holes in the Seat Back Support for each Seat slat and secure with 32mm pocket hole screws.
GOOD TO KNOW: If you prefer, you can determine where the pocket holes will go and drill these into the Seat Back Support before assembly.
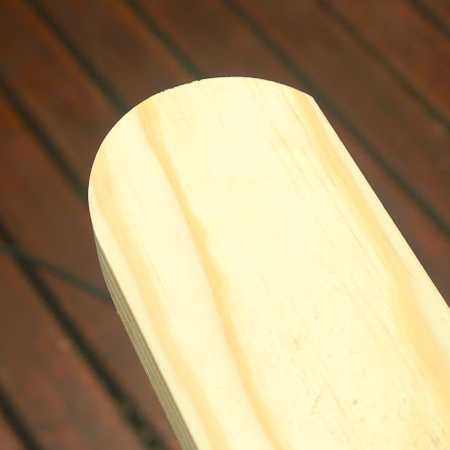
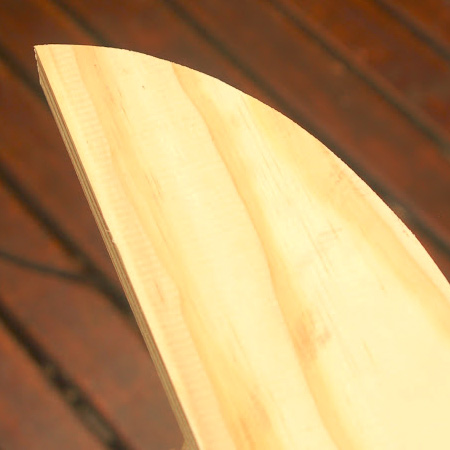
11. On the [2] Seat Arms, use a template to give you the desired shape.
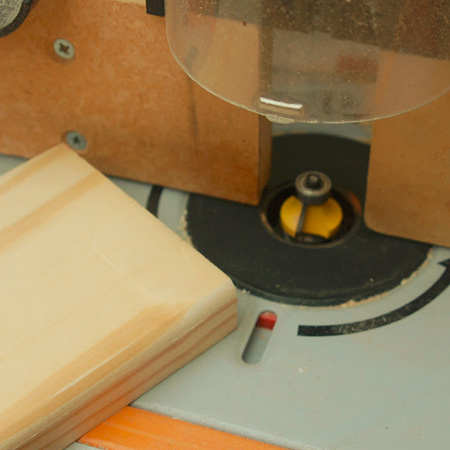
12. Cut out the drawn shape with a jigsaw and clean-cut blade and sand smooth.
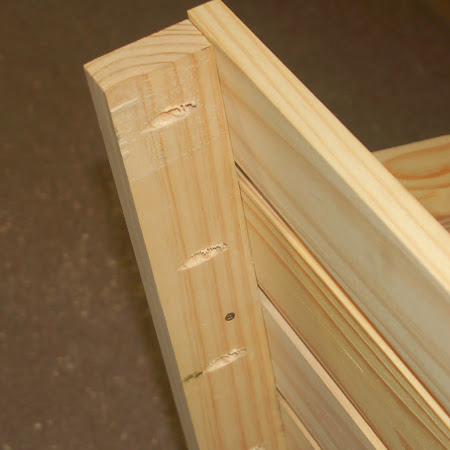
13. The Chair Arms are glued on top of the Arm Support and Chair Legs with exterior wood glue. If you prefer, you can add pocket holes to the Arm Supports before assembly.

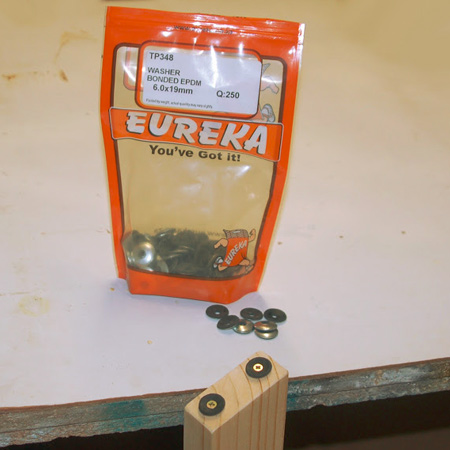
OPTIONAL: For added protection from the elements, we added roofing washers to the bottom of each chair leg. These raise the legs off the floor and prevent moisture being absorbed up into the leg, which could cause wood rot later on.

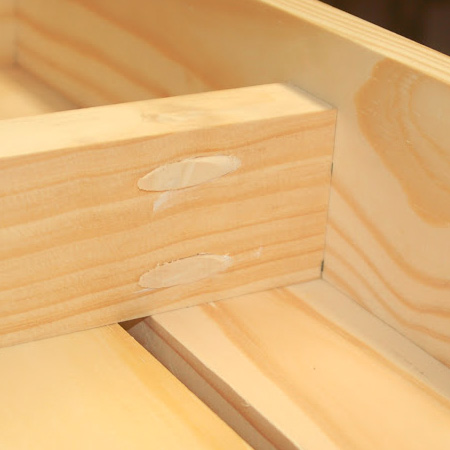
OPTIONAL: We used a Kreg Plug Cutter to cut plugs to fill all the pocket holes. This finishes off the project and also extends the life, by preventing moisture from gaining access via the plug holes.
Finishing
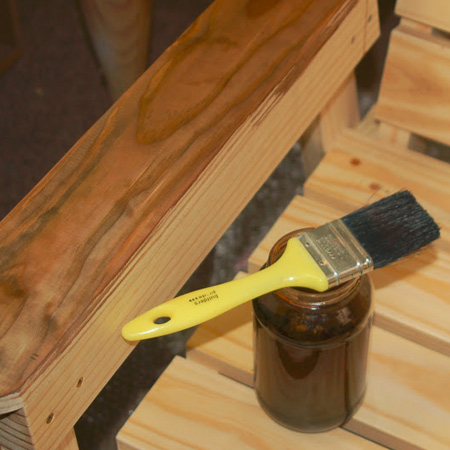
We used a homemade wood stain - vinegar and steel wool - to stain our garden chair. Fill a glass jar quarter full with steel wool and then fill up with white spirit vinegar. Leave overnight and then you can apply to raw wood.
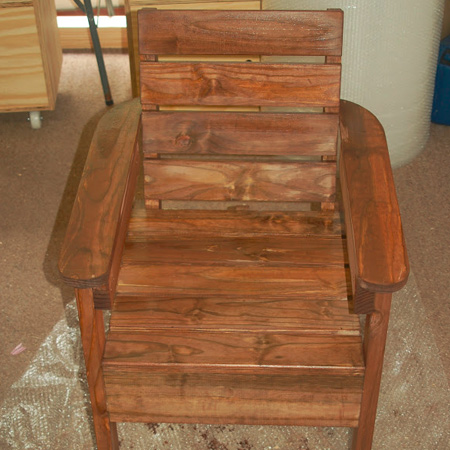
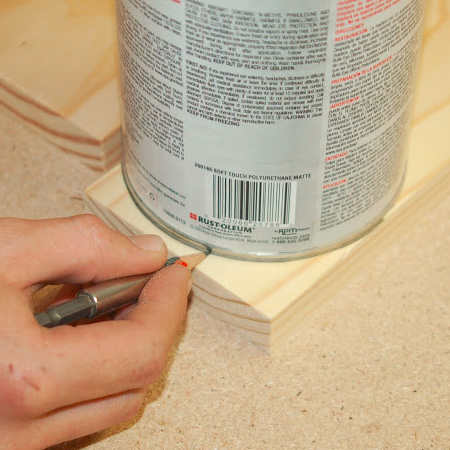
14. After letting the wood stain dry completely, three coats of exterior sealer were applied. It's important to follow the manufacturer's guidelines for proper application.