How to make sliding barn doors
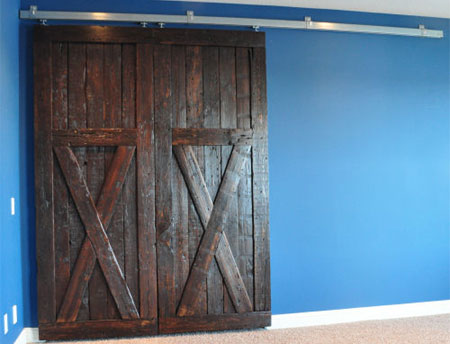
Over at Timber and Lace, Marci and hubby get creative with scrap timber and a hanging rail to make sliding barn doors to close off an alcove for Marci's craft room.
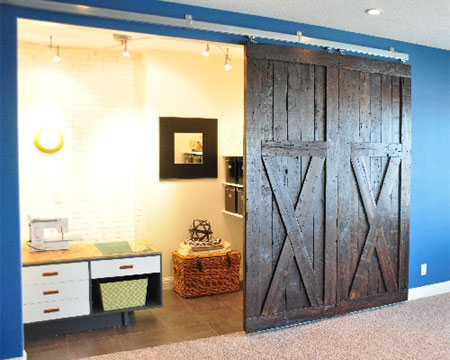
The opening for the craft room is 3 metres wide by 2 metres high. We opted to break it into two 1 metre-wide doors. With some 19mm plywood left over from a previous job, they used this as a backing for reclaimed timber for the front of the door, as the timber was fairly thin and not perfectly straight.
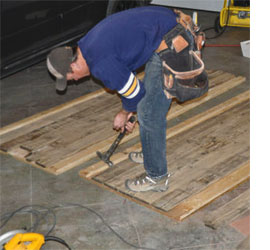
The plywood panels were layed out on the floor of the garage and the reclaimed wood nailed onto it. You can use the plywood sheets as a guide to dry fit the various timber sections before nailing them down, so that you can pick the best pieces. Use a jigsaw or circular saw to neaten any rough or uneven edges.
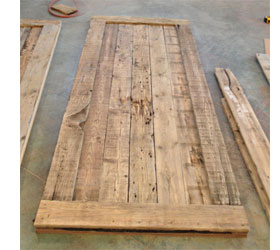
After fastening down the first layer of reclaimed timber to the plywood panels, build a frame around the edge of the panel for effect. Use wood nails to fasten the frame around the edge of each door.
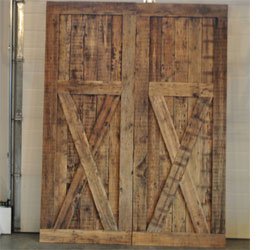
To finish off the doors, use reclaimed timber to create the 'barn-style' effect on each door. Once again, use wood nails to fasten these panels in position. Before mounting hardware, take the time to sand with 180-grit sandpaper and then seal the doors with three coats of Woodoc 10, clear or with added stain concentrate in your choice of wood tint.
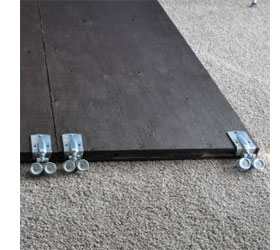
To mount the doors you need a hanging rail of suitable length and four heavy-duty rollers. If you are unable to find these at your local Builders Warehouse, get in touch with www.Hillaldam.co.za or www.barndoor.co.za, who manufacture these systems.
GOOD TO KNOW: If you are unable to source the sliding mechanism, rail and brackets for a sliding door you may need to consider getting in touch with a local welder / handyman that can make these up for you.
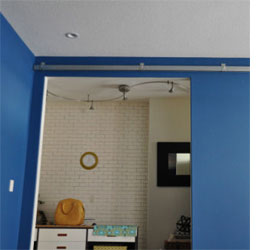
Mount two rollers at the top of each door, making sure they are securely fastened. Follow the manufacturer's instructions for mounting the door. You will find details on a similar project we have done here.