
How to install a sliding door
I recently completed a project for the next issue of Easy DIY magazine. You will find the latest issue on the shelf at your local Builders Warehouse.
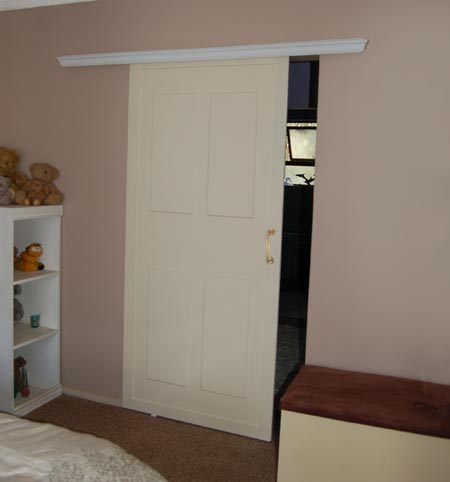
My dressing room and bathroom do not have a bathroom door, and while that’s all fine and well if your hubby is always on his best behaviour, mine has the manners of a donkey! It’s definitely time to fit a sliding door to hide his bathroom manners.
Not wanting to schlep around looking for a door and hardware to fit the space, I realised it would be far easier to make my own door. I bought the hanging hardware from my local Builders Warehouse and ordered all the board cut to size.
YOU WILL NEED:
All board is 9mm SupaWood*
1 of 900 x 2000mm – door back
2 of 60 x 900mm – door side frames
2 of 60 x 78-mm – door top/bottom frames
4 of 250 x 450mm – door panels
Wall plugs and screws
No More Nails
Sliding door hardware
Prominent Paints sheen – broken white (or choice of colour)
Dremel Trio and angled cutting bit
Drill/Driver and assorted bits
Impact drill and 6mm masonry bit
Foam paint pad
Paintbrush
Clamps
Spirit level
Tape measure
Pencil
*I prefer to specify SupaWood, as there are a lot of suspicious cheap imports floating around and these do not offer a nice smooth finish that is essential for painting.
HERE'S HOW:
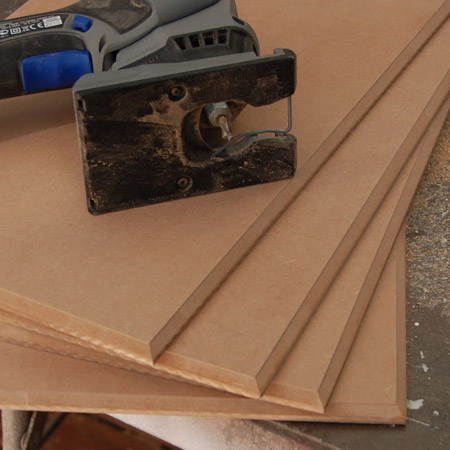
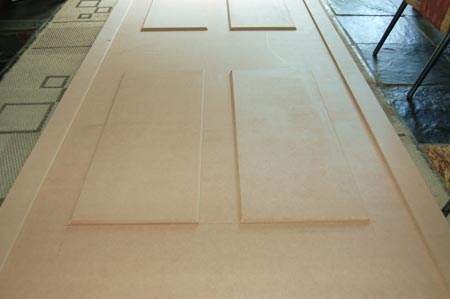
1. Having all your pieces cut to size means that this project is more assembly than anything else. However, if you own a Dremel Trio, you can use this to angle the edges of the door panels for a decorative finish.
GOOD TO KNOW
Using an angled cutting bit, the Dremel Trio allows you to create edges that are more decorative. You could also use a router to do the same.
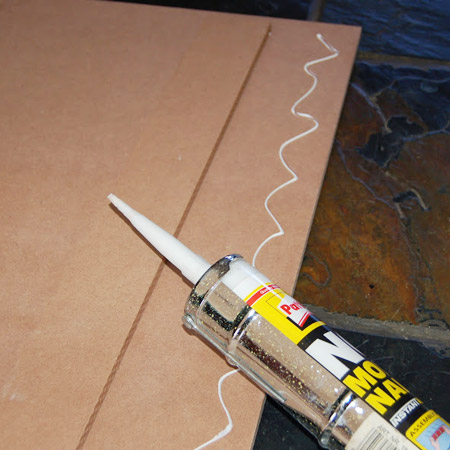
2. Apply a bead of No More Nails adhesive down both long sides of the door and glue the side frames in place. I placed my door back on the floor, as you do need a large, level and flat surface for this project.
3. Mark in 90mm from the side panels and 200mm from the top and bottom and draw a pencil line. Use this line to mount the door panels. Squeeze adhesive onto the back of the panels and follow your drawn marks for placing.
4. Use No More Nails to affix the top and bottom frames in place.
GOOD TO KNOW
You can use clamps to hold the sections together while they dry, but do not move the door until you are absolutely sure the adhesive has cured. If you try to move while still wet the panels will lift up.

5. I applied the base coat of acrylic PVA with a foam applicator as it is easier to get into all the nooks and crannies with this. Plus it also leaves a nice smooth finish.
6. You will need to apply a total of three coats of paint, allowing drying time between each coat.

7. The sliding door kit should come complete with track, fastenings, hangers and handles. The hangers are screwed to the top of the door, the track is mounted onto the wall with wall plugs and screws.
8. To mount the track onto the wall above the door, use a spirit level and pencil to mark at the correct height. Depending upon the style of track, follow the manufacturer’s instructions for mounting.
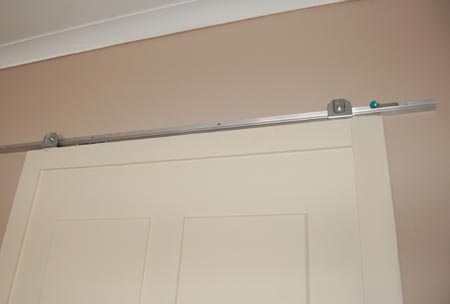
9. With the door at a slight angle, fit the door hangers onto the track. Slowly level the door into place and make sure that it slides smoothly. Tighten all the required screws or nuts.
10. Finally, fit the bottom door guide as instructed, making sure to adjust for the size and thickness of your particular door.