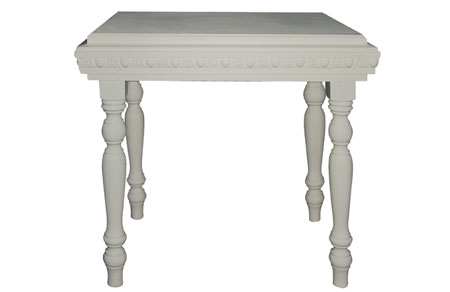
How to make a side table
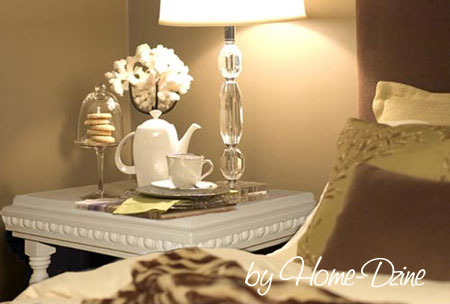
We look at creating a vignette, or setting up an arrangement on a table or shelf. To tie in with this feature I decided to show you how to make a small decorative side table that you can use to create your first vignette.
There’s nothing difficult about making this decorative side table. Once you have constructed the frame, it’s simply a matter of adding the legs, gluing on the polystyrene trim and painting. I presented this side table as part of our Career Workshop to show how easy it can be to make your own furniture. The project took about 30 minutes for the entire assembly and cost around R150.
YOU WILL NEED:
1 of 400 x 500mm 16mm SupaWood - top
2 of 50 x 500mm 16mm SupaWood - long apron
2 of 50 x 368mm 16mm SupaWood - short apron
4 of 450mm turned legs*
3.5 x 30 and 40mm cut screws
1 of polystyrene moulding
Drill/Driver and assorted bits
Modo low sheen PVA - blizzard
Foam roller and thin paintbrush
No More Nails adhesive
240-grit sandpaper
Wood filler
HERE'S HOW:
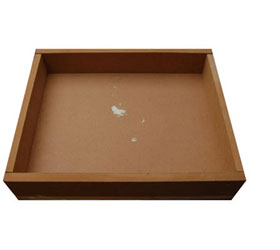
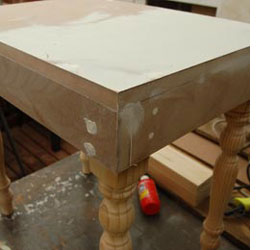
1. Construct the frame as shown left. The aprons sit on top of the table top and are screwed through the tabletop. Drill pilot holes and countersink. It’s also a good idea to use wood glue when joining the aprons to the top - for added security and plus it also fills in any gaps.
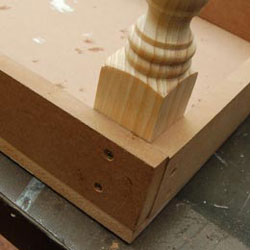
2. The legs are fitted snugly into each corner, a pilot hole drilled and countersunk and then attached with 3.5 x 40mm cut screws. Attach on two sides and drill the holes at differing heights.
3. Use wood filler to fill in screw holes and any gaps. The trick is to apply a thin layer of wood filler, let this dry and then apply more as required until filled.
4. Let the wood filler dry completely and then sand smooth with 240-grit sandpaper, paying particular attention to cut edges of the SupaWood, so that paint is not quickly absorbed and the finish will be nice and smooth.
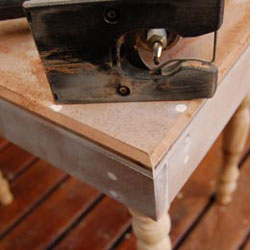
I used my Dremel Trio (router) to cut an angle around the top edge of the table. Keep an eye out for a new selection of cutting bits for the Dremel Trio - due to launch this month!
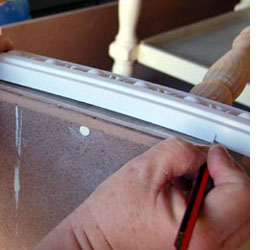
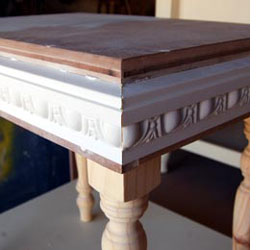
5. To add the decorative trim, I first cut one end at the correct 45-degree angle and then laid this down on the side to measure and mark where to cut the other end. Repeat this for all the sides.
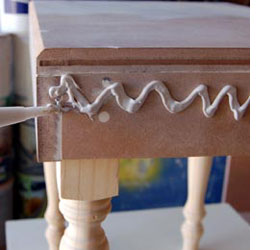
6. Apply a liberal amount of No More Nails adhesive to the area where the moulding will be stuck. While the adhesive has a fair amount of tack, if you need to fasten the moulding down while the glue dries, wrap tightly with masking tape.
7. After leaving the glue to dry, preferably overnight, you can remove the tape and fill in any remaining gaps with No More Nails or wood filler. Once dry, sand smooth with 240-grit sandpaper. I also like to sand lightly over the polystyrene to prepare for painting. The paint adheres better to the finish after it has been sanded.
8. Before painting, do a final check to make sure that there are no gaps and that screw holes are filled and nicely smoothed.
9. I used Modo low sheen PVA to paint the entire table. Available at Builders Warehouse. It did require four coats of paint with a light sanding between the second and third coats.
10. Once dry, the table was given a final sanding with 400-grit sandpaper, but this is optional and up to you. Finally, I rubbed on Woodoc Antique Wax to protect the table.