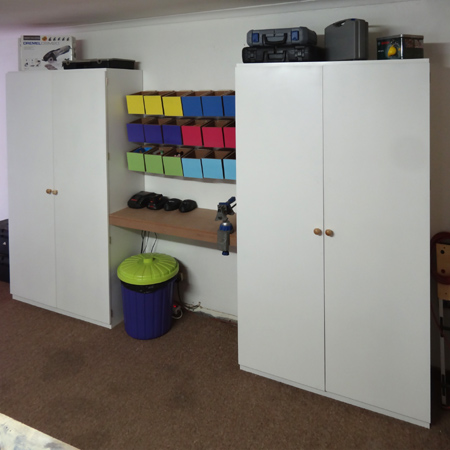
New storage cabinets for DIY Divas workspace
This past week I finally got around to making new storage cabinets to house all our tools and supplies, as well as make up colourful storage boxes that are mounted on the wall for smaller items.

I based the storage bin design on the easy DIY storage solution featured recently, since this will allow us easy access to handles, hinges, brackets, etc., without having to dig through drawers to find them.
YOU WILL NEED:
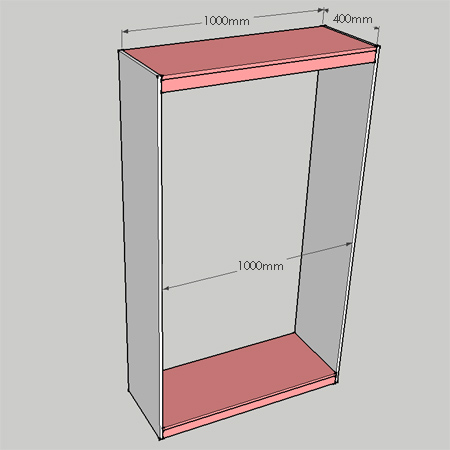
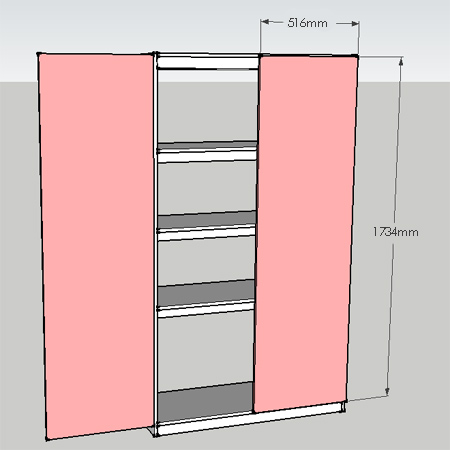
All sections of 16mm SupaWood. To make one cabinet
2 of 400 x 1800mm - sides
5 of 400 x 1000mm - shelves
5 of 50 x 1000mm - aprons
2 of 514 x 1734mm - doors
4 x 50mm screws
Wood filler
No More Nails adhesive
1000-grit sandpaper
Choice of paint to finish, or Plascon Polvin and Prominent Paints clear acrylic sealer
Paintbrush and foam roller, or Bosch PFS spray system
2 knobs or handles
2 double roller catches
TOOLS:
Drill / Driver + assorted bits
Countersink bit
Orbital sander + 120- and 240-grit sanding pads
Tape measure and pencil
You will find everything you need for this project at your local Builders Warehouse.
NOTES:
- Refer to Easy Workshop Storage Solution for instruction on making the storage bins
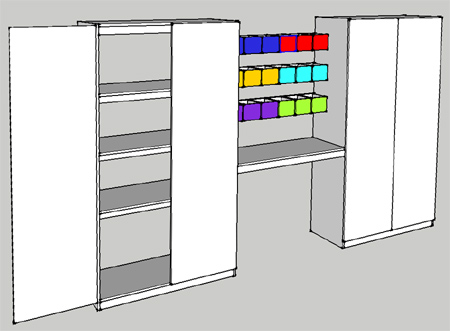
- Double up the quantity if you plan on making two storage cabinets and include an extra shelf and apron for the centre worktop.
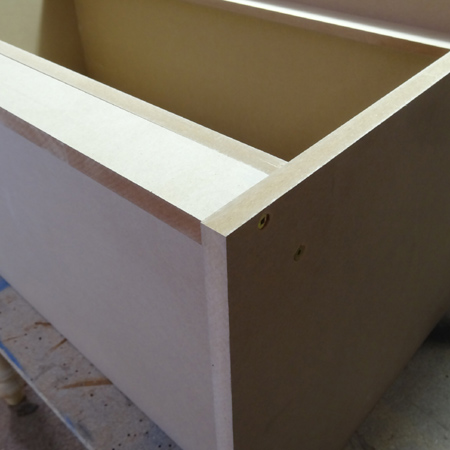
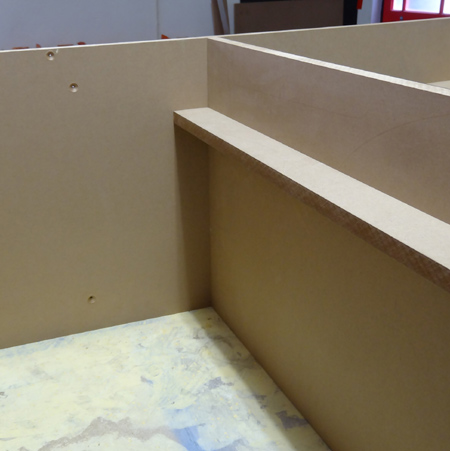
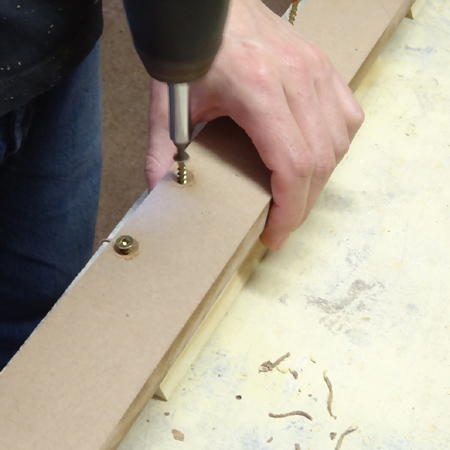
1. Assembling the frame
Aprons were screwed onto the top and base sections. The sides were attached to these sections by drilling countersunk pilot holes through the sides and into the shelf and apron - see below.
2. Mounting the shelves
You can place the shelves at any height you wish. I wanted to allow a large space at the bottom of stacking boxes and containers, and at the top for taller items. The shelves are secured in exactly the same way as the top and base.
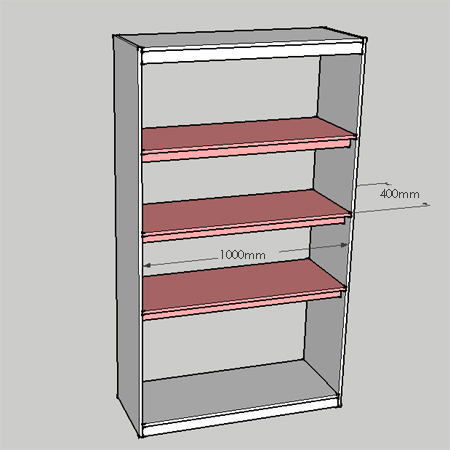
BELOW: The apron for the shelves is further back from the front edge to provide more support across each shelf.
3. Finishing the assembly
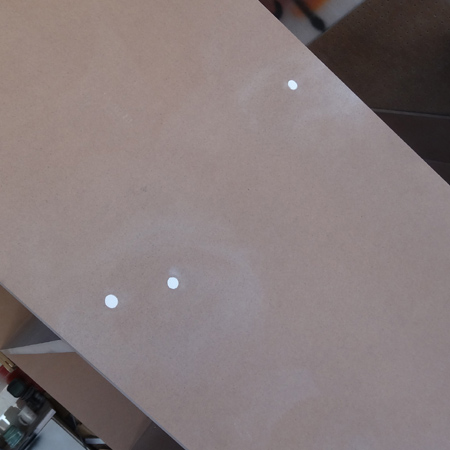
All the screw holes are concealed with wood filler left to dry and then sanded smooth.
GOOD TO KNOW
I like to apply a thin layer of Pattex No More Nails over the screw heads before putting wood filler. This seems to reduce the likelihood of the filler cracking and also bonds the wood filler better.
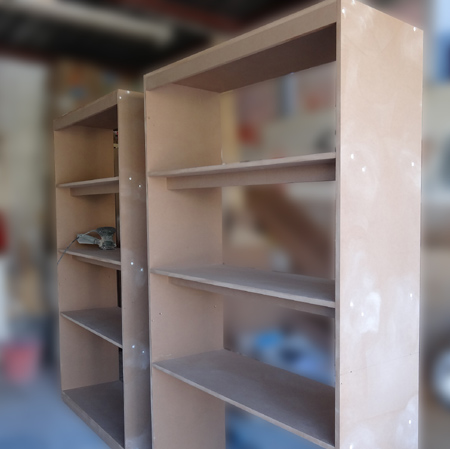
4. Sanding and painting
The two cabinets then head into the workshop for final sanding and painting. All the edges are sanded with 120- and then 240-grit sandpaper. The 120- takes off the sharp edge and the 240- polishes the edging for a perfect painted finish.
We used a Bosch PFS 65 spray system and Plascon Polvin (white) to paint the cabinets inside and out. Three coats of paint were applied and sanded with 1000-grit sandpaper. After this, two coats of acrylic sealer were applied. Quite a few people have asked me why we do this, and the reason is that it is easy to sand the Polvin between coats for an ultra-smooth finish.
Using the PFS makes painting quick and easy, and we have two paint pots - one with paint and one with sealer. We can simply switch them over when ready.
5. Finishing
Four butt hinges are mounted onto the back of each door with 16mm screws and then the doors are hung onto the cabinet frame with 30mm screws. It's important to drill pilot holes to avoid splitting the frame. Add your choice of knobs or handles and attach 2 double roller catches to the base and top shelf.
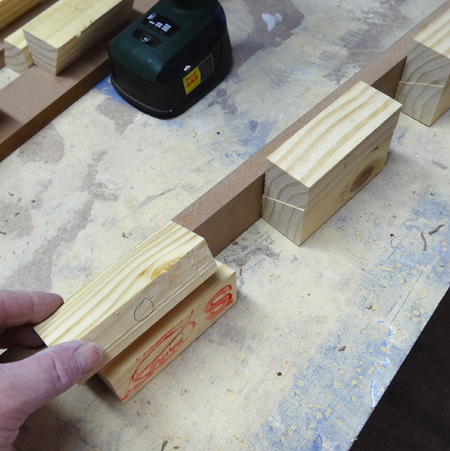
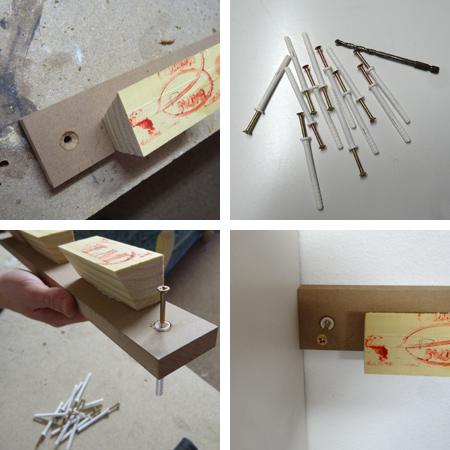
6. Wall mounting for storage bins
To mount the bins onto the wall the bottom section of the French cleat was attached to a length of supawood. This wasn't part of the original plan, but since we were unable to obtain the right size of wood, a substitute needed to be found.
BELOW: Here are the mounting boards with bottom sections attached. The top of the French cleat still needs to be attached to the storage bins.
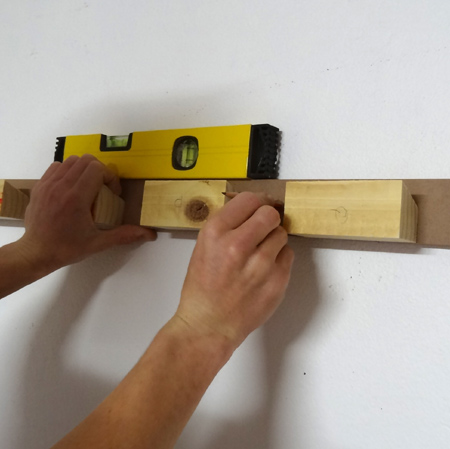
To secure the mounting bar to the wall a countersunk hole is drilled at both ends. The size of the hole equals the size of the wall plugs, in this case 6mm. We used long wall plugs and screws to allow for the weight, although after filling all the bins it wasn't even that heavy... overkill ! The board was placed against the wall and a mark made with a pencil to indicate where to drill the holes. These were drilled out, the plugs and screws pushed through the board and the assembly secured to the wall.
GOOD TO KNOW
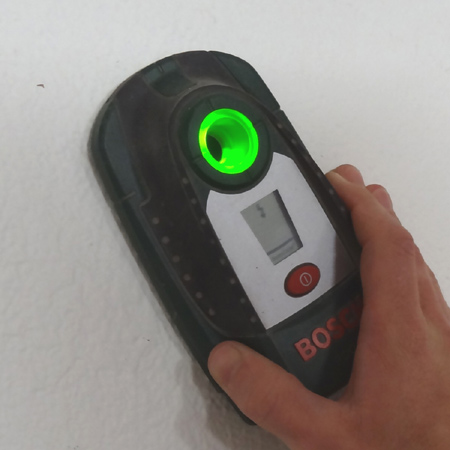
Before drilling into walls use an electronic detector to check for electrical conduits or pipes. In this case we knew there was wiring for a plug point and needed to make sure that we weren't drilling anywhere near it.
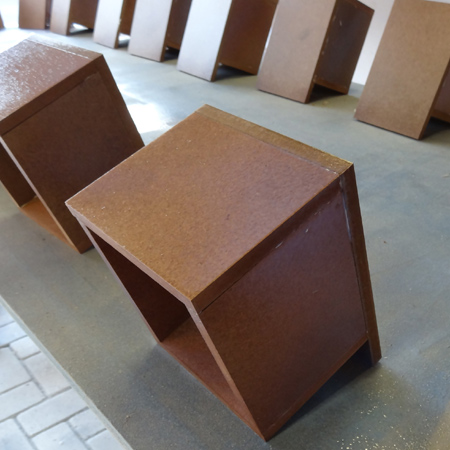
6. Storage bins
Each individual storage bin was glued together using Pattex No More Nails. The boxes were sanded and given two coats of clear acrylic sealer.
I wanted to introduce some colour into the DIY Divas workshop area and ended up painting the front of each box with a different shade of Rust-Oleum 2X spray paint. Love it...! After assembly and painting the top section of the French cleat was glued and screwed to the back of each box.
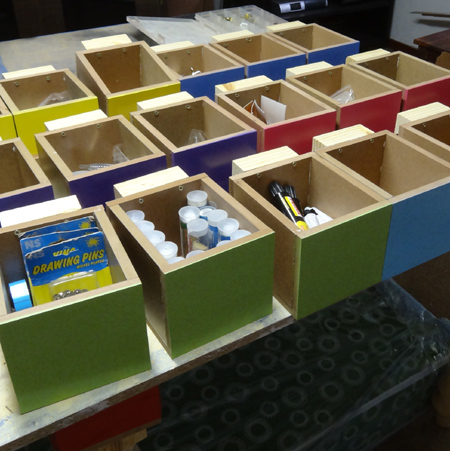
The storage bins were a bit of a boo-boo that turned out OK. Because we couldn't find the right size timber, we ended up attaching the cleats to the backing board, which in turn meant that the base support on each bin was a bit short. However, now we can see what's in each bin and I won't have to add labels.
If you prefer to have the bins sit flush with the frame, use a piece of 32 x 94mm PAR pine as shown in the Workshop Storage project and mount the French cleat in the same way.