Make a modular bathroom cabinet
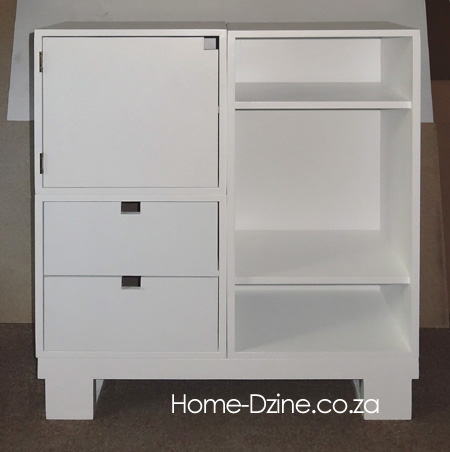
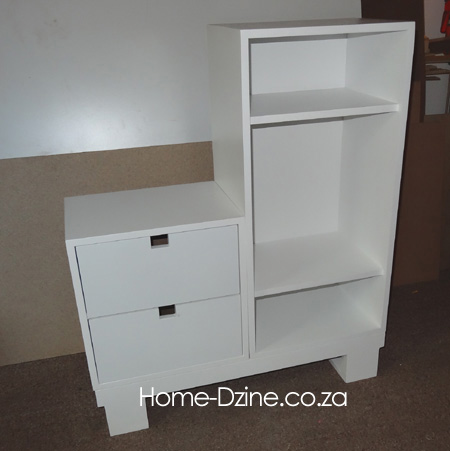
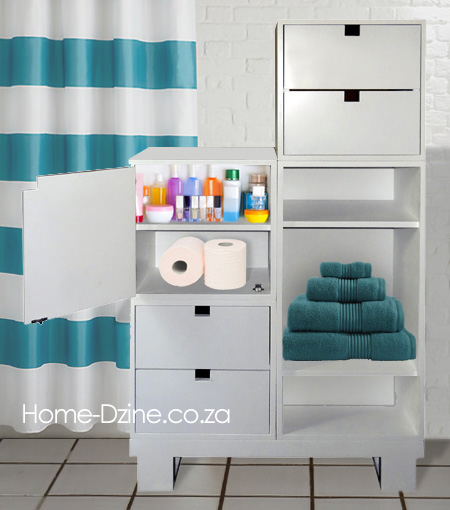
This modular bathroom cabinet is made up of separate cubes that can be added to create the ultimate bathroom storage. Mounted on a sturdy base, you can add cubes with drawers, cubes for shelves, or cubes with doors for cupboard to hideaway bathroom clutter.
YOU WILL NEED:
QTY |
W |
L |
MATERIAL | ITEM | |||
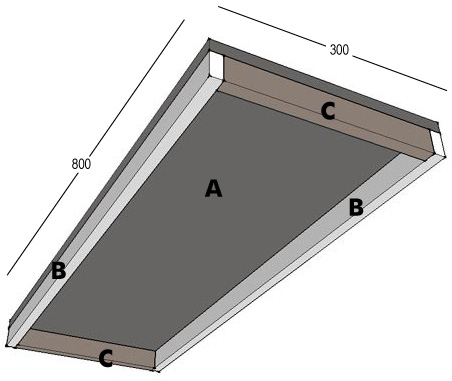
A |
1 |
300 |
800 |
16mm SupaWood | Base top | ||
B |
2 |
34 |
800 |
16mm SupaWood | Base front/back apron | ||
C |
2 |
34 |
268 |
16mm SupaWood | Base side apron | ||
D |
2 |
100 |
300 |
16mm SupaWood | Base bottom | ||
E |
4 |
100 |
118 |
16mm SupaWood | Base leg front | ||
F |
4 |
84 |
100 |
16mm SupaWood | Base leg inner | ||
G |
2 |
300 |
400 |
16mm SupaWood | Cube top/bottom | ||
H |
2 |
300 |
368 |
16mm SupaWood | Cube sides | ||
J |
2 |
16 |
283 |
16mm SupaWood | Cube drawer divider | ||
| Additional components: | |||||||
| 276 | 368 | 16mm SupaWood | Shelf | ||||
| 364 | 364 | 16mm SupaWood | Door | ||||
30mm wood screws
Optional: Butt hinges + 12mm screws for mounting doors
Wood filler
Plascon Kitchens & Bathrooms paint
Plascon Glazecoat (matt or gloss)
8 x Roofing washers and 12mm screws
TOOLS:
Drill/Driver and assorted bits
Countersink bit
Orbital or random orbit sander + 180- and 240-grit sanding pads
Bosch PFS spray system or painting equipment
Tape measure and pencil
HERE'S HOW:
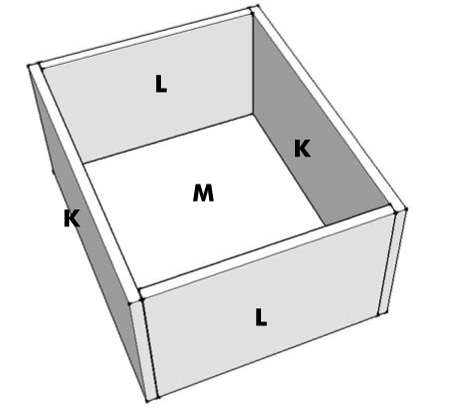
CUBE DIAGRAM
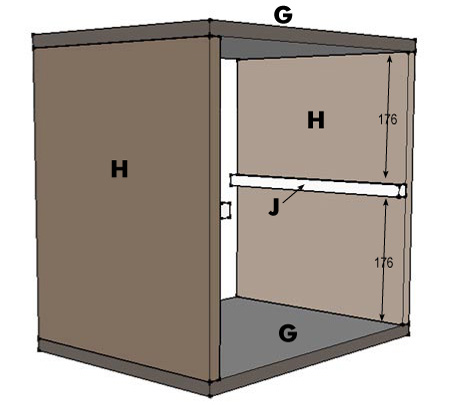
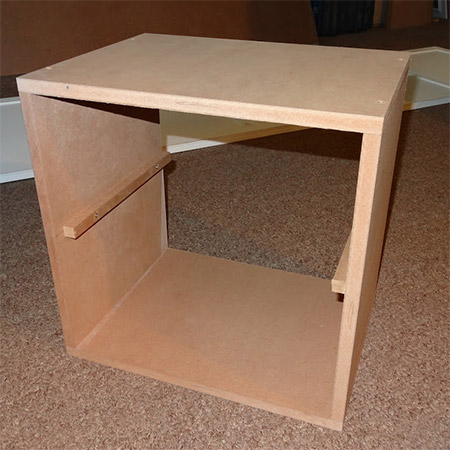
As per the cube diagram, assemble the cubes as shown. Pre-drill countersunk pilot holes through the top and bottom to attach the sides. Measure down/up on both sides to mark the position for the drawer divider. Pre-drill countersunk pilot holes to attach the divider to the inside of the cube.
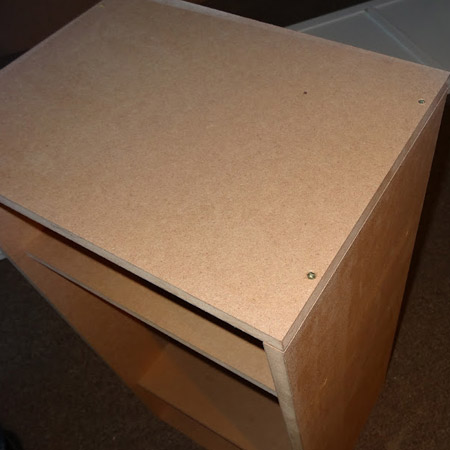
Make additional cubes in the same way, adding shelves or a drawer divider for drawer units. Measure and mark for shelf placement and then pre-drill countersunk pilot holes through the sides. For the cube with a door, attach butt hinges to the side edge of the door and mount onto the inside of the cabinet.
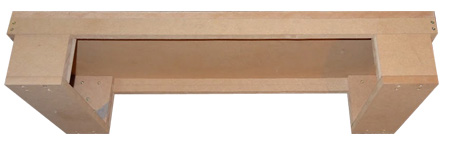
BASE DIAGRAM
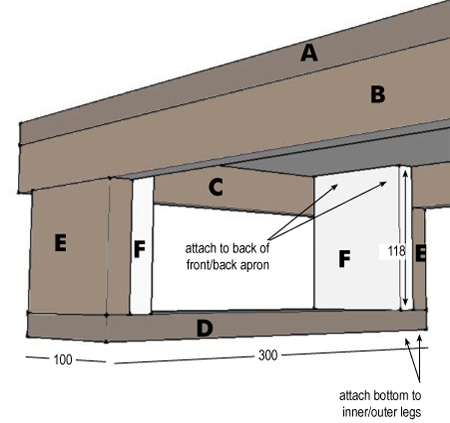
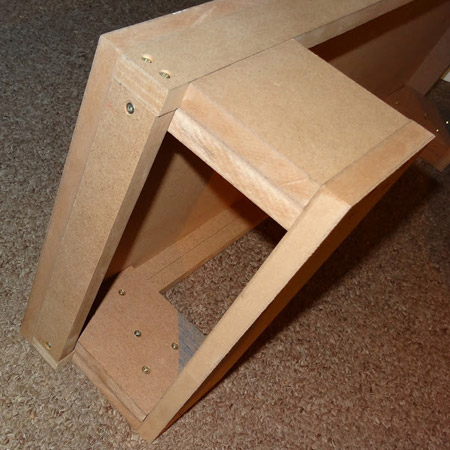
The design of the base provides a sturdy and secure platform for a wide configuration of storage cubes. If you want, you can make the base long, but I would then recommend adding a centre leg to the design to prevent the board from bowing under the weight.
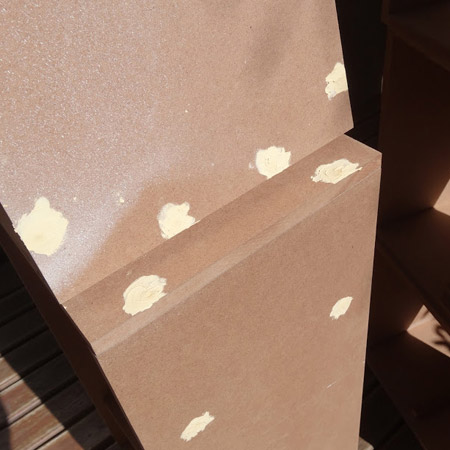
Fill all holes with wood filler and let this dry before sanding smooth with 180-grit sandpaper. It is best to use a sander - orbital or random orbit - for sanding these areas, as a sander leaves a much smoother finish than hand sanding. Sand all cut edges with 240-grit sandpaper until smooth.
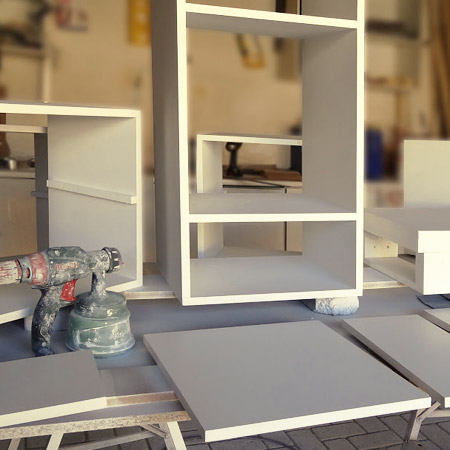
I use a Bosch PFS spray system for all my projects. It makes painting so much easier and leaves a professional finish.
When mixing paint I normally add about 20% water to the mix for the first coat, and 10% water for the remainder. Set the spray gun on the lowest setting for a super-fine spray. If you don't have a Bosch PFS, you can use a foam roller to apply paint.
For bathroom cabinets I apply Plascon Kitchens & Bathroom paint. This a premuim quality water-based enamel paint and is formulated with silver technology that protects the paint film surface and inhibits the growth of micro-organism. This paint leaves a matt finish, so I add further protection with two coats of clear sealer.
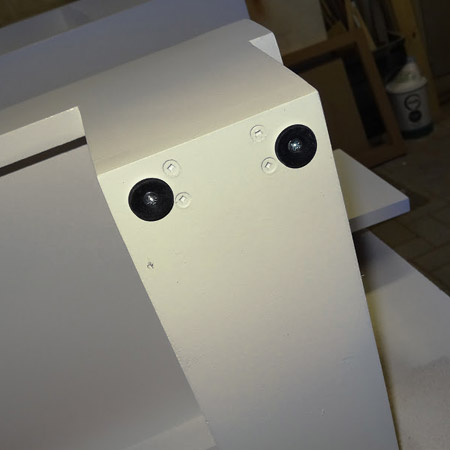
It's also important to prevent the finished project from touching the floor, especially in a bathroom. SupaWood is absorbent and by fitting roof washers to the bottom of your new bathroom cabinets, you reduce the possibility of moisture absorption through the base.
DRAWER DIAGRAM
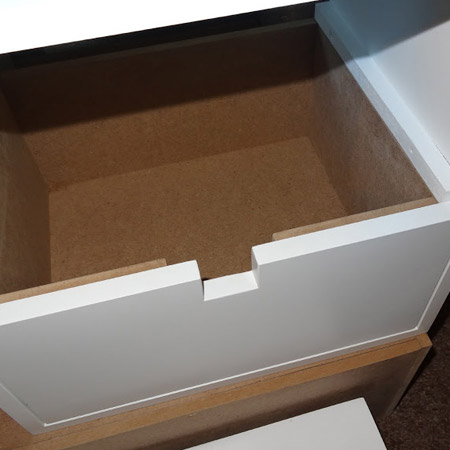
Assemble the drawers as shown above by pre-drilling countersunk pilot holes through the front and back into the sides and for mounting the base. The base slips snugly between the sides, front and back.
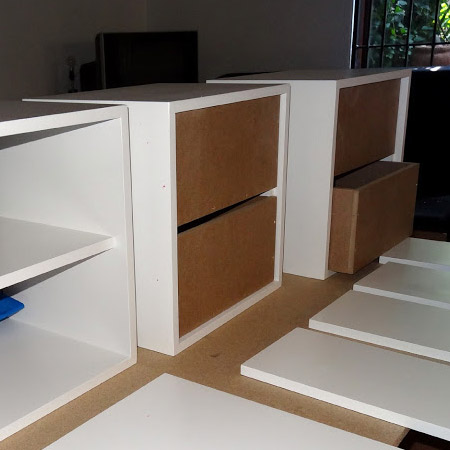
Here are the finished drawer and shelf cubes waiting for doors and shelf front to be attached.

Just before attaching the drawer fronts I realised that I hadn't done the cutouts for the handles. You can use a jigsaw to do this and sand smooth and then paint. Or be clever and cut out the holes for handles before you paint...!
That looks better. Drawer fronts are attached and the handle slots are now cut out and finished.
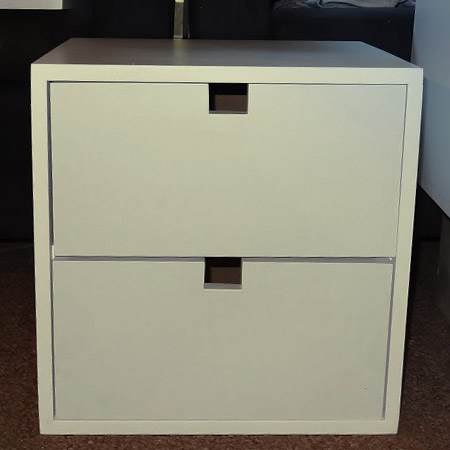
Now you can see what the finished drawer cube looks like. The drawers are sized to fit perfectly within the cube and the drawer divider [J] allows easy opening and closing of the drawers. Here is a basic configuration that includes a rectangular shelf unit and 2-drawer cube unit.
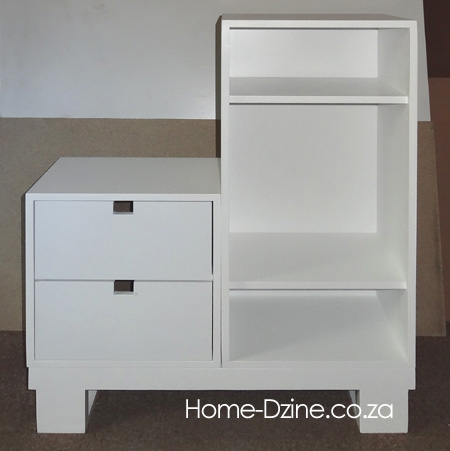
This design allows you to add any configuration of storage cubes, cupboards and shelf units.