
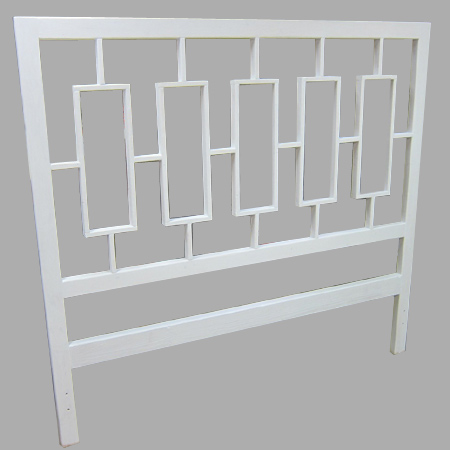
DIY west elm window headboard
These window headboards are fabulous, but at a cost of over R4600 for a queen-size headboard (excl shipping costs), that's more than what you pay for a bed these days. The solution... make your own window headboard of course!
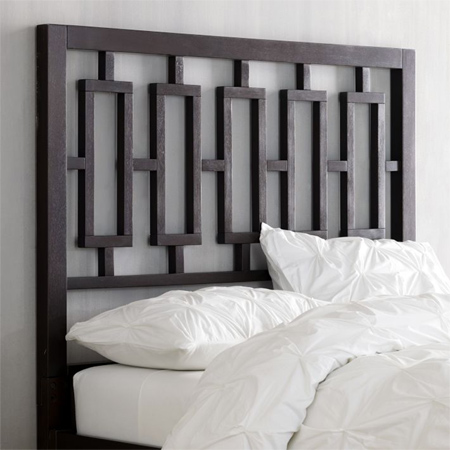
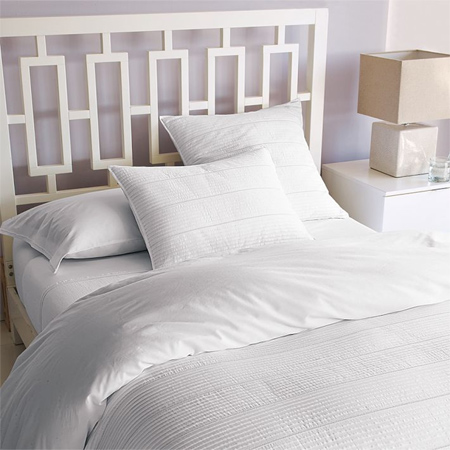
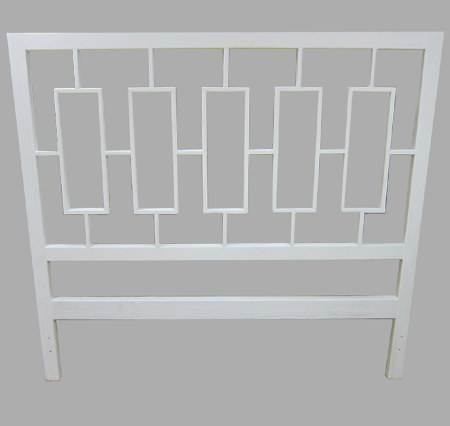
We recently looked at adding a headboard to your bed to add impact and make the bed a feature of any bedroom. In this article we showed you the window headboard from west elm and basic instructions for making your own. Dave Wirth went one step further and made the headboard with full instructions.
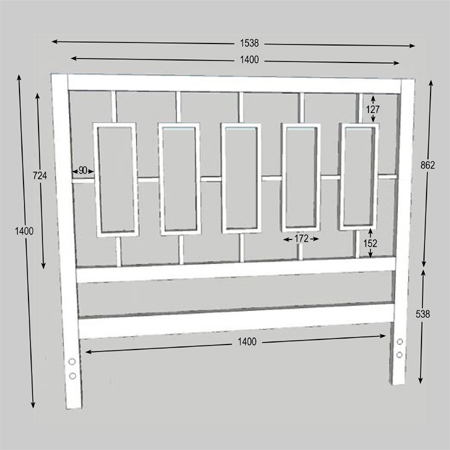
This design is for a queen size bed, but you can modify the design to fit any size of bed simply by removing one or more of the window panels.
YOU WILL NEED:
3 of 22 x 69 x 1400mm PAR pine - top/bottom frames
2 of 22 x 69 x 1400mm PAR pine - sides
5 of 22 x 22 x 127mm PAR pine - box frame top upright
5 of 22 x 22 x 152mm PAR pine - box frame bottom upright
6 x 22 x 22 x 90mm PAR pine - box frame horizontal crosspiece
10 of 22 x 22 x 172mm PAR pine - box frame top/bottom
10 x 22 x 22 x 401mm PAR pine - box frame sides
12 of 5 x 75mm cut screws
Wood glue
Wood filler
Long panel pins
TOOLS:
Drill/Driver + assorted bits
Orbital sander + 120- and 240-grit sanding pads
Carpenter' square
Hammer
Nail punch
HERE'S HOW:
I had to change the design that Dave used for his headboard, as our PAR pine doesn't come in the same sizes and there is less choice. While the PAR pine used is 20-22mm thick, if you come across a 44 x 69mm PAR pine, this would be a much stronger design.
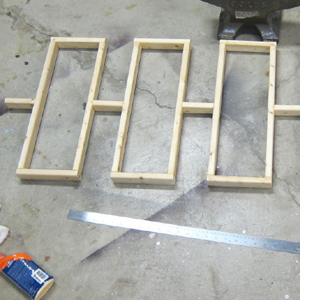
Because we're using 22 x 22mm pine for the frame, it doesn't leave a lot of room to work with. I'm not fond of dowel joints as they don't always line up, but using dowel joints would make for a stronger joint. However, if you build the centre panel first and then fit this snugly within the outer frame, you can get away with using wood glue and long panel pins to join the centre boxes together. You need to keep everything straight and square as you work, so check with a carpenter's square as you make each box.
GOOD TO KNOW
Use a nail punch to ensure that the heads of the panel pins are just below the surface of the wood. These can later be filled in with wood filler for an invisible join.
Once the entire centre section is glued and fastened together, leave this to dry overnight.
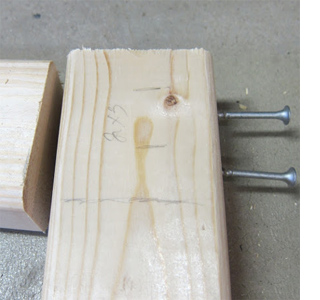
Attach the frame to fit around the centre section. To join the frame together pre-drill 4mm pilot holes through the sides into the top and bottom crosspieces. Countersink the screw holes. Apply wood glue to the edges to be joined before using 5 x 75mm cut screws.
GOOD TO KNOW
Where drilling the pilot holes to attach the frame sections together, use an 8mm wood bit to drill to one-third of the depth on the side frames. This will allow the 75mm screws to have more to bite into on the horizontal pieces.
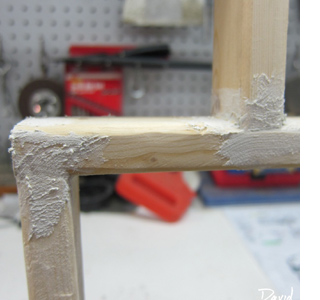
Use wood filler to fill in any gaps and nail holes. Let this dry before sanding smooth with 240-grit sandpaper. If any gaps are still visible, repeat the process until the finish looks nice and neat. It's always better to apply thin layers of wood filler and let dry before applying another thin layer.
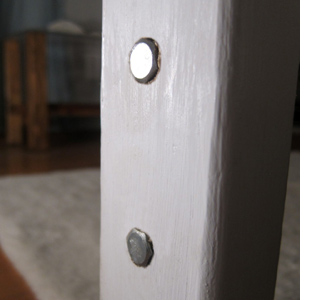
If you want to attach the headboard to your existing bed, rather than have it freestanding, repeat the process used for joining the frame sections together. Any screw heads can be covered with self-adhesive or pop-on caps. These come in a variety of colours. And there you have it... a decorative headboard at a fraction of the cost to buy new.
Finishing
If you have a Bosch PFS spray gun, painting is quick and easy and you can use Plascon Polvin finished off with two coats of clear acrylic sealer matt or gloss sealer. Hand painting will take a bit longer and you can use a small paintbrush for getting into the corners, smoothing everything with a foam roller. Alternative, Rust-Oleum 2X satin blossom white will hide any minor imperfections and provide the perfect finish.
davewirth.blogspot.com