Upholster your made dining chairs
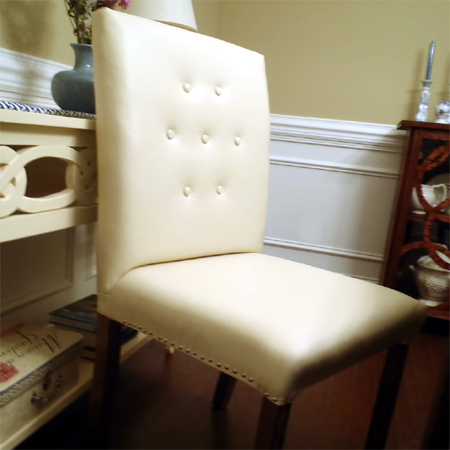
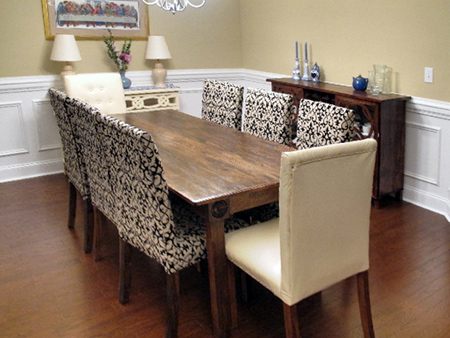
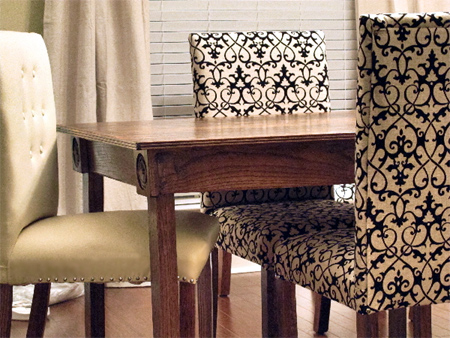
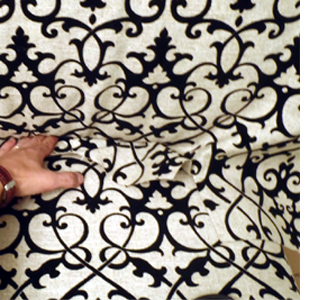
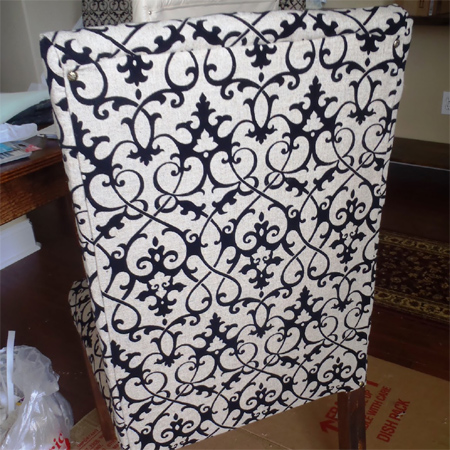
We previously looked at how easily you can make your own upholstered dining chairs for around R150, as opposed to spending R700 and upwards for a chair. In this feature we finish off our made dining chairs by upholstering them with our choice of fabric. As you can see, these chairs are finished in a cream pleather and an off-white and black upholstery fabric.
lazylizonless.blogspot.com
YOU WILL NEED:
Follow the instructions here to make your own dining chairs
Sheet of 5cm thick medium density foam
Medium-weight batting
Carving knife or craft knife
Permanent marker
Tape measure and pencil
Staple gun and 10mm staples
Upholstery webbing
Upholstery strips
Upholstery pins
Needle and matching thread
Hammer
HERE'S HOW:
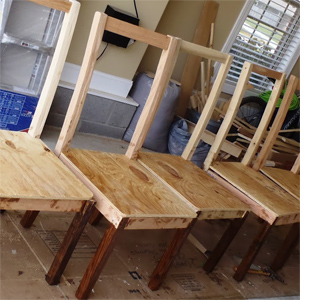
The final step in the assembly of our dining chairs was to cut and attach a plywood seat before staining and varnishing the bottom section of the chairs. Carrying on from here, we are now going to start upholstering the dining chairs.
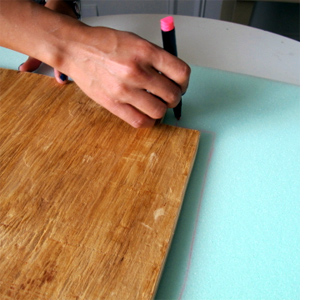
1. Use one of the chair seats as a template to cut the foam to shape for your chair sheets. You can use a carving knife or sharp craft knife to cut the foam to size. Don't worry if the edges are a bit ratty, as this will be covered by batting.
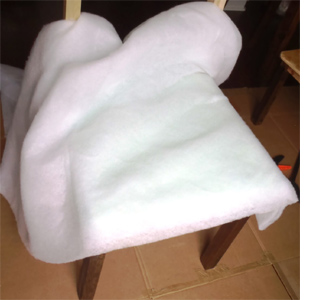
2. Place the foam on top of the chair seat and then wrap the batting over this. Cut large enough that you can staple the batting to the side of the chair seat frame.
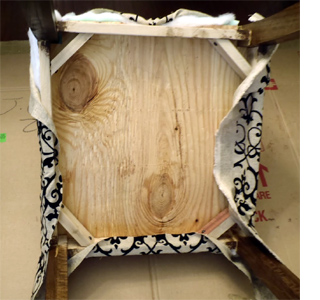
3. The fabric to cover each chair seat should be large enough to fold over and under the chair seat. Use a staple gun to fasten down the fabric, leaving the corners until last.
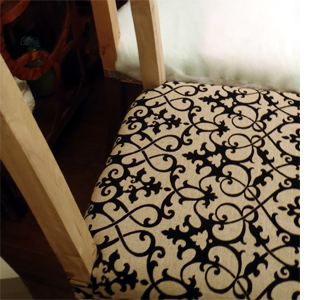
4. When you get to the corners, neatly tuck and fold the fabric around the legs before securing to the underside of the frame, or stapling where staples won't be visible once you upholster the chair back.

5. At the front corners, neatly tuck and fold the fabric under and out of sight. You may need to cut off extra fabric at the corners. Use a needle and matching thread to close up.
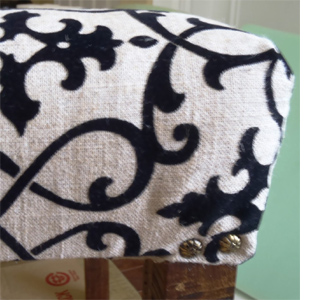
6. To finish off around the legs, hammer in a couple of decorative upholstery pins to secure the bottom edge of the fabric.
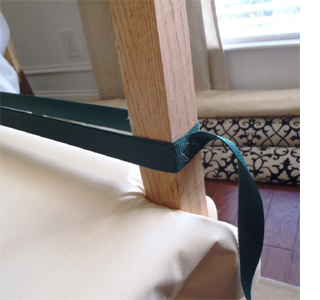
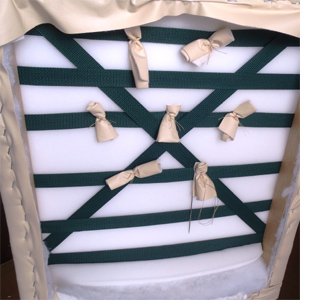
7. On each chair seat back you will attach stretchable upholstery webbing to provide comfortable support. Staple down one end of the webbing and then wrapping the webbing and around and back to the starting point; add a couple of staples to secure before cutting the end.
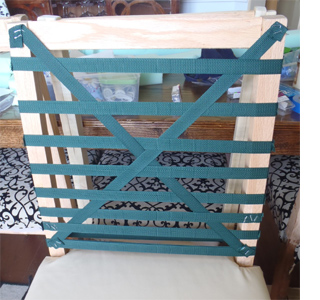
8. Repeat this process all the way up the back of the chair seat. Also add diagonal straps - weaving these through the horizontal straps and securing with staples at each end.
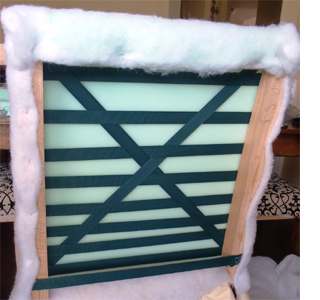
9. As with the chair seat, cut a piece of foam to fit onto the seat back and cover with a layer of batting, securing this to the side of the frame.
10. Cover the foam and batting with a piece of fabric large enough to fold over the sides and be stapled to the inside back of the chair seat back frame. At the bottom, push the fabric through to the back for securing to the back of the chair seat (not the seat back).
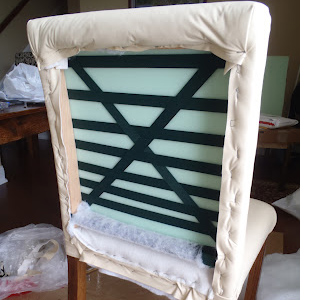
11. Here you can see how the fabric is pulled around the sides and fastened to the back. Note how the bottom piece of fabric has been stapled to the back of the chair seat. Close off the top corners with needle and matching thread.
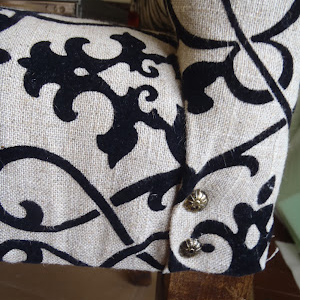
12. Fasten the bottom edges of the fabric of the chair seat back to the back legs with a couple of decorative upholstery pins. This ties in with the finish at the front of the chair seat.
13. To finish off the back of the chair, cut a piece of fabric that is slightly larger to allow for folding under all the way around. It is better to sew a hem if you are using fabric that frays easily. If you don't have a sewing machine you can hem the edges using iron-on webbing and an iron.
14. Attach this closing flap by using a upholstery strip, upholstery pins, or by hand-sewing into place.
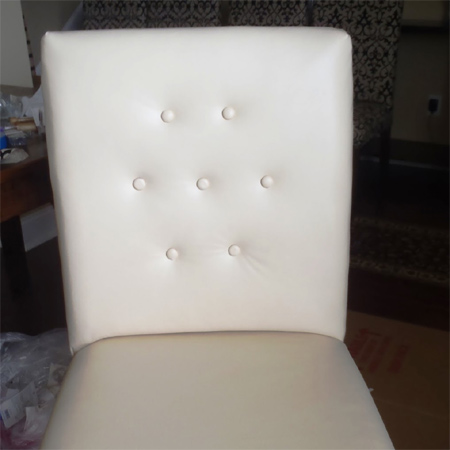
If you want to add a tufted finish to the chairs, as done with the pleather ones shown here, do this before you attach the closing back flap. Push a long needle through the back, secure the upholstery pin at the front, and push through to the back again. Knot off the end around a piece of scrap fabric to prevent pulling through.