
Use Reclaimed Wood Offcuts to make a Vintage-Inspired Charcuterie or Cutting Board
If you are looking for a unique gift idea for family or friends, this beautiful, vintage-inspired charcuterie or cutting board can be made from reclaimed wood, hardwood offcuts, or pine from your local Builders.
12/12/2023
When you have small hardwood offcuts lying around you never think about all the ways you can use these for practical projects. The same applies to any reclaimed wood that you come across. In the past, I trolled auction sales and secondhand shops to pick up bargains, usually very damaged furniture, that hid wood that today is hard to come by. These pieces are usually covered in paint or layers of varnish and it is hard to tell what lies beneath, but if you are willing to put in the effort you may be rewarded with a beautiful hardwood that can be used for a multitude of small projects.
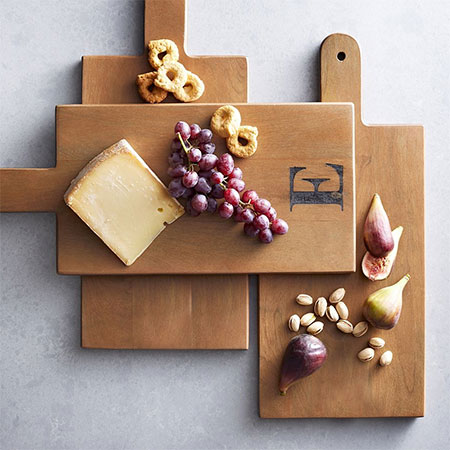
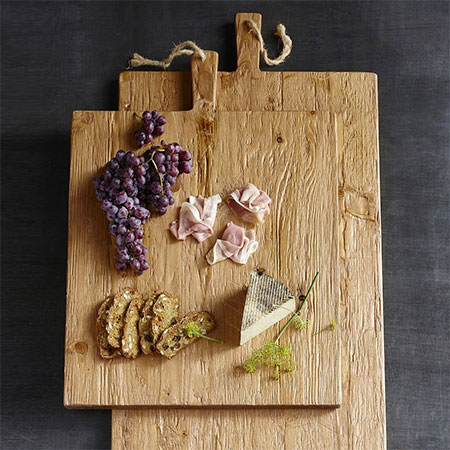
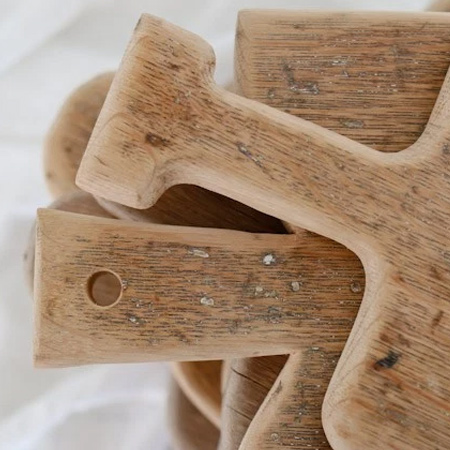
The next time you are out treasure hunting for hidden bargains, keep projects like this in mind, especially when it is close to special occasions or celebrations. Imagine turning an old shelf into charcuterie, cheese or chopping boards similar to the ones shown here.
tidbits.com
If you are lucky to have some old offcuts in your workshop or know someone who has reclaimed wood that you can use, Cami over at Tidbits features a post where her husband turns an old piece of wood into a beautiful, vintage cutting board or charcuterie board. Use this tutorial to make use of any old wood you have lying around or get your hands on small offcuts of hardwood to make your own vintage cutting board. If you do not have access to reclaimed wood or hardwood offcuts, you can use PAR pine by following the steps below. Some roughing up with odds and ends in the workshop and wood stain will easily make new pine look like aged wood.
Step 1 - Select a Shape and Design
The first thing you need to do is to decide on a shape or design for the cutting board. Go online for inspiration that you can use for this and then begin by using a pencil to outline the shape that you want for your vintage cutting board.
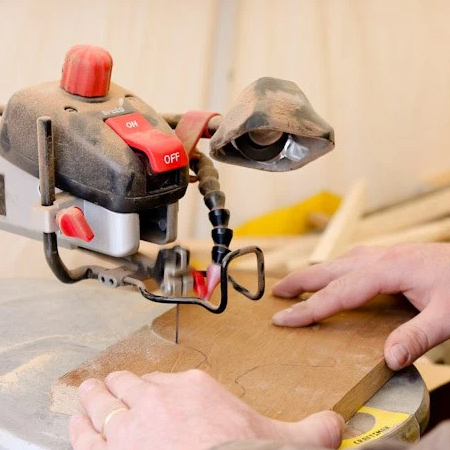
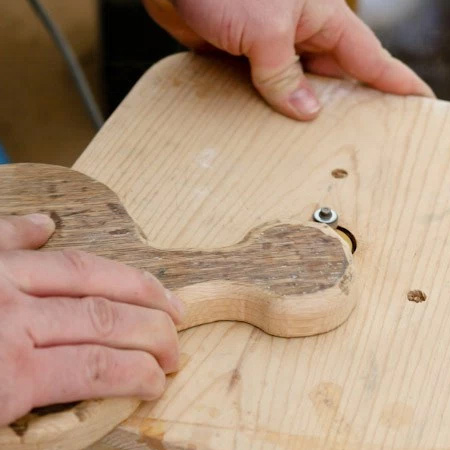
Step 2 - Cutting out the Shape
Use a jigsaw and clean-cut blade, band saw or scroll saw to cut this out. If you plan on making more than one cutting board, make sure to make a sturdy template that can be used over and over again.
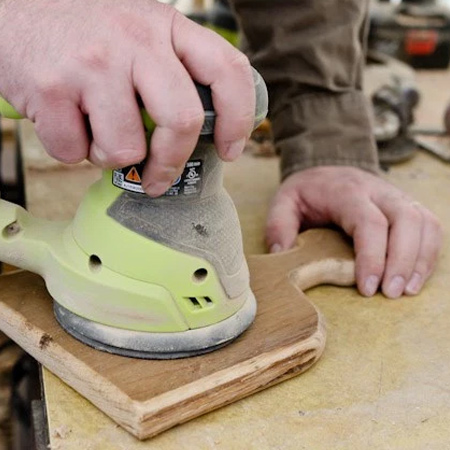
Step 3 - Sanding and Smoothing
Even though you are going for a vintage-inspired or aged look for the cutting board, you still need to sand and smooth away any rough edges. It is also a nice finishing touch to round off the edges and you can do this with a router and roundover bit or sander to chamfer around all the edges.
GOOD TO KNOW
If you are not using aged or reclaimed wood for this project, you will want to use an ageing technique so that the cutting board resembles an aged piece of wood. This article offers comprehensive information on ageing wood.
Step 4 - Finishing
If you have used an ageing method and/or applied wood stain, in this step you will simply sand for a smooth finish. While the wood should look aged, you still want to be able to use the project as a cutting board and the next step is one that you do not want to miss out.
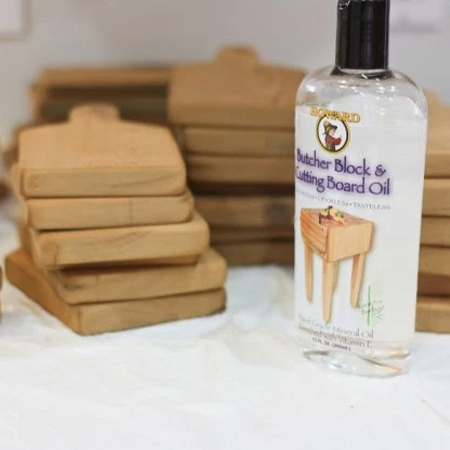
Step 5 - Safe for Food Preparation
Finish off your vintage cutting board with Howard's Butcher Block and Cutting Board Oil. You can buy this from Makro or online suppliers. Or get in touch with www.vermontsales.co.za to find your nearest retail stockist.
tidbits-cami.com
Howard Products include a range of wood conditioners and polishes that restore and bring out the natural beauty of wood. Click here to visit the Vermont Sales Howard Brand page to download their catalogue.