Quick Project: Make a Stylish Wood Picture Frame
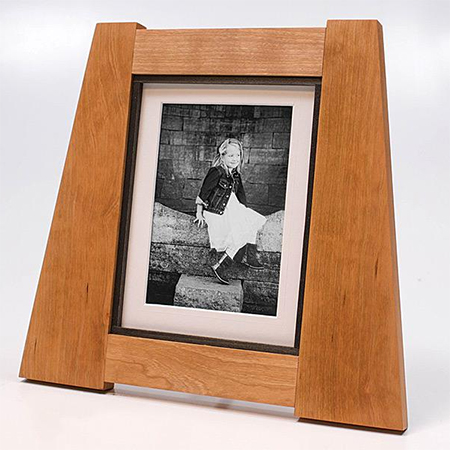
Framing your favourite photographs require an equally beautiful frame in which to mount them, and this wood picture frame perfectly fits the bill.
07/10/2021
kregtool.com
This wood picture frame is made of meranti, a medium hardwood that has a rich, warm colour and only a small grain that runs through the wood. To enhance the colour and bring out the natural beauty, apply Howard Feed-N-Wax to enrich and protect the wood - see bottom of this page for more details.
This wood frame might look like a difficult project, what with all the angles, but it is actually a very simple project that yields a beautiful wood frame that will last for generations. You can, of course, use PAR pine as a substitute for meranti if you want to spend a little less, or you can make the frame using your choice of hardwood because everyone has their favourites that they like to work with.

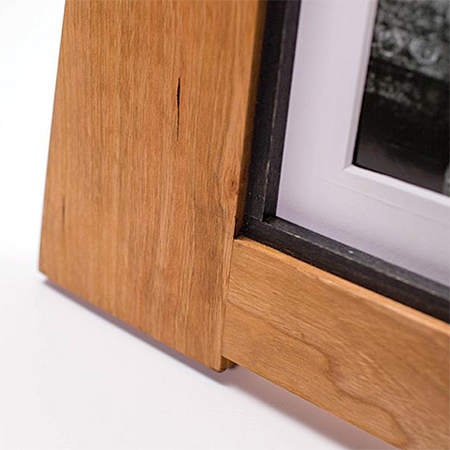
The standing method for the picture frame uses a support leg at the back of the frame, but you can add a picture hanger if you would prefer to mount the frame onto a wall.
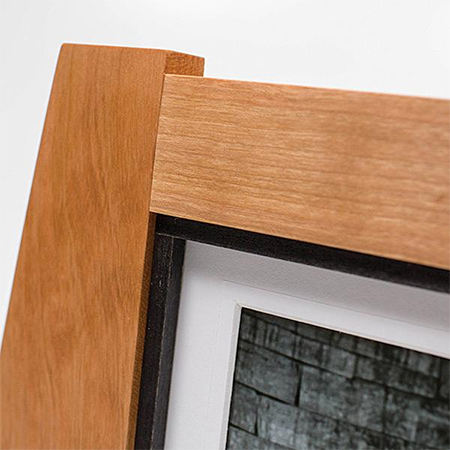
The tapered sides bring something unique to the frame and make it different from what you can buy in home stores.
YOU WILL NEED:
2 of 19mm x 82mm x 305mm meranti - sides
2 of 19mm x 38mm x 165mm meranti - rails
2 of 6mm x 6mm x 200mm pine or meranti - vertical stops
2 of 6mm x 6mm x 165mm pine or meranti - horizontal stop
1 of 6mm dia. x 140mm - leg
1 of 3mm x 190mm x 240mm - back board
32mm fine-thread pocket-hole screws
13mm wood screws
4/5mm glass cut to fit the opening
Photo mat board
Wood glue
180-grit sandpaper
Howard Feed N Wax
TOOLS:
Drill or Combi Drill + assorted bits
Kreg Pocket-Hole Jig - any model
Jigsaw + fine-tooth blade, table saw or mitre saw
Clamps
Utility knife and cutting mat
Tape measure and pencil
Safety gear
HERE'S HOW:
Step 1
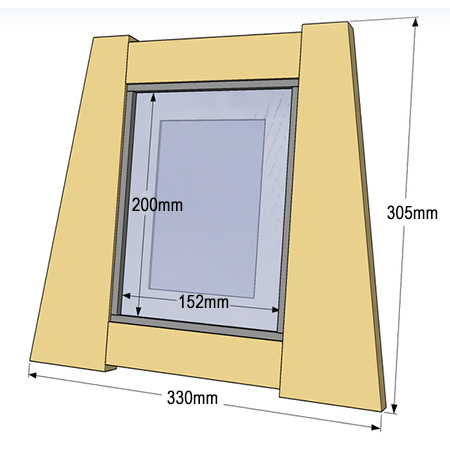
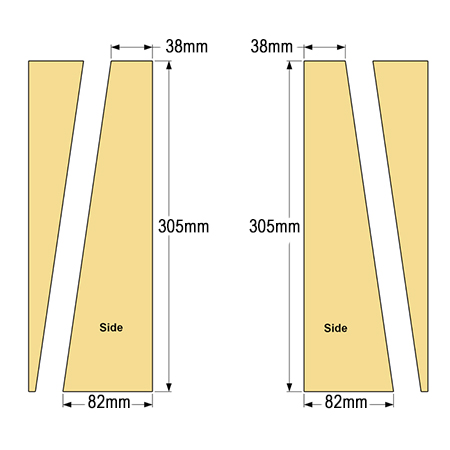
Using the diagram below, cut the tapered sides. The tapered pieces run from 38mm at one end to 82mm at the other end. The best way to cut these to size is using a mitre saw but if you don't own a mitre saw, cut cleanly with a jigsaw or table saw. Use a small or fine-tooth wood-cutting blade in the jigsaw to prevent ripping or chipping along the cut edges.
Step 2
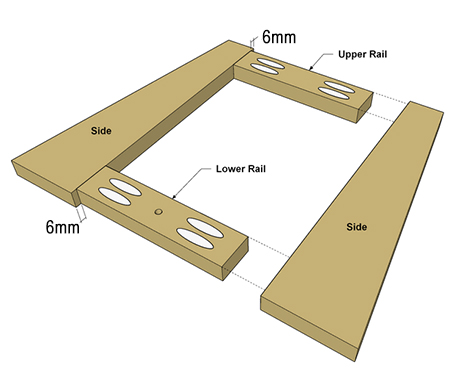
Set up your pocket-hole jig for the material thickness and then drill [2] pilot holes at both ends of the side pieces, as shown below.
Step 3
Sand all the cut pieces with 180-grit sandpaper along all edges for a smooth finish.
Step 4
If not already done so, cut the horizontal and vertical stops to the required length (see cutting list under the 'You Will Need' section, also cut to length the dowel that supports the back of the frame.
Step 5
If you are painting or staining any of the components, it is better to do this before assembly. For this project, the horizontal and vertical stops were stained with black wood stain. If you are leaving the wood as is - without any finish other than an oil finish, apply this now. With a product like this, you need to apply regularly to keep the wood conditioned and healthy.
Step 6
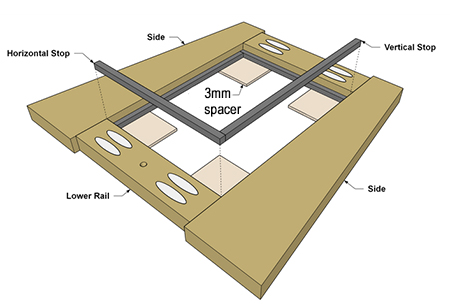
For this step, you will need 3mm spacers to help position the horizontal and vertical stops. A scrap piece of masonite or hardboard will work well for this or any other material you have on hand that is 3mm in thickness. The spacers will sit underneath the centre opening when mounting the stops.
Step 7
The stops are glued inside the centre opening. Place the frame face-down, add a bead of wood glue to the stops and secure it in place. Do not apply too much wood glue as this will make a messy finish. If any glue does ooze out it is better to remove it once the stops are glued in place and it can be scraped away.
Step 8
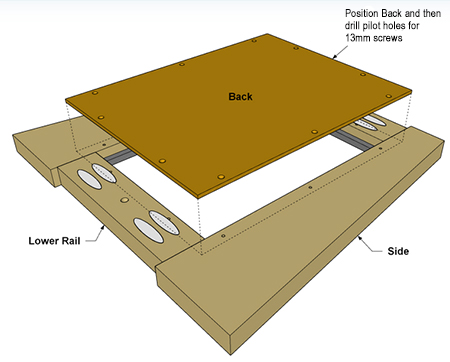
Measure for the glass to be cut to the exact size, place in the opening and add the backboard. This can be secure in place with 13mm screws.
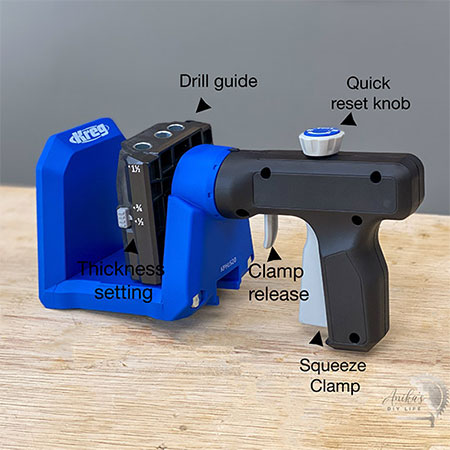
Whether you select the Kreg 520PRO or 720PRO Pocket-hole Jig system, you can be guaranteed a successful project every time.
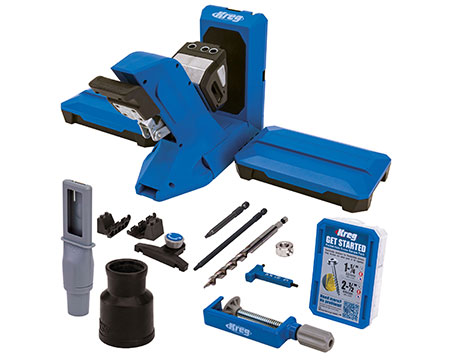
Find the Kreg 520, 520PRO or 720 PRO at hardware stores and tool suppliers around the country, or get in touch with www.VermontSales.co.za
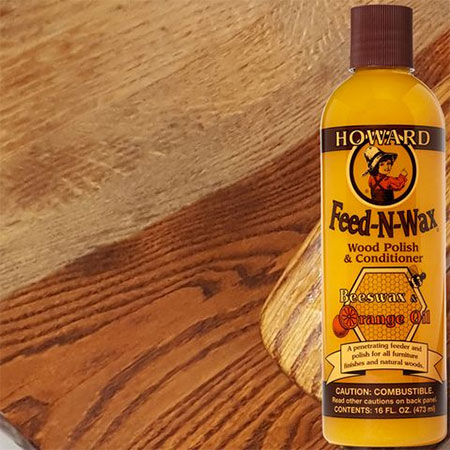
Howard Feed-N-Wax enhances the beauty of natural wood and protects and preserves your wood projects. Click here for more information on the Howard range of products.