
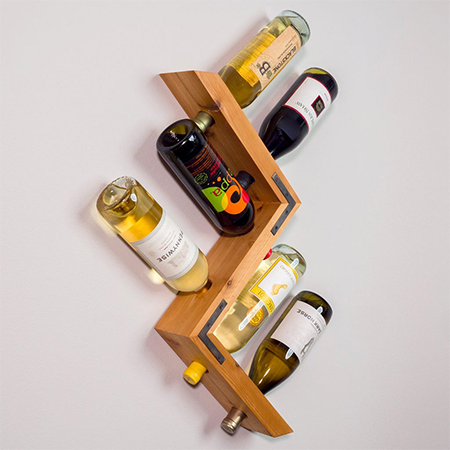
How to Make a Simple Yet Stunning Wine Rack
This simple wooden wine rack will only take you an hour to make and all the materials you need are at your local Builders store.
02/11/2021
family handyman magazine
For anyone who loves to enjoy wine, this simple wine rack is easy to make and can be mounted onto a wall. The wine rack is made using 32 x 94mm PAR pine that you can buy at any Builders store at a cost of around R170 each, and the only other item you need is a couple of steel angle braces to give the wine rack a bit of an industrial design.
Follow our step-by-step instructions below to make this wine rack, which should only take you about an hour to complete.
YOU WILL NEED:
1 of 32 x 94 x 1800mm PAR pine
2 of steel angle braces and 16mm screws
4 x 45mm cut screws
1 of keyhole hanger
Wood glue
Wood filler
Painter's tape
120-grit sandpaper
TOOLS:
Combi drill or drill for masonry/brick
32mm spade or MAD bit
16 mm spade or MAD bit
Mitre saw
Quick clamps
Wood chisel
HERE'S HOW:
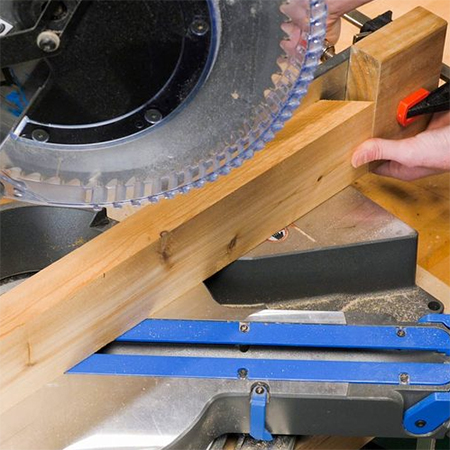
1. Cut all the pieces to size
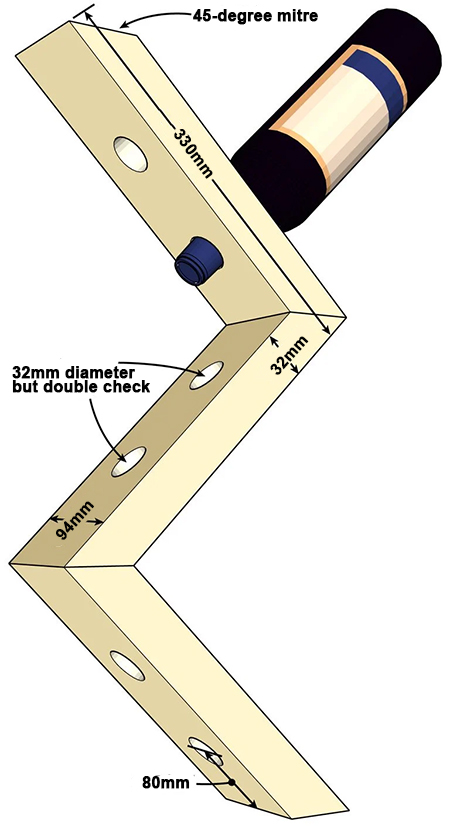
Cut [3] lengths from the 32 x 94 x 1800mm PAR pine. Each length is 330mm long and has a 45-degree mitre at both ends of each length. See the diagram above for cutting the mirrored angles.
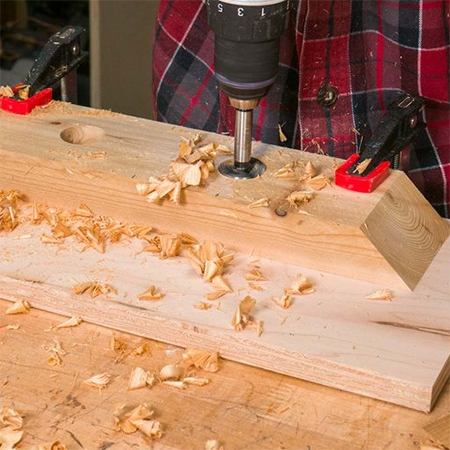
2. Drill the holes to support the bottleneck
Measure and mark the location to drill the holes to support the bottlenecks. The holes on either side should be 80mm in from the edge (see diagram above). The typical diameter for this is 32mm, but double-check the size of the bottles you have to make sure. Drill through the [3] lengths with a 32mm spade or MAD bit.
Place a scrap piece of wood underneath the lengths before drilling out to prevent the wood from splitting.
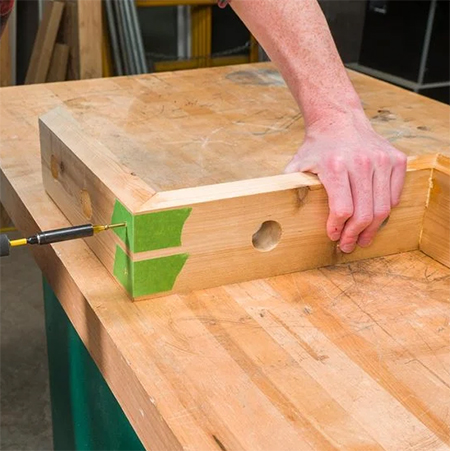
3. Assemble the wood pieces
Apply wood glue to the mitred edges and secure these in place with painter's tape and leave to dry for a couple of hours. To secure the glued mitred sections together, drill 3mm countersunk pilot holes and drive in 45mm screws before removing the masking tape.
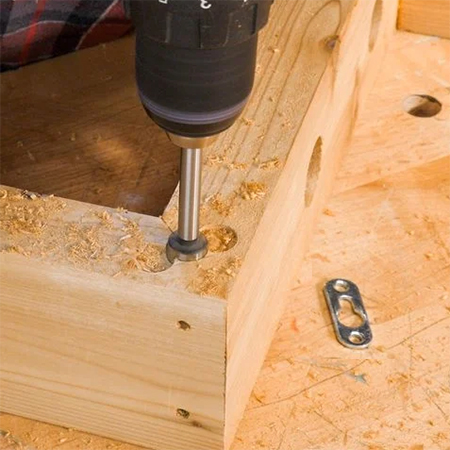
4. Add keyhole hangers for wall mounting
We have an article that explains how to flush mount a keyhole hanger if you want to hang something on a wall. Use this method to drill or rout out the opening for the keyhole hanger.
FINISHING
With the wine rack assembled, you have options for finishing. You can leave it in its natural state and add a clear sealer or varnish, or you can apply a tinted sealer or varnish. Sand before finishing.
For a decorative touch, spray paint [2] corner braces in black or brown and screw these over the angled sections of the wine rack, as can be seen below.
Now you can mark and drill holes in the wall to fit wall plugs and screws, with just the head of the screw above the wall to mount the keyhole hanger and hold the wine rack firmly in place.