DIY Tip: How to Flush Mount a Keyhole Hanger
In this article, we show you how to flush mount a keyhole hanger for mounting floating shelves or anything else you want to hang on a wall.
15/08/2021
While many people simply mount a keyhole hanger on the back of an item that is to be hanged on a wall it is better to flush mount so that the piece sits directly onto the wall and not leave a gap. I like using keyhole hangers for mounting onto walls because it allows you to easily remove the item say, if it needs to be cleaned such as an upholstered headboard, or you are moving and want to take it with you.
We received some enquiries regarding our Bedroom Storage Wall for Kids, specifically how to mount the shelves on a wall. Below we take you step-by-step through the process of flush-mounting a keyhole bracket.
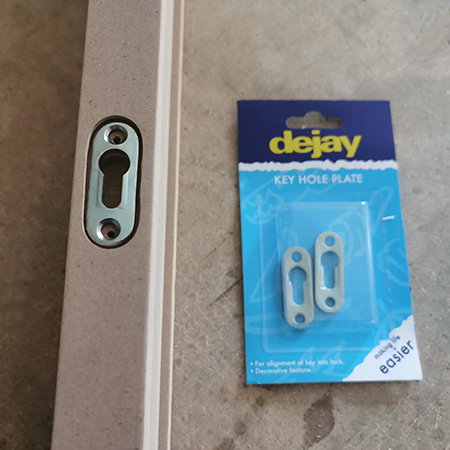
What is a Keyhole Hanger?
When flush-mounted below the surface of wood or board, a keyhole hanger allows to hang a piece on a wall so that it sits flush with the surface. To hang anything on the wall with a keyhole hanger, the screw in the wall sits 3 to 4mm proud so that the keyhole hanger can be slotted over the head of the screw at the larger end of the keyhole hanger and then either slid in one direction to lock in place if the keyhole hanger is mounted on its side, or pushed down if the keyhole hanger is mounted upright.
Using a keyhole hanger instead of any other hanger lets you mount something that can easily be removed if required. This makes this type of hanging system great if, for example, you are making an upholstered headboard that you need to occasionally clean or, as in this case, mount shelves on the wall without any visible hangers.
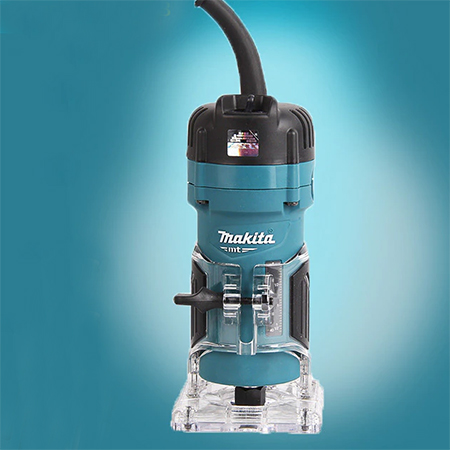
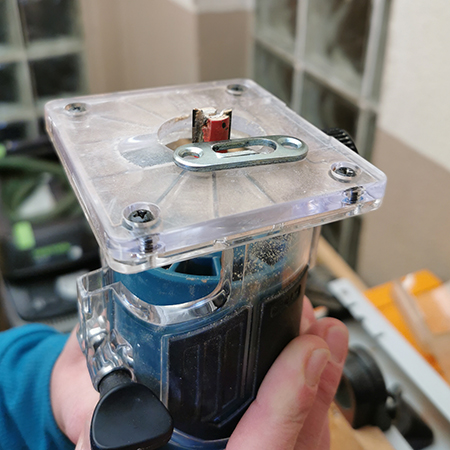
To make the hole for the keyhole hanger, we used my Makita Edge Trimmer. Now that the Dremel Trio is no more, I have discovered that this little powerful trimmer is perfect for occasional routing and far easier to use than a conventional router especially the female DIY enthusiasts.
HERE'S HOW:
Step 1
Set the cutting depth on the router. The first depth is the smaller opening that will allow the screw head to be slotted in and then across or down, whichever way you mount the hanger. For a shelf, the keyhole hanger is mounted horizontally along the edge of the board.
Step 2
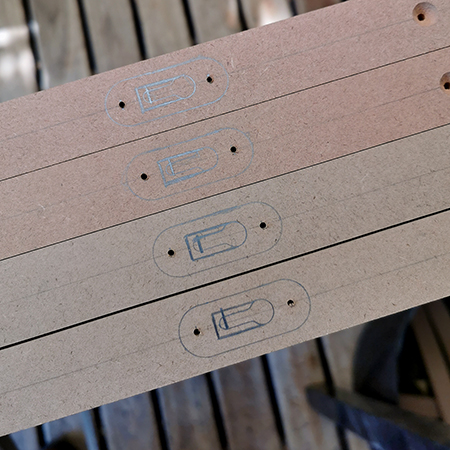
Use the keyhole hanger as a template for marking out the dimension of the keyhole hanger to drill the two openings. The larger opening needs to be deep enough to ensure the keyhole hanger is flush with the top edge of your wood or board.
Step 3
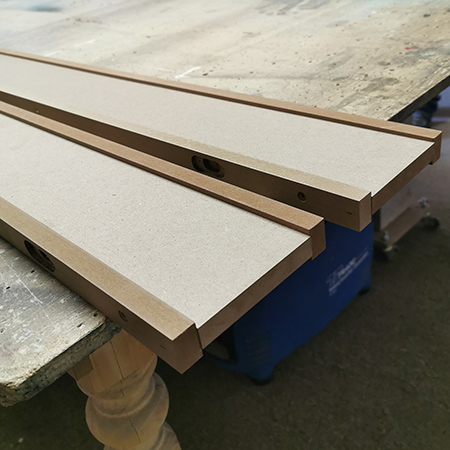
Using the drawn image as a guide, position the edge trimmer over the deeper opening to rout this out. We are making 4 floating shelves and need to drill 8 holes - one at each end for mounting the shelves.

Step 4
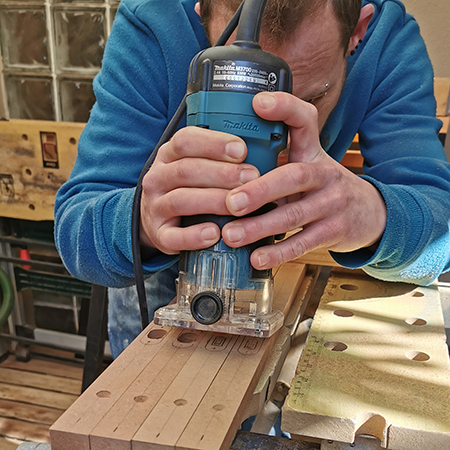
You can use the edge trimmer as a plunge router by tilting it slightly and then down into the wood or board. In this way, you can perfectly line up the cutting bit with the marks.
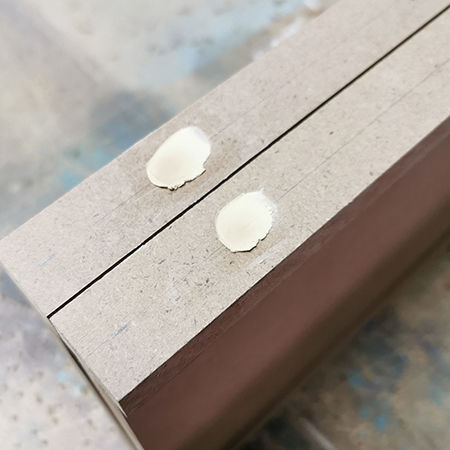
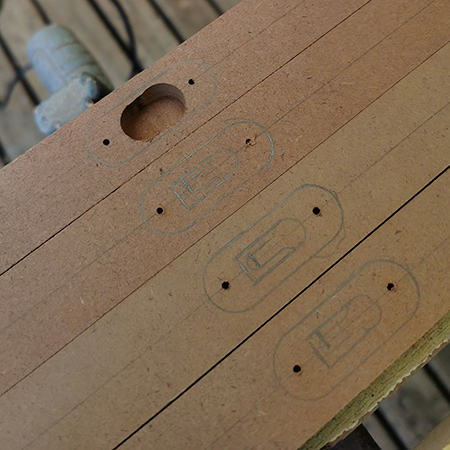
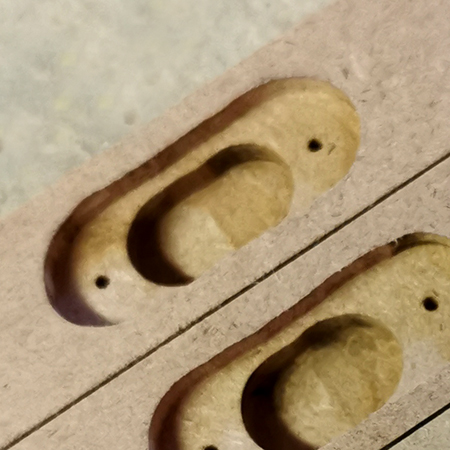
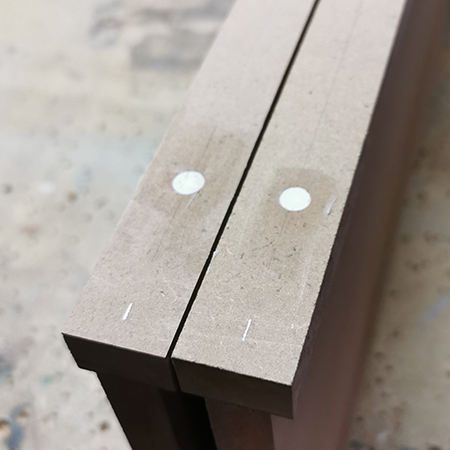
Deeper hole to allow the screw head to be inserted into the keyhole hanger.
All four rebates completed and now ready for mounting the keyhole hangers in position.

Close up of holes routed out for the keyhole hangers.
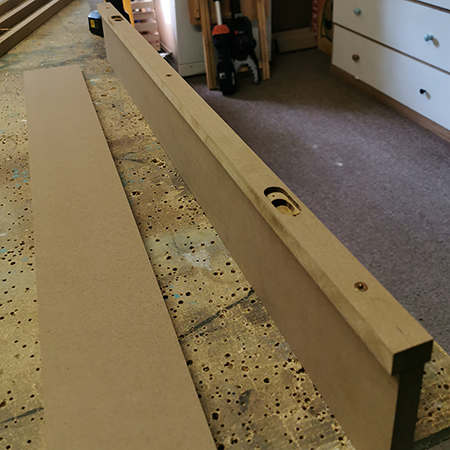
Shelf assembled with keyholes drilled out. Because we are using 16mm SupaWood for the shelf and this does not allow sufficient space for mounting a keyhole hanger, an edge has been added to the front and back to allow for fitting the keyhole hangers.
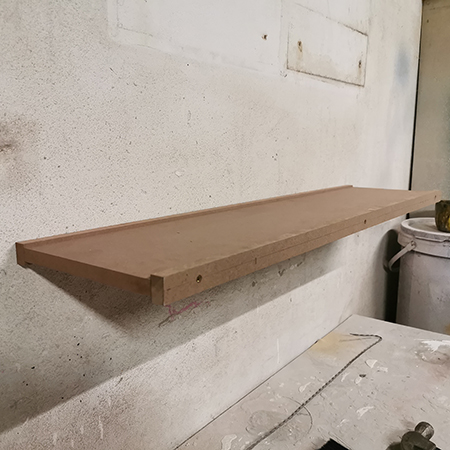
How Strong is the Floating Shelf?
Not all ready-made floating shelves are strong and some can hardly hold any weight before dropping down at the front. We wanted to make a floating shelf that was strong enough to hold a decent amount of weight with bowing or dropping at the front and you can see below that this shelf is very strong, so strong that we managed to support three full paint containers on the shelf.
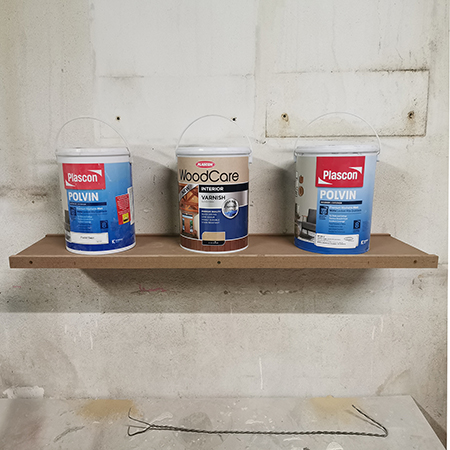
Our wall-mounted floating shelf is strong enough to hold 3 full paint cans.

See how the floating shelf sits flush against the wall by rebating a hole for the keyhole hanger.
FINISHING:
Since the sections that make up the floating shelf are screwed together, we needed to apply a thin layer of No More Nails adhesive to cover the screw head and then filled up with wood filler. Once the wood filler was dry, the shelf was sanded smooth and painted.