
How To Replace A Light Fitting
Still have some old light fittings in your home that need replacing? Here's a simple way to swap them out for new light fittings.
03/03/2021
None of the light fittings in my home are old but I do need to 'up' the brightness in certain rooms, so I'm replacing these light fittings.
The other day someone asked me where he could buy light bulbs, thinking he meant LED, CFL or Halogen, I told him he can buy at Builders or his closest hardware or electrical store. But what he meant was the old incandescent light bulbs that have now been replaced by energy-efficient lighting alternatives. He mentioned that most of the lighting in his home still uses these globes and I was a bit surprised by this. Why would anyone still be using now obsolete incandescent lighting when there are far more energy-efficient solutions on the market?
I suppose he's not the only one sitting with light fittings in their home that only accept the old globes, especially if they have a bayonet-type fitting. Not everyone can afford to go to the expense of having an electrician come out and install new light fittings. But doing it yourself is not expensive and there are some affordable energy-efficient lighting solutions to be found at your local Builders store, some for under R300. And when you think about the long-term savings for replacing old light fittings with new, energy-efficient ones, you do save money on your monthly electricity bill.
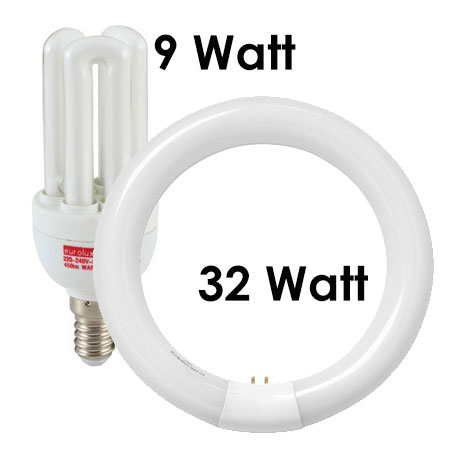
When light fittings used incandescent light bulbs, you pretty much knew what you were getting depending on the wattage of the globe you purchased. We knew that 40W wasn't very bright and that 60W was okay for most rooms. But today there are so many different types of light sources, light levels and colour options, it can be confusing to know what will work best in a particular room.
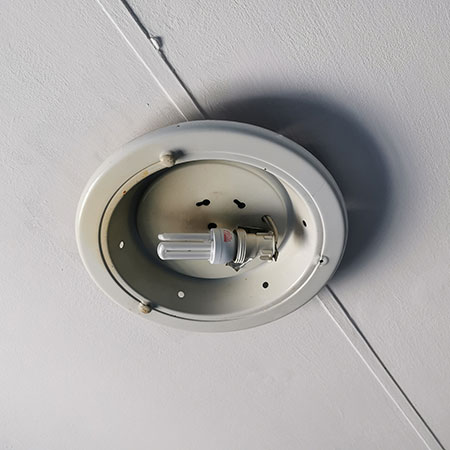
The light fitting in my dressing room, for example, was originally a warm white that didn't add enough brightness. Changing to a cool white globe also didn't have the right brightness. Now I'm replacing the old light fitting with a circular CFL to bring more brightness into the room.
HOW TO REPLACE LIGHT FITTINGS WITH ENERGY-EFFICIENT FITTINGS
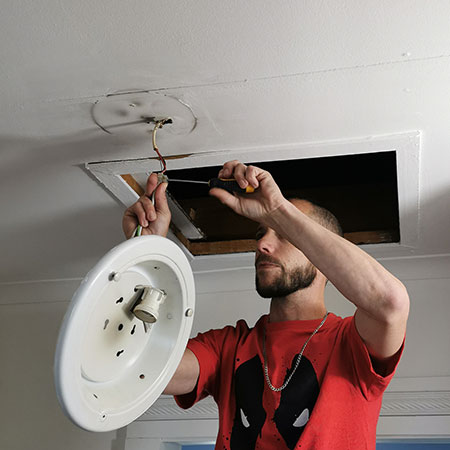
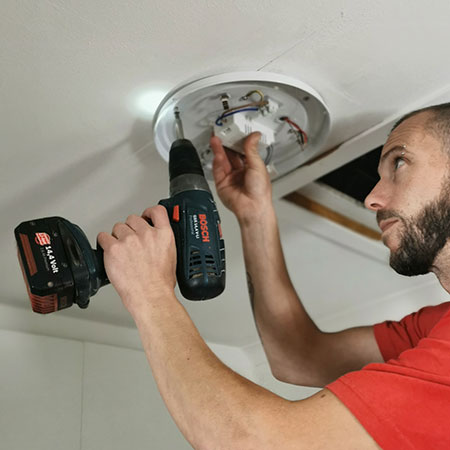
Before you even touch your screwdriver, SWITCH OFF THE POWER AT THE DISTRIBUTION BOARD. Do not even attempt to remove the light fitting until you know the power is off. Once you know you are safe to work, the rest is easy.
YOU WILL NEED:
Screwdriver
Drill/Driver plus assorted bits
Pencil
HERE'S HOW:
1. Carefully loosen the screws to remove the old light fitting. Also, use a screwdriver to loosen the screws on the connector that joins the light fitting to the main power wires. Note that the main electrical wires are red (live) and black (neutral). If the colour of the wires from the ceiling is any other colour, best refer to a licensed electrician.
2. Place the new light fitting against the ceiling and mark with a pencil if you need to drill additional holes for mounting the new light.
3. Drill a hole using a drill bit that is the same diameter as the wall plugs you are using to mount the light fitting. In this case, the wall plugs are 6mm and a 6mm hole was drilled. Insert the wall plugs into the drilled holes, thread the main wires (red and black) through the hole in the top of the light fitting, place the light fitting against the ceiling and line up with the drilled holes to insert and secure the screws to hold the light fitting in place.
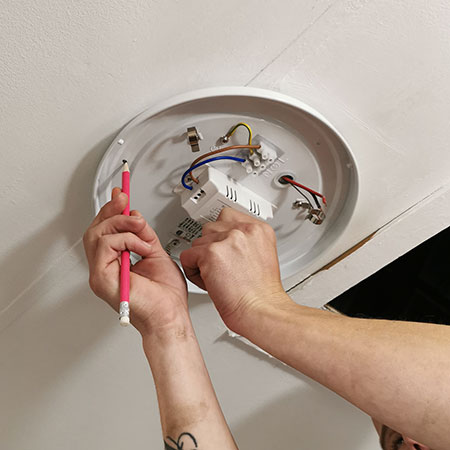
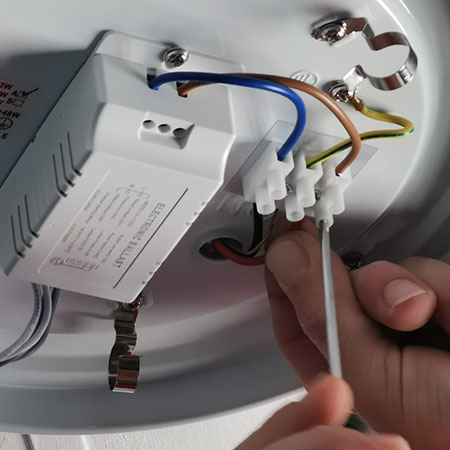
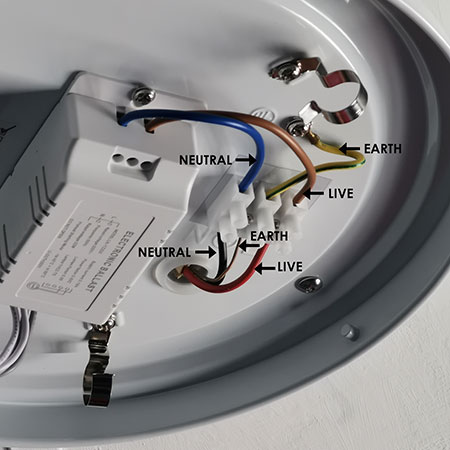
4. Now you can connect the red (live), black (neutral) and copper wire (earth) to the connector block, making sure to insert in the correct blocks. In this case, red and brown are LIVE and black and blue are NEUTRAL, with the copper wire being connected to the EARTH block (yellow and green wire).
HOW TO KNOW WHAT WIRE GOES WHERE?
Appliances are not always wired with red (live) and black (neutral wires). This light fitting has brown (live) and blue (neutral), with a yellow and green (earth) wire. If you are uncertain as to how your particular light fitting should be connected, rather have a licensed electrician fit the light fitting for you.
5. To finish installing the light fitting, connect and fit the CFL tube to the fitting.
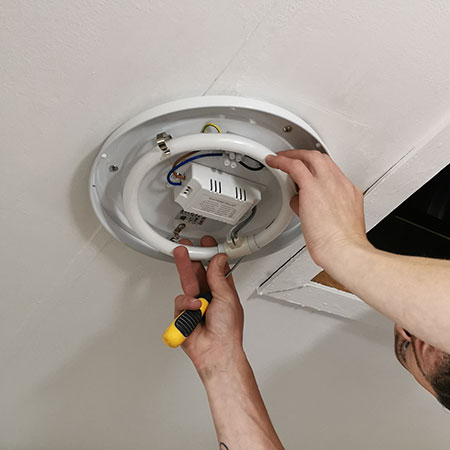
Replace the cover for the light fitting, switch on the power and test your new light fitting. Should there be any problems, consult with a licensed electrician.
