
Make a Ping Pong Table
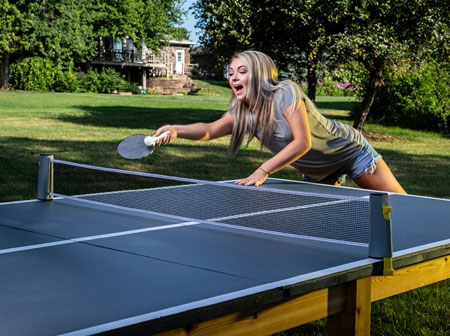
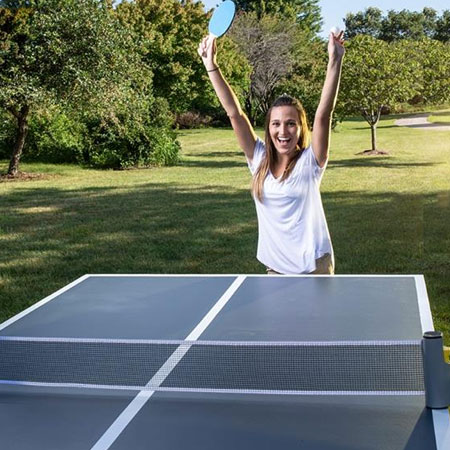
This DIY ping pong table is a great way to keep the kids occupied during the school holidays and over the festive season.
21/11/2018

https://www.buildsomething.com
This cool ping-pong table is made using PAR pine and Nutec ceiling board, and when treated properly, will provide many years of fun for the whole family. As an alternative you can make the table using Meranti.
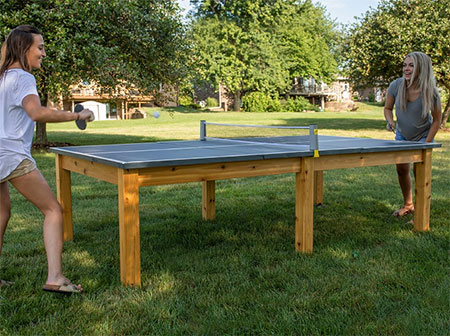
If you're looking for a way to keep the kids occupied during the holidays, this ping-pong table is sure to provide hours of entertainment. You will find all the accessories you need for the ping-pong table at Makro or Sportsmans Warehouse.
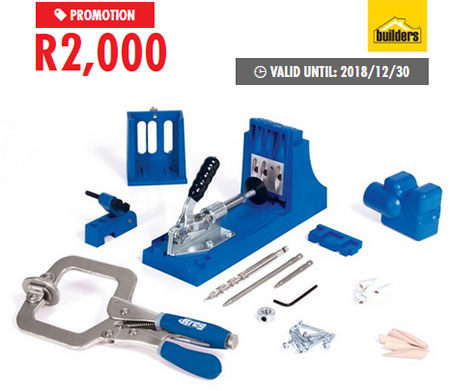
Make the ping-pong table using the Kreg Pocket Hole jig for invisible joints and easy of assembly.
YOU WILL NEED;
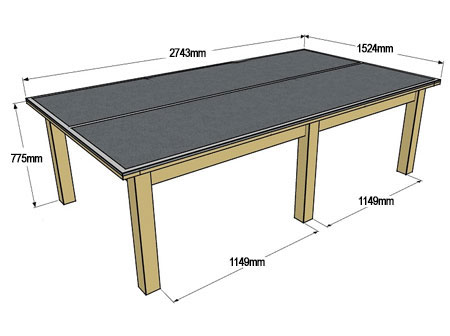
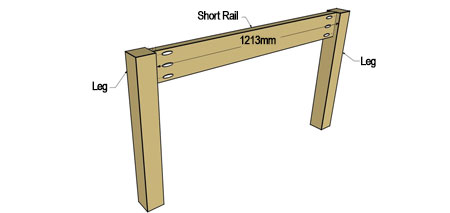
2 of 22 x 94 x 1213mm PAR pine - short rail
2 of 22 x 94 x 2388mm PAR pine - long rail
1 of 22 x 94 x 2438mm PAR pine - centre rail
2 of 32 x 94 x 613mm PAR - centre support
6 of 32 x 94 x 152mm PAR pine - corner brace
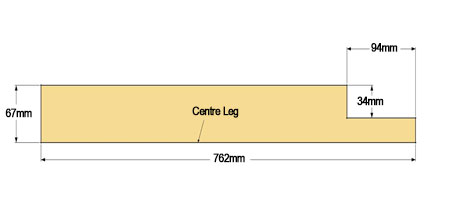
6 of 67 x 67 x 762mm PAR pine - legs
3 of 22 x 94 x 3000mm PAR pine - edging, cut to fit
Wood glue, waterproof
Construction or exterior adhesive
64mm coarse thread pocket hole screws [90]
2 of Nutec Ceiling Board 900 x 3600mm, cut to fit
Paint and sealer to finish
TOOLS:
Drill / Driver plus assorted bits
Orbital sander plus 120- and 180-grit sanding pads
Kreg pocket hole jig
Clamps
Tape measure and pencil
Buy all the tools, materials and supplies for this project at Builders Warehouse.
Not responsible for errors or omissions
HERE'S HOW:
1. On the Centre Rail, Long Rail and Short Rail drill [2] pocket holes at both ends. Sand the boards smooth after drilling.
2. Position the End Rail so it is centered on the width of each Leg and flush at the top and secure to the legs with wood glue and 32mm screws. Repeat to assemble the other end section
3. Place one Long Rail between the two end assemblies, making sure it is centred on the width of each Leg and flush at the top edge. Secure with wood glue and screws to one end assembly. Repeat for the other side.
4. Position the Centre Rail centered on the Short Rail and flush at the top. Secure it with wood glue and screws. Repeat to attach to the remaining end assembly.

5. Mark a notch on the centre legs (34mm deep and 94mm long) and set your mitre saw or circular saw blade cutting depth to 34mm. Make consecutive cuts close to one another, working your way toward the upper end of the Leg, to remove material. Click here to see how we cut this joint for our Farmhouse Table or click here for a video for cutting the rebate with a circular saw.
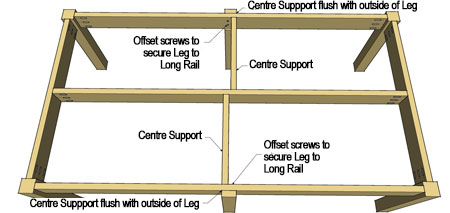
6. Mount the Centre Legs on the Long Rails. Apply wood glue the Leg notch and clamp in position. Check that the Leg is perpendicular to the Rail. Secure with [2] screws, as shown. Note that the screws should be offset to the left side of the Leg as you face it. That way, they won’t interfere with mounting the Centre Supports later on.
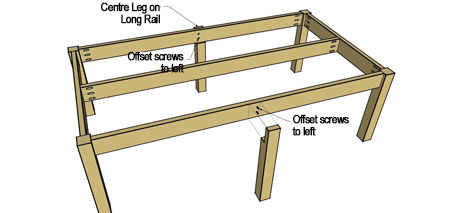
7. Drill [3] pocket holes at both ends of the Centre Support and sand. Use wood glue and 32mm screws to secure the Centre Support so it is offset to the right side, as shown below. Repeat for the other Centre Support.
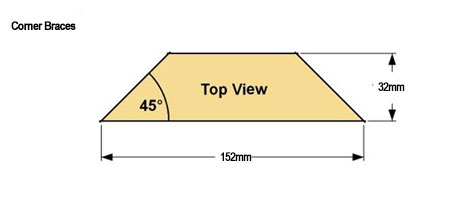
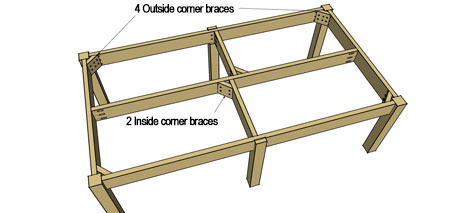
8. Cut the corner braces at a 45-degree angle on both sides. Drill pilot holes and then apply wood glue to the beveled ends before securing to the frame, as shown below.
9. Trim the Nutec Ceiling Board to fit (2 x 762 x 2743mm). Place the [2] ceiling boards onto the frame and adjust so they overhang the base equally. Handle the panels carefully until you have the edging in place, as too much flexing and the board may break.
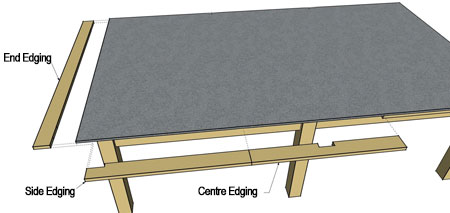
10. To strengthen the top panels, you will need to add edging around the table. Use 22 x 94mm boards, trimmed to fit. The edging gets attached to the underside of the ceiling boards with construction adhesive. Start by cutting [2] End Edges, [4] Side Edges and [2] Centre Edges. Start the installation at the ends and apply a bead of adhesive to one face of each piece of End Edging. Clamp in place so it sits flush with the end of the table top / top edges.
Before attaching the first Side Edging mark the location where you need to cut a notch for the Corner Leg and cut out with a jigsaw. Reposition to check the fit and then secure with adhesive and clamp. Repeat for the remaining Side edging. Attach the Centre Edging in the same way, cutting a notch for the Centre Leg.
Finishing
Allow the adhesive to set before painting the table top and applying an exterior finish to the base. Clean any dust off the panels and wipe them down with a damp rag. Use concrete or paving paint to paint the boards and once the paint dries, mask off the edge and a line down the centre and paint the lines white. Apply an exterior sealer to the base.
GOOD TO KNOW: Before removing the ceiling boards, mark the position with a permanent marker so it will be easy to reposition them on the base.