Make a farmhouse table - any size
In this project we show you how to make a farmhouse table - for indoors or outdoors - that can be modified to seat as many people as required.
04/09/2018
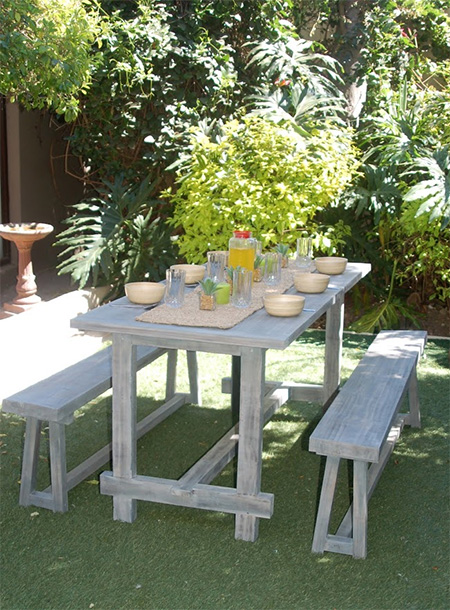
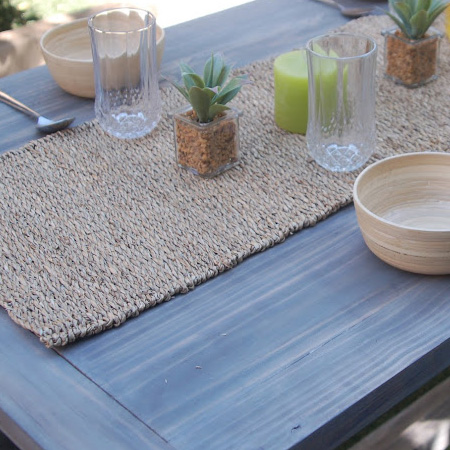
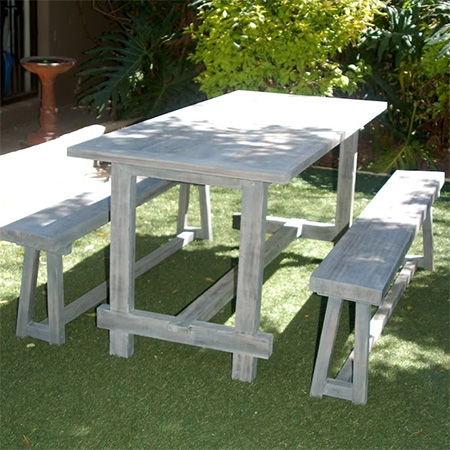
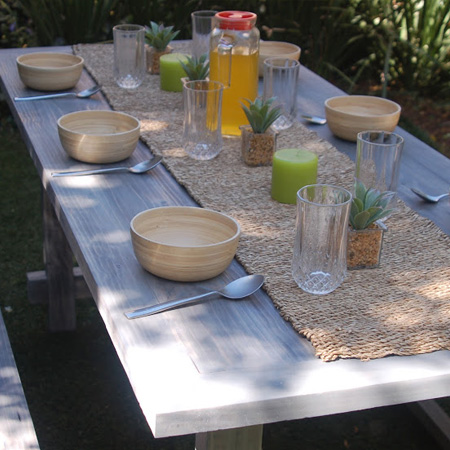
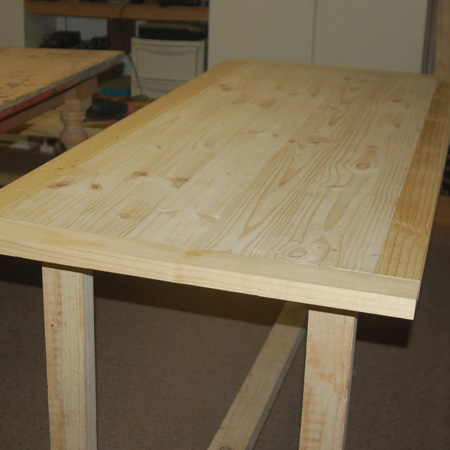
This farmhouse table is suitable for indoors or outdoors and is finished with Rust-Oleum Ultimate Wood Stain. We saved a bundle on making the frame and benches for the table using untreated pine, as this works out far cheaper than buying treated pine. The cost to make the table and benches comes in at under R1000 for the lot. The wood has a rough finish, but once you've done the wood burning, sanding and sealing, the table has a smooth finish.
For the table top, we used a piece of laminated pine for the centre and edged this with 32mm PAR pine, which gives the table a chunkier look than using 19mm thick pine.
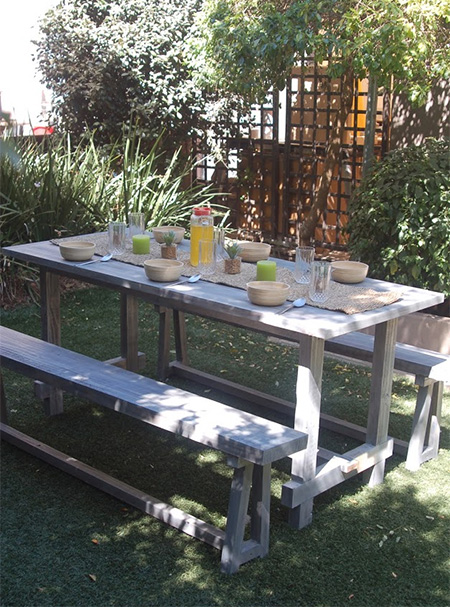
Our farmhouse table is designed to comfortably seat six, but you can quite easily lengthen the table top to seat eight or more. The sturdy frame will support a table up to 3 metres in length to accommodate a large family gathering or for when entertaining a group of friends.
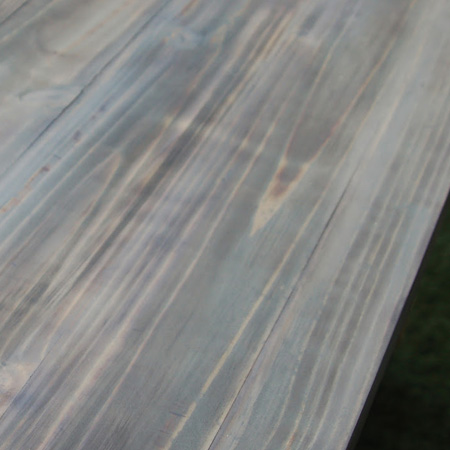
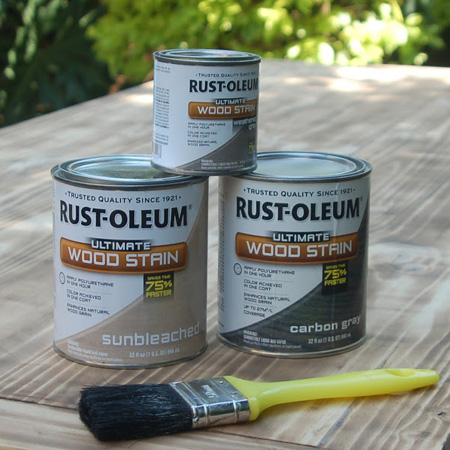
The finish on the farmhouse table and benches was achieved using Rust-Oleum's Ultimate Wood Stain in Sun Bleached and Carbon Grey. We used two colours for this project as the Sun Bleached was a bit too light and the Carbon Grey toned down the lightness and added silvery streaks that replicate the look of naturally aged timber.
YOU WILL NEED:
1 of 19 x 614 x 1600mm laminated pine - table top
2 of 32 x 67 x 1734mm PAR pine - sides of table top
2 of 32 x 67 x 748mm PAR pine - ends of table top
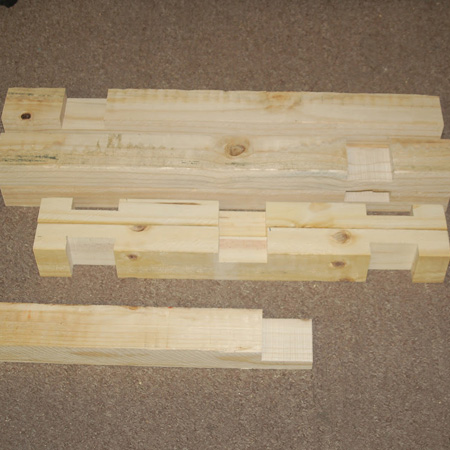
2 of 50 x 76 x 1380mm untreated pine - frame top sides
2 of 50 x 76 x 394mm untreated pine - frame top ends
2 of 50 x 76 x 644mm untreated pine - frame base crosspieces
1 of 50 x 76 x 1532mm untreated pine - centre crosspiece
4 of 50 x 76mm untreated pine - legs
Benches:
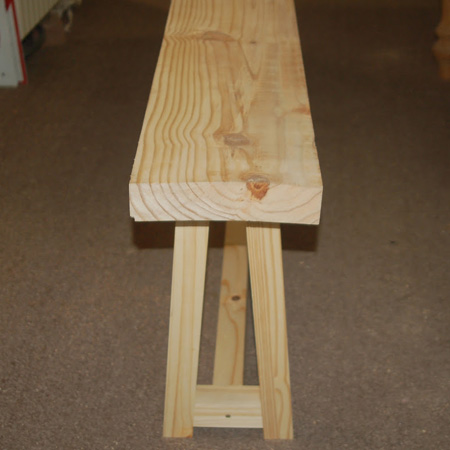
2 of 50 x 228 x 1734mm untreated pine - bench seats
4 of 44 x 44 x 210mm PAR pine - top supports
4 of 44 x 44 x 100mm PAR pine - bottom supports
8 of 44 x 44 x 370mm PAR pine - legs
2 of 44 x 44 x 1446mm PAR pine - centre crosspiece
Wood glue
6 x 100mm screws - for the table
4 x 60mm screws - for the benches
Rust-Oleum Ultimate Wood Stain, or choice of finish
Paintbrushes and rags
TOOLS:
Mitre saw - or hammer and sharp wood chisel
Drill / Driver plus assorted bits
Orbital sander plus 120-grit sanding pads
Tape measure and pencil
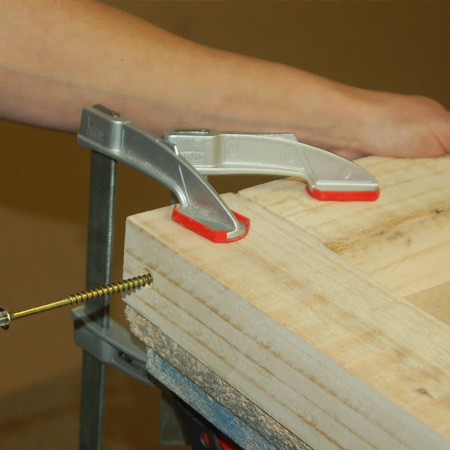
Quick clamps [2]
Kreg Pocket hole jig and 32mm coarse-thread screws
HERE'S HOW:
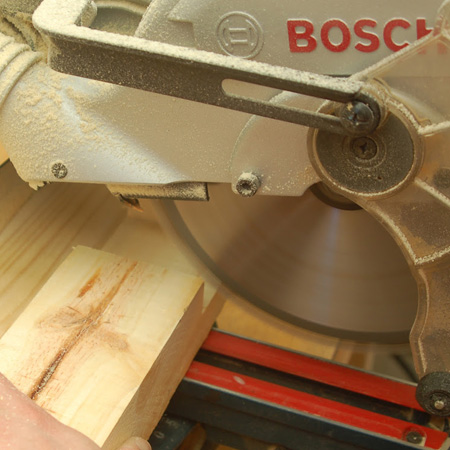
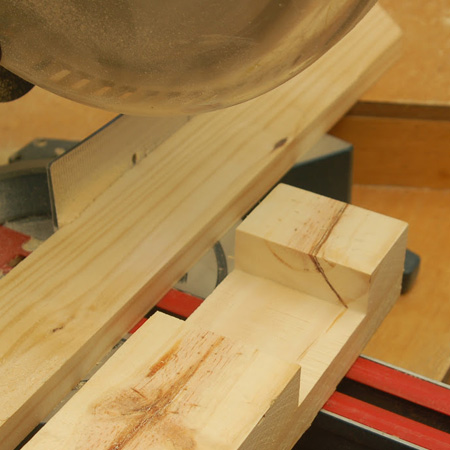
1. The joints for the table base are half-lap joints. To make these we used a mitre saw set to only cut to a depth of half the thickness of the planks - 25mm on the 50mm thick pieces. If you don't have a mitre saw you can use a hammer and wood chisel, or even a jigsaw. Cut the legs, crosspieces and centre crosspiece as follows:
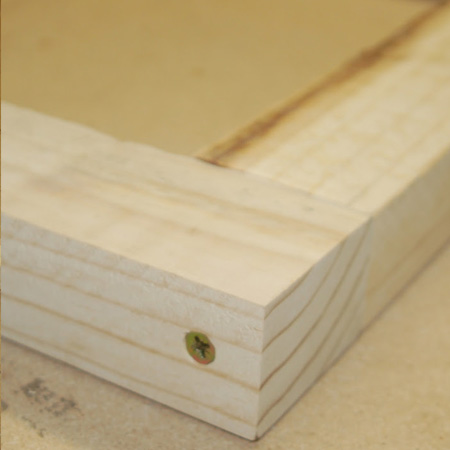
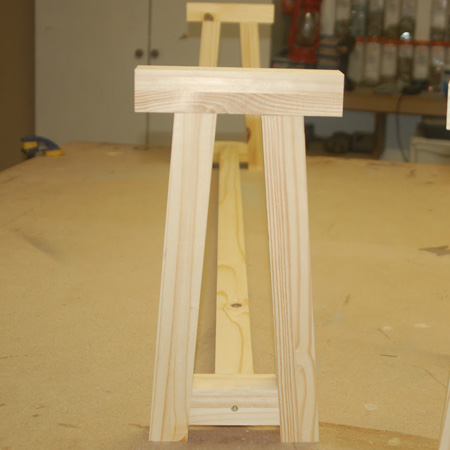
2. Assemble the Leg frames by placing a Frame Top End between 2 legs and joining with wood glue and 6 x 100mm screws. Position the Base Frame Crosspiece and glue together. Clamp the glued assembly for an hour.
GOOD TO KNOW: All screw holes are pre-drilled and countersunk
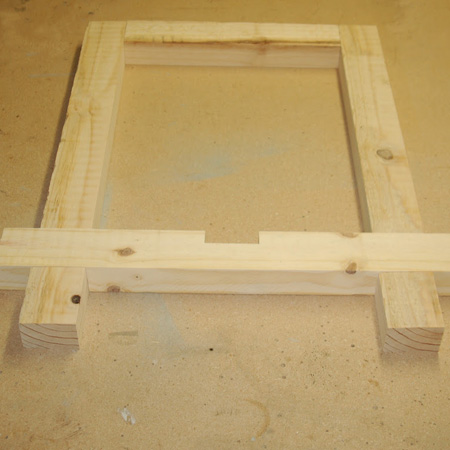
TOP TIP: To prevent any movement while joining sections, clamp the sections firmly to your workbench.
3. Now you can add the [2] Frame Top Sides to the leg assembly, again using wood glue and 100mm screws. Check the placement of the screw to avoid the screw already used to join the leg to the Frame Top End.
GOOD TO KNOW: The Frame Top Sides are inset from the edge to sit in the centre of the legs.
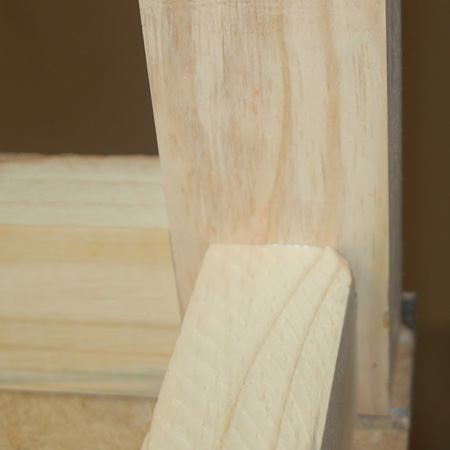
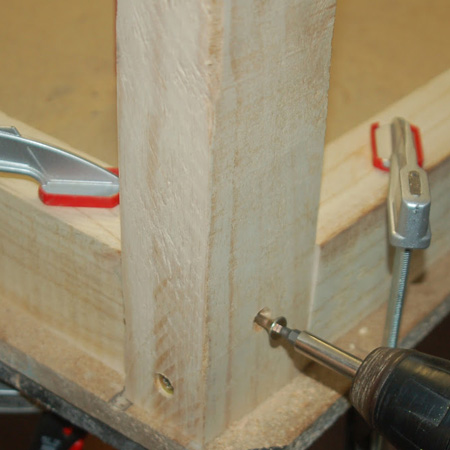
4. To make the supports for the benches, join the Top and Bottom Supports to the Leg using wood glue and 50mm screws. Note that we were originally going to join these together using a pocket hole jig, but the space was too small.
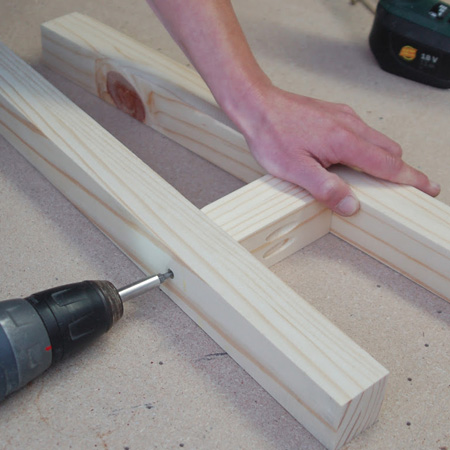
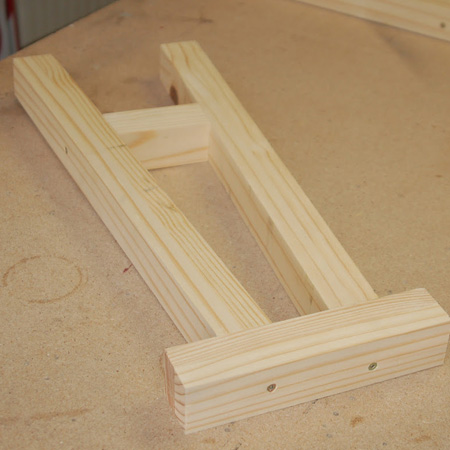
5. To complete the base for the benches, insert the Centre Crosspiece to join the two Leg Assemblies. Use wood glue and 50mm screws.
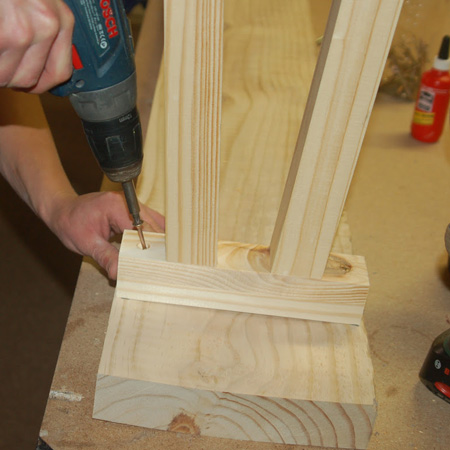
6. Secure the complete base frame to the underside of your Bench Seat using wood glue and 50mm screws. Note that the screws are driven in at a slight angle.
GOOD TO KNOW: You may find that untreated pine is warped or twisted slightly. This was the case with our benches and we had to clamp everything firmly to fasten the frame to the seat. Additionally, some trimming of the legs was required to prevent the benches from wobbling.
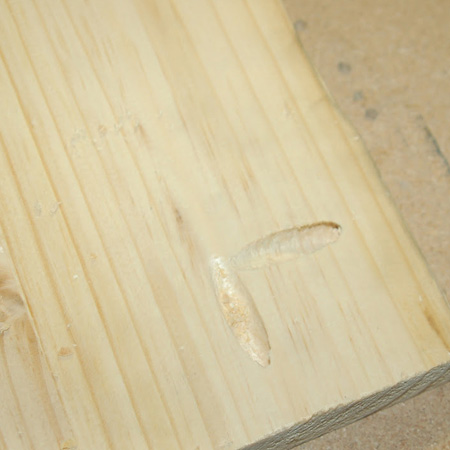
7. Moving on to the table top, pocket holes were drilled in the ends of the Table Top Sides. This will allow the sides to be joined to the Table Top Ends without any visible screws.
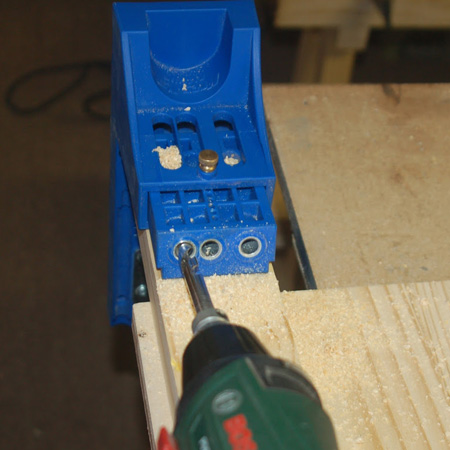
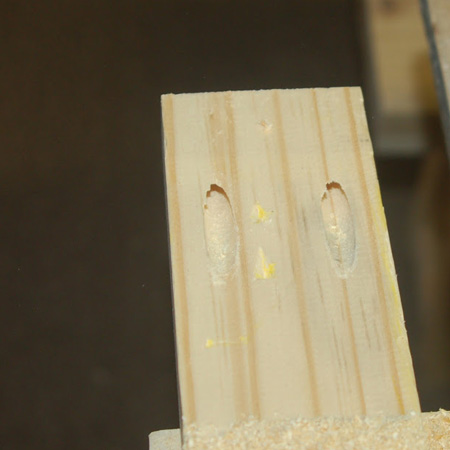
8. Pocket holes were also drilled along the sides and ends of the laminated pine for the centre of table. These will be used to attach the Table Top Sides and Table Top Ends.
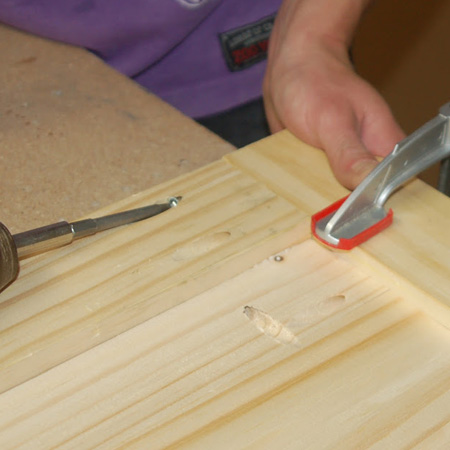
9. Use wood glue and 32mm pocket hole screws to secure the Table Top Sides to the laminated pine centre piece.
GOOD TO KNOW: Ensure that the centre piece is flat against your work top so that the centre piece and sides are flush on the face.

10. Attach the Table Top Ends with 32mm screws through the Side and Centre pieces.
Optional Wood Burning
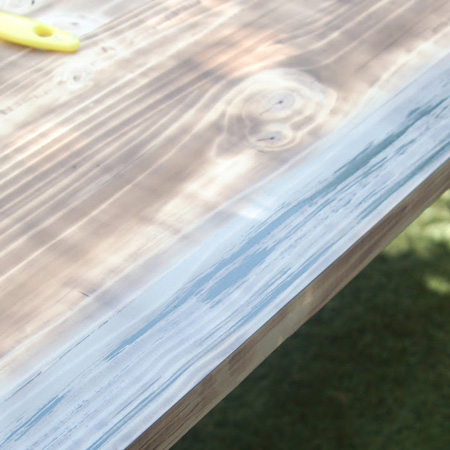
Having done a sample test beforehand, it was decided to scorch the table and benches with a heat gun to bring out the grain. During the test it was discovered that, because we are using pine, the Sun Bleached wood stain didn't really bring out the best of the wood. Scorching the wood before staining allows the wood grain to be more visible.
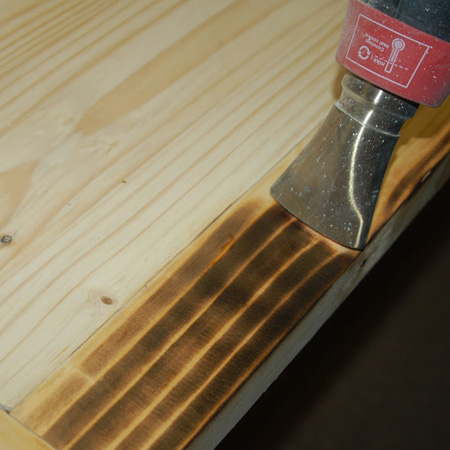
The entire table top, frame and benches were scorched with the heat gun.
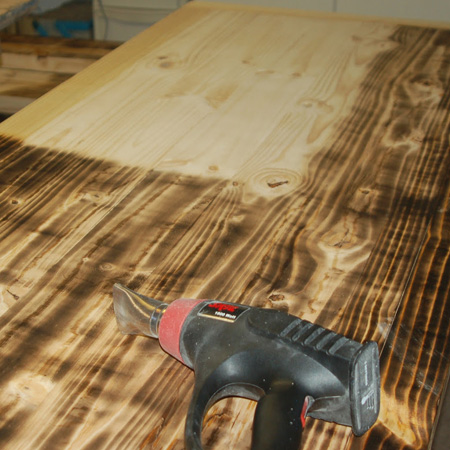
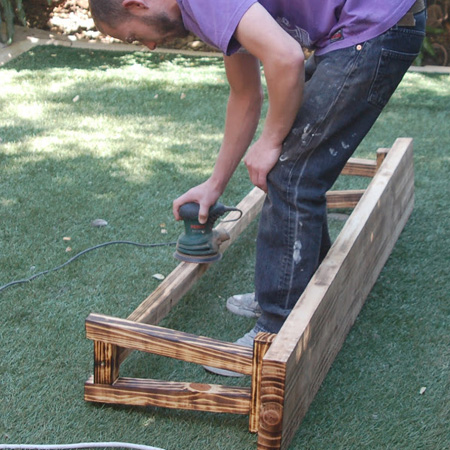
After scorching, all the pieces were sanded with 120-grit sanding pads to remove the scorched wood.

11. As mentioned previously, we tested out various products for the farmhouse table. To achieve the desired effect shown here, we used Rust-Oleum Ultimate Wood Stain in Sun Bleached and Carbon Grey. You will need a large can of the Sun Bleached and a small can of Carbon Grey.
12. Working in strips and going with the grey, Sun Bleached was applied to each plank and then rubbed down.
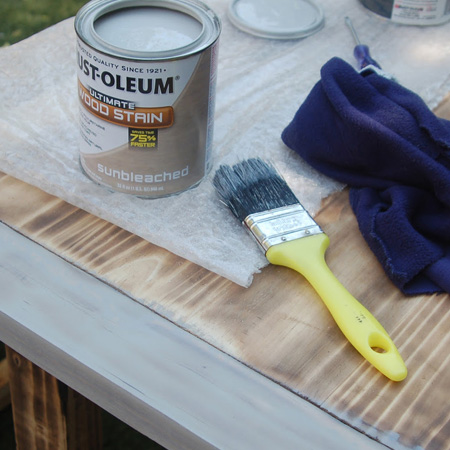
13. We then applied the Carbon Grey with a few streaks along each strip and then rubbing with the grain to blend this in. At this point you can apply less streaks for a lighter finish, or more streaks if you prefer a darker effect.