
Make Easy Box Shelves for Storage in any Room
Box shelves are easy to make and you can arrange them in a variety of configurations to provide essential storage for any room in a home.
26/06/2020
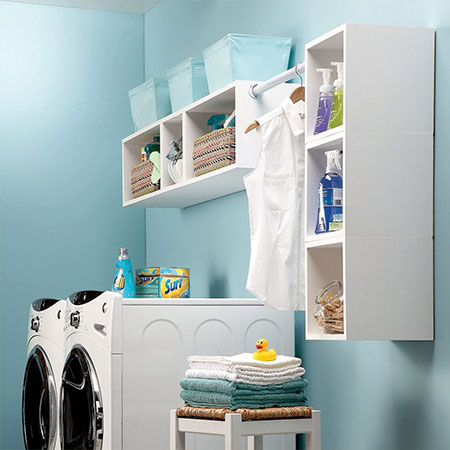
Make these box shelves using 16mm SupaWood to provide storage in a bathroom or laundry.
As any DIY enthusiast or woodworker will agree, once you know how to make a box, you can so many other different things. If you think about it, how many things you can make revolve around a basic box shape. Think ottomans, toy boxes, chests, cupboards, cabinets and oh so much more.
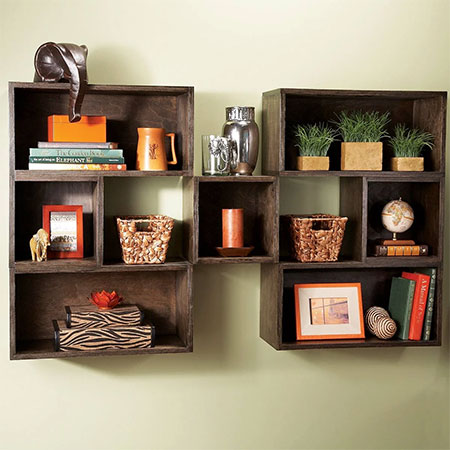
These box shelves are ideal for making and arranging in assorted configurations and mounting onto a wall to provide storage. You can make them using pine plywood or veneered plywood or pine and then stain and varnish them, or you can make them using SupaWood and then paint them.
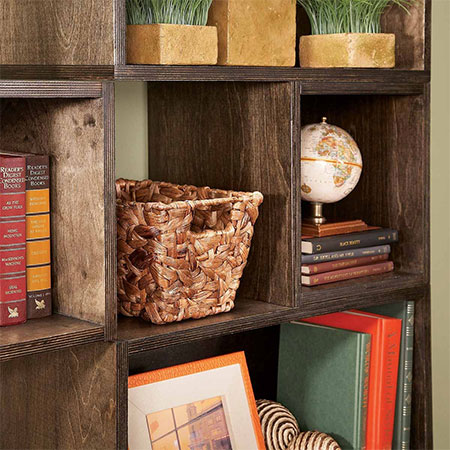
Modify the dimensions of these boxes if you prefer to make smaller or larger boxes for attractive wall mounted display shelves.
YOU WILL NEED:
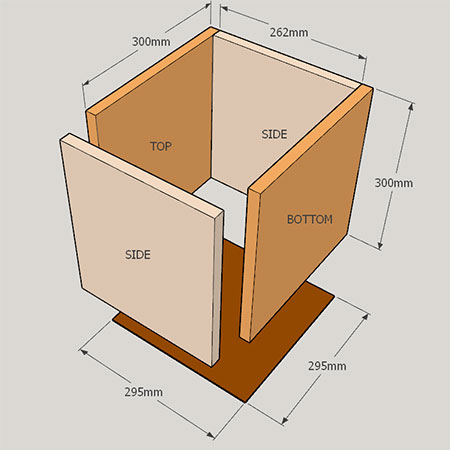
2 of 19 x 300 x 300mm plywood - top and bottom
2 of 19 x 300 x 262mm plywood - sides
1 of 3 x 295 x 295mm plywood - base
Wood glue
Stain and sealer or varnish, or paint
Screw cap covers or adhesive screw covers
TOOLS:
Drill / Driver plus assorted bits
Pneumatic nail gun or hammer and panel pins
Multi- or orbital sander plus assorted sanding pads
Carpenter's square
Clamps
Tape measure and pencil

HERE'S HOW:
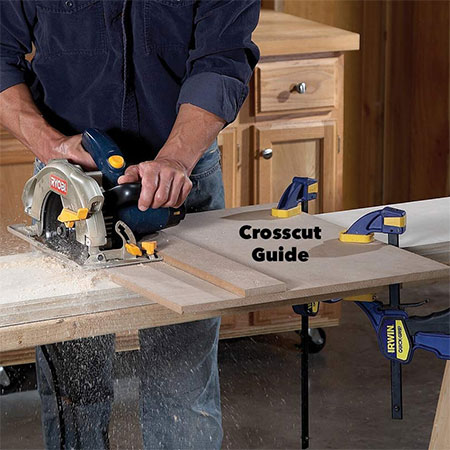
1. Have all the pieces cut to size at your local Builders or hardware store. This means you cut out the cutting time and have more time to assemble more boxes! Decide how many boxes you want to make and their size and then take your cutting list with you to have all the pieces cut. Alternatively, you can use a circular saw or jigsaw to rip and cut the boards down.
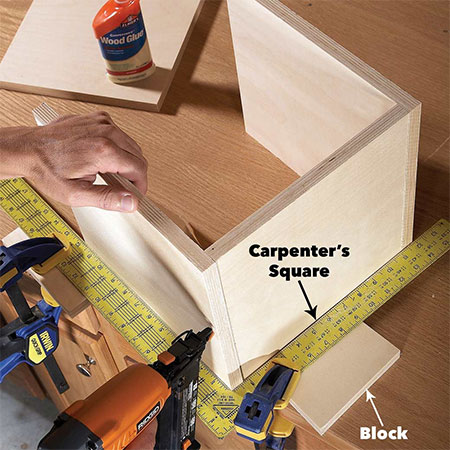
2. Stack all your pieces according to size so that you don't get confused when assembling the boxes. Apply wood glue to the top and bottom edges of the sides and secure these to the top and bottom pieces. A carpenter's square comes in handy for making sure that your corners are lined up and perfectly square.
3. As you glue each side section, secure with your pneumatic nailer. If you don't have a pneumatic nail gun, glue both side sections, wrap with tape and leave overnight. The next day you can use a hammer and panel pins to reinforce the joints.
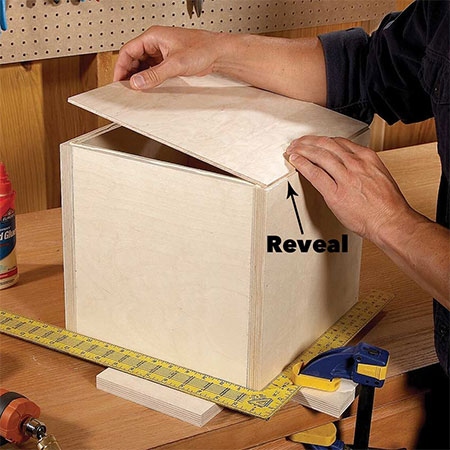
4. To finish off the boxes, now you can attach the backing board. There is a 5mm reveal all the way around, so make sure to align properly before securing with your nail gun, pneumatic stapler or heavy-duty staple gun.
5. Sand the boxes nice and smooth and wipe away any dust before applying your choice of finish.
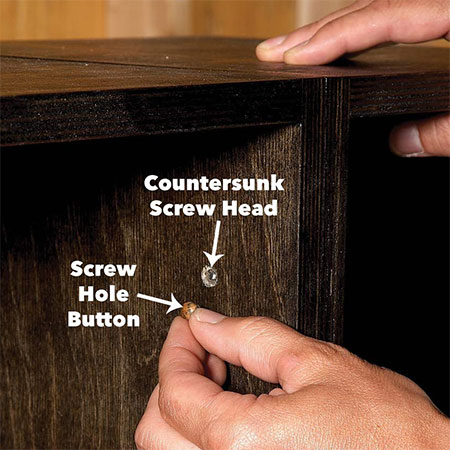
6. Where you need to join boxes together, use 30mm screws to do this and pre-drill countersunk pilot holes that can be disguised with screw cap covers or adhesive covers. Make sure to buy screw cap or adhesive covers in a colour that matches the finish on your boxes.
GOOD TO KNOW: When joining or hanging the boxes, the sides must be at the top to keep the integrity of the joints. You can secure to the wall by attaching keyhole brackets on the back of the boxes with corresponding nylon wall plugs and screws on the wall.
family handyman