
How to Make a TV Unit or Media Cabinet
Making furniture you have seen in a store is one way to have a piece of furniture you love and not have to pay a lot of money for it.
07/10/2022
Furniture is becoming extremely pricey and, in some cases, overpriced for what you get. You know me, I have always been one of those that sees something I like and simply make it for myself. Making your own furniture can save you a fortune and there is also the fact that you can design something that is of a custom size if you need to fit it into a specific space. There is nothing I like better than popping onto Builders.co.za to see what is on special offer for any immediate or planned projects or improvements. I also find it handy to visit the Builders website when looking for specific items to check what is in stock. Saves me time having to schlepp there in my car!
Why Buy When you can Make
This TV unit or TV stand is one that I had seen online and liked very much. The retail price was R14 999, and it was advertised as being 'reclaimed pine'. Now, if you are a regular visitor, you already know my feelings on furniture made with reclaimed pine and how you can easily make any piece of pine look like reclaimed pine and I really don't understand why we should have to pay more for furniture made with reclaimed pine when it is probably cheaper than buying pine new.
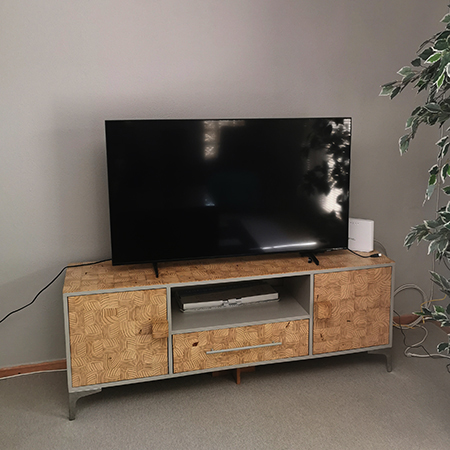
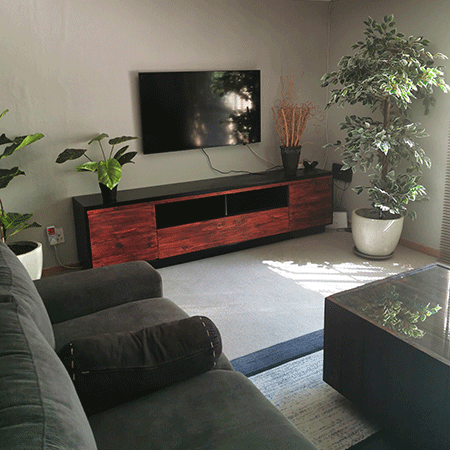
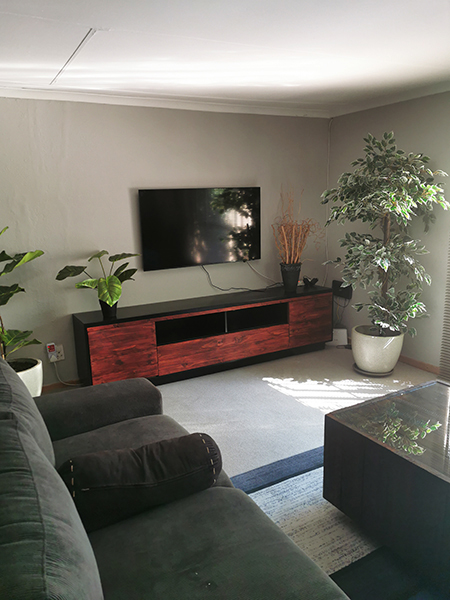
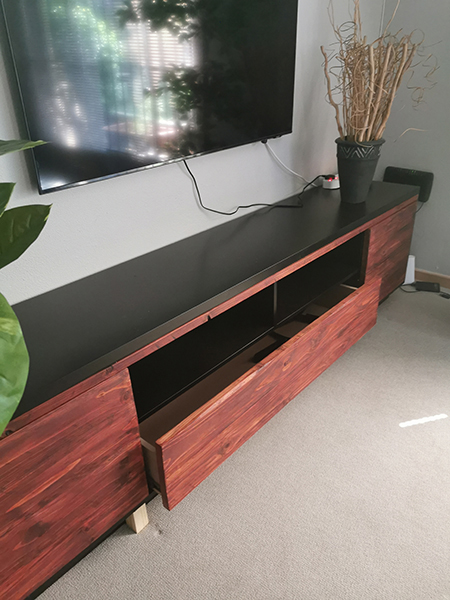
The TV unit or TV stand that is currently in the room is one that I made for our upstairs TV room and you will find the DIY instructions to make it here. It fits nicely in this space and matches the light decor of this room but most definitely does not belong in the new downstairs lounge, which is darker and moodier - and I will explain the reason for this just now.
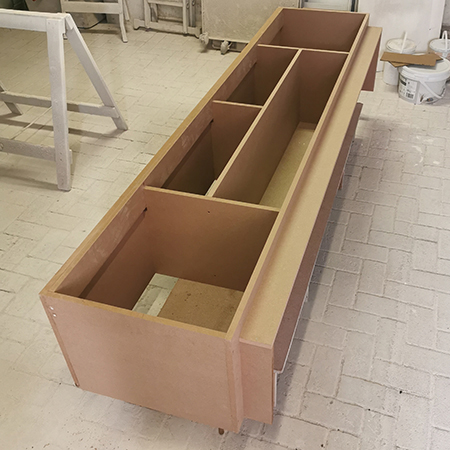
I wanted a TV unit that wasn't overly fussy and incorporated natural woods for a minimalist piece that could be designed specifically to fit into the large space. It needed to be extra-long and ended up being just short of 3 metres in length. When you look at the before and after TV stand, you will see the difference this longer piece makes when the large flat-screen TV is mounted above.
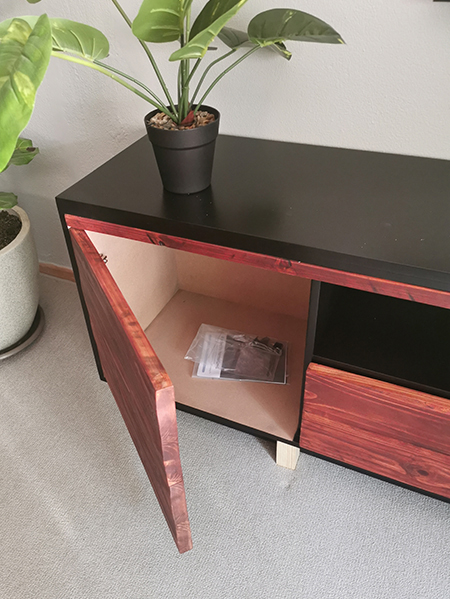
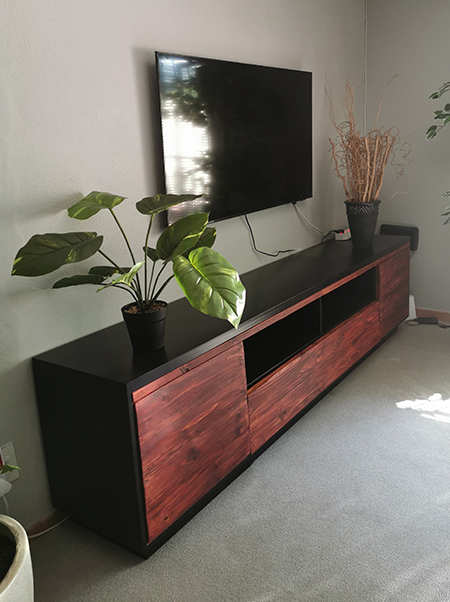
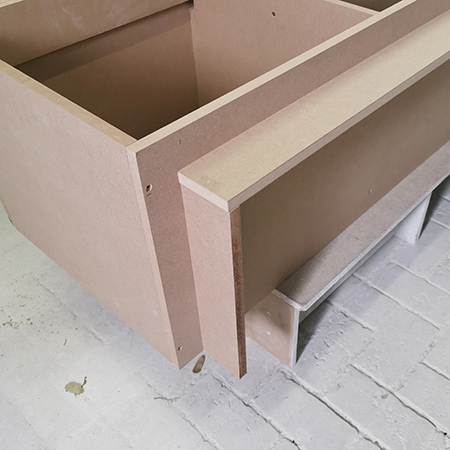
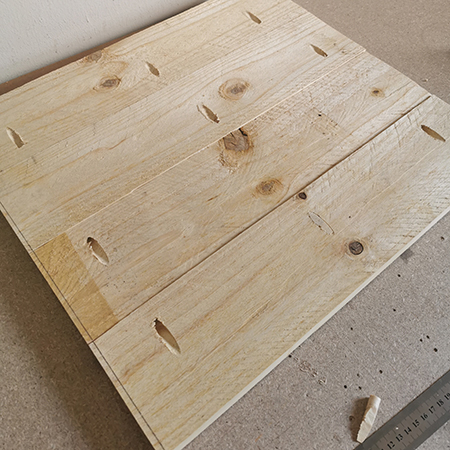
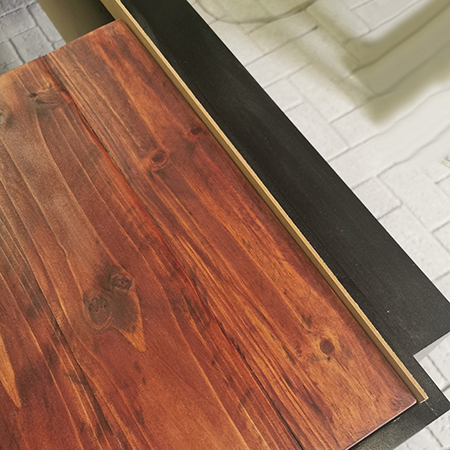
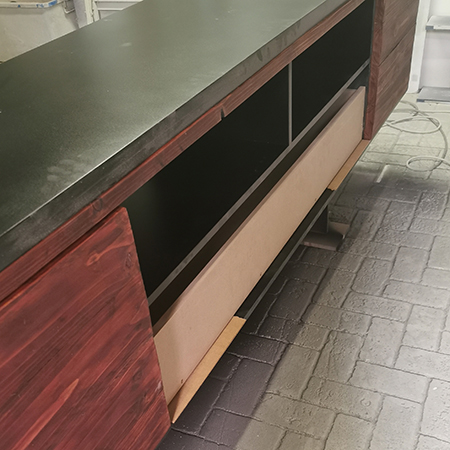
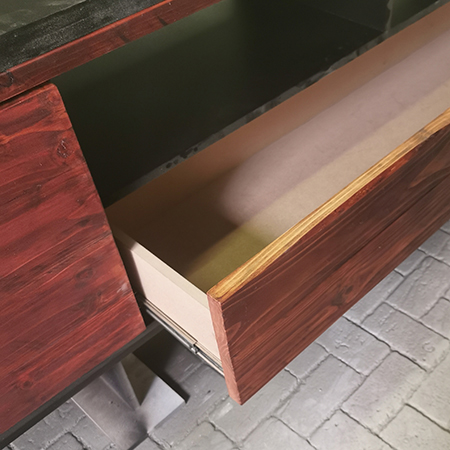
It isn't made using 'reclaimed pine' but is made using raw and not planed pine. This means that plenty of sawmill marks, dings and dents are very visible and which I want. I want the wood to look raw, earthy, and natural. The good news is that raw pine is much cheaper than PAR pine since it hasn't had to go through the whole planing process to get it smooth. Although it is hard to see in the picture below, the top of the drawer front actually has a live edge, which means that some of the underneath bark still remains and was not sanded away which adds to the rawness.
So, moving on, I'm not going to give actual dimensions to make the unit but will be offering helpful tips, advice, and things you should do when making any piece of furniture for a home.
Helpful Tips, Advice on Making Furniture
TIP #1
The best and strongest material to use for constructing any piece of furniture is 16mm SupaWood, unless you want to make the entire piece out of wood, particularly if you plan on painting certain areas. SupaWood (MDF) has a smooth finish that takes paint nicely and provides a smooth finish. However, if you buy it from anywhere other than Builders, you need to specify that you want PG Bison SupaWood and not MDF. There are cheaper versions out there that are sold at the same price but are not manufactured under strict guidelines and that means you will be exposed to toxic VOCs when working with it. Keep that in mind.
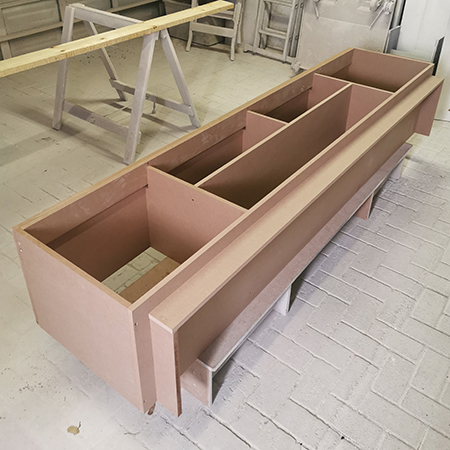
You can use 16mm SupaWood for the frame or carcass and definitely for those pieces that are to be painted. In my case, the entire frame and outer areas were made using SupaWood.
TIP #2
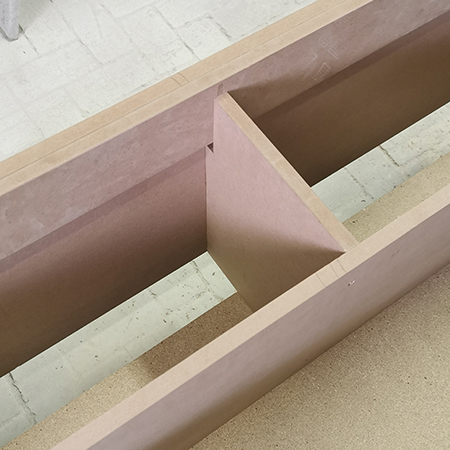
Planning and drawing out the design are important. When you draw up a sketch in SketchUp 2017 or similar, it allows you to confirm the exact measurements of each piece so that you can have everything cut to size at your local Builders store. It also provides you with an opportunity to go over the design to pick up any faults there may be. Something to bear in mind when designing furniture using SupaWood, board product, and even pine, is that lengths longer than 1 metre need to be supported to prevent them from bowing. If you look at the image above, you will see that the centre opening has been divided by a centre support and this support splits the total length into two sections to prevent any distortion.
A drawing or sketch is essential to working out the measurements of each piece that needs to be cut and assembled perfectly. Use a drawing program or graph paper to work out accurate dimensions.
TIP #3
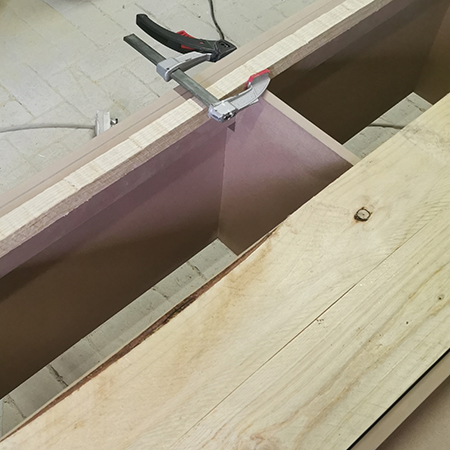
When used correctly, wood glue creates the strongest bond ever between two pieces of wood. Wood glue should be applied to one face of the mating pieces and cover the entire face. Joined pieces must be clamped to ensure a strong bond between the two pieces.
Use a damp cloth to immediately wipe away any excess glue that oozes out of the join.
TIP #4
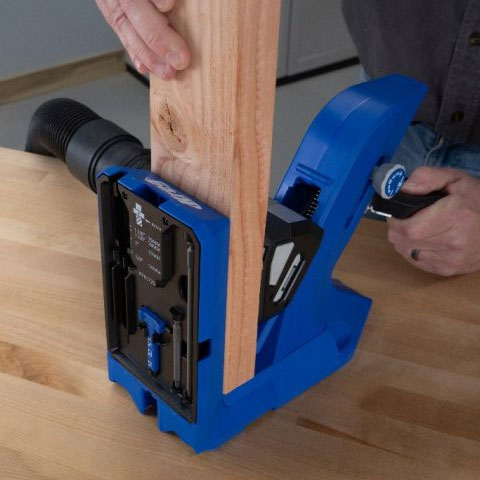
If you don't already have one, investing in a Kreg Pocket Hole jig is a wise choice. This amazing tool can be used to join timber and board is almost any configuration - without any visible screws. Most laminated woods purchased tend to fail along the joined seams but by using a Kreg Pocket Hole Jig you are guaranteed joints that will last forever.
The Kreg 520 PRO was used to assemble the doors for the TV Stand.
TIP #5
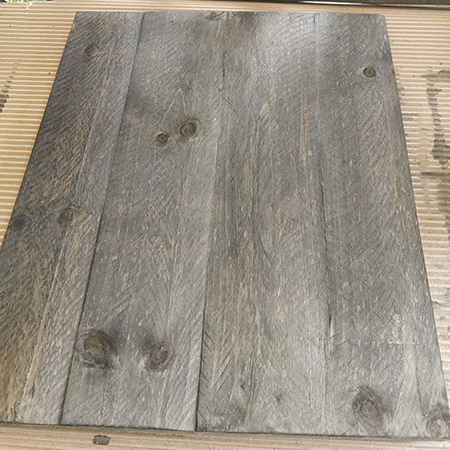
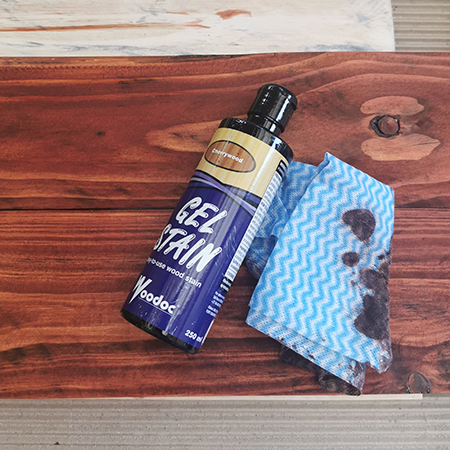
Choosing a colour for the wood stain can be daunting. Do you want a dark stain or light one? Do you want the wood to look natural or distressed? Think about your options before you start. Keep in mind that wood stain reacts differently on soft and hardwoods and the wood stain colour you think you have selected might not look the same once it is applied.
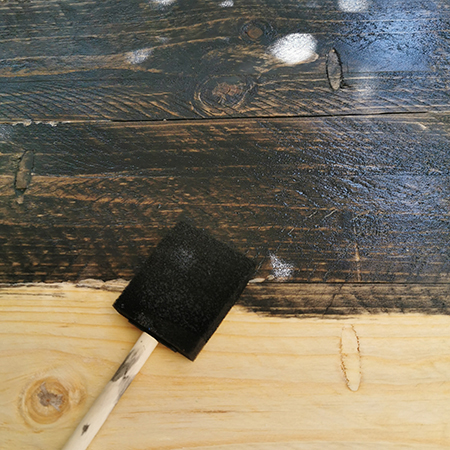
Paint combined with wood stain can bring about surprising effects. I wanted the wood to look aged but also wanted a warm wood stain. The only way to achieve the look that I wanted was to use watered down black paint on the wood before applying the wood stain. Below is one of the doors after brushing on the weak black paint. Love this effect!
TIP #6
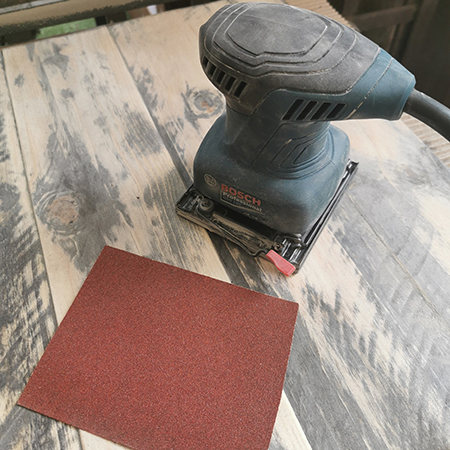
Do yourself a favour and invest in a flatbed sander. These models take normal sandpaper sheets that can be cut to size to fit the sander bed and you will save a fortune on sandpaper. Always start with a lower grit (40, 60) and then move up to medium grit (80, 120) and finish with a fine grit (180, 220). This saves you time when sanding any surface.
TIP #7
Don't be afraid to experiment. Use some leftover wood to try out the wood stain. Sometimes two coats of stain give more depth of colour than a single coat.

TIP #8
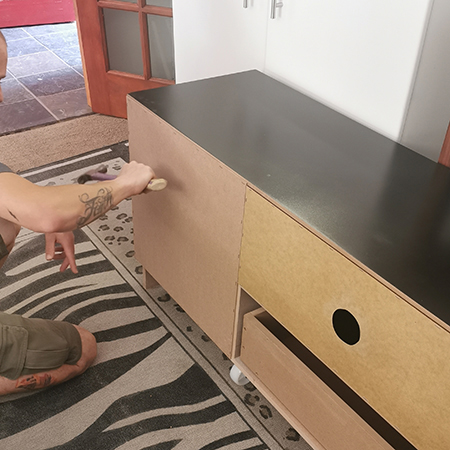
Make sure that you have everything you need on hand to start and finish the project. Also, see how jigs or makeshift pieces can make the job easier. For example, mounting the doors can be tricky, particularly when a piece is on its side or back, but offcuts and scraps can be used to make your life easier. To fit the doors onto the frame a 3mm offcut was used as a spacer.
TIP #9
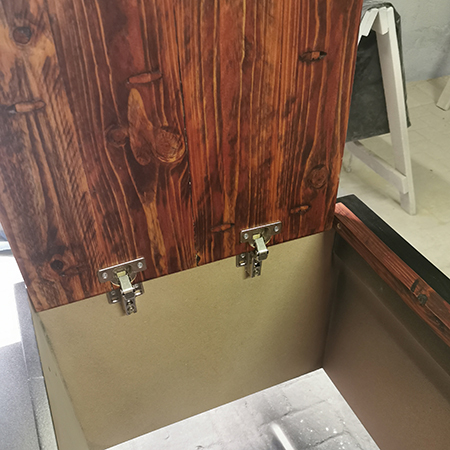
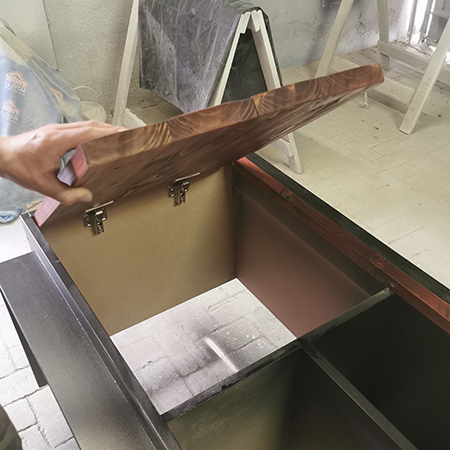
Do your homework on the steps you need to take so that you fully understand what to do. Installing concealed hinges is not as difficult as it looks. Installing soft-close hinges is exactly the same method as traditional concealed hinges, so you don't have to miss out on special features for your projects.
TIP #10
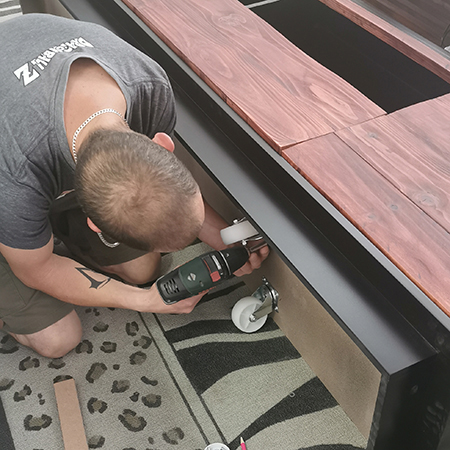
One item that is often overlooked when making a big piece of furniture is portability - getting it from one place to another or, as in this case, being able to move the unit once it is in place. The finished TV unit is going to be heavy and that will make it hard to move. The only way to overcome this is to fit wheels to the base. Not wanting to see the wheels, an apron was designed to cover the bottom and hide the wheels out of sight. A small detail but one that makes a big difference.
Another item that sometimes gets forgotten is that of adding a backing board that has pre-drilled holes for cables and wires.
Don't just rush into a project. If you plan properly and think carefully about all the details, you will have easy assembly, perfect finishing and a piece that will look as though it was bought and not made - exactly what you want.