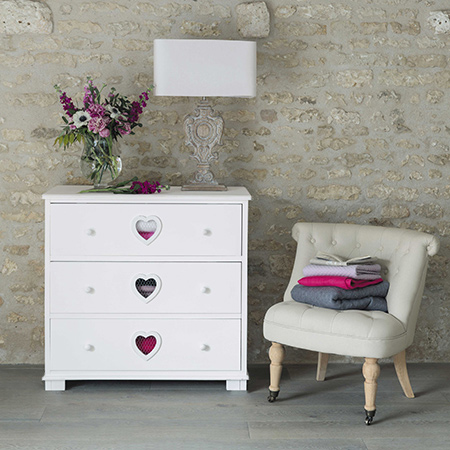
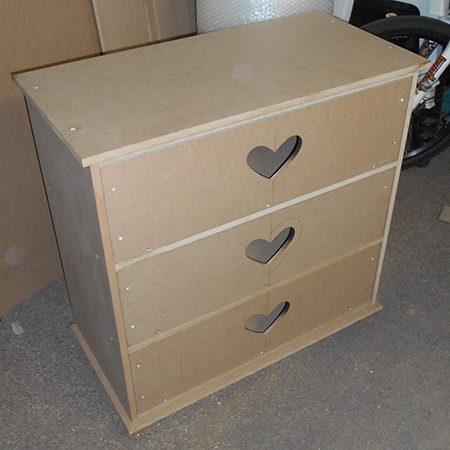
Make a chest of drawers with heart cut out
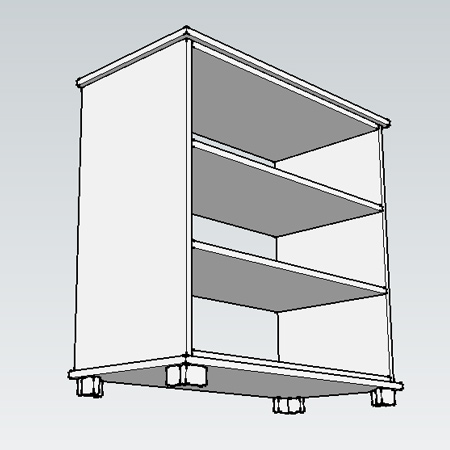
This chest of drawers has three spacious drawers and beautiful heart cut outs in the drawer fronts. The entire chest of drawers is painted and distressed to give it a vintage effect.
YOU WILL NEED:
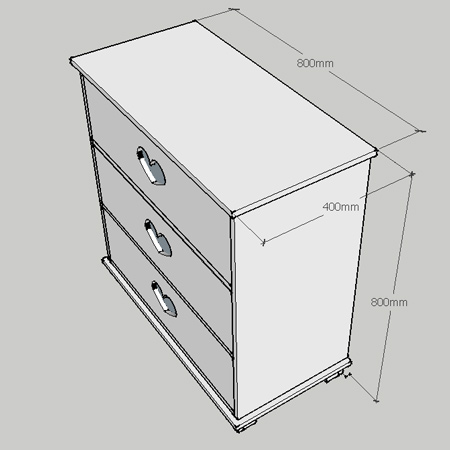
2 of 384 x 728mm 16mm MDF - sides
2 of 400 x 800mm 16mm MDF - main top / base
4 of 384 x 736mm 16mm MDF - undertop / bottom / dividers
4 of 40 x 60mm 16mm MDF - feet front
4 of 40 x 44mm 16mm MDF - feet side
3 of 218 x 732mm 12mm MDF - drawer front
3 of 218 x 708mm 12mm MDF - drawer base
6 of 218 x 359mm 12mm MDF - drawer side
3 of 359 x 684mm 12mm MDF - drawer back
Quarter sheet of 3mm masonite / hardboard
Wood glue
4 x 40mm screws
Wood filler
6 pine knobs
Prominent Paints Select Sheen - your choice of colour*
1 metre chicken wire
TOOLS:
Drill / Driver plus assorted bits
Jigsaw and clean-cut blade
Orbital sander + 240-grit sanding pads
Bosch Tacker and staples or heavy-duty stapler
Hammer and small panel pins
Tin snips or all-purpose scissors
*The most professional way to paint furniture is to use a Bosch PFS spray system, but if you don't own one, use a quality paintbrush and foam roller.
Buy everything you need for this project at your local Builders. Save time by having your board cut to size.
HERE'S HOW:


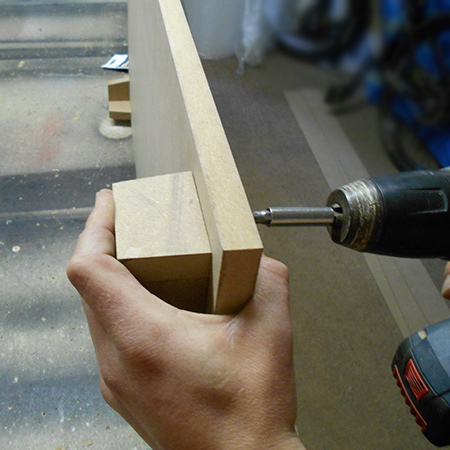
Glue the feet sections together, leave for a couple of hours and then attach the feet to the base using 40mm screws. Put the base aside for now.
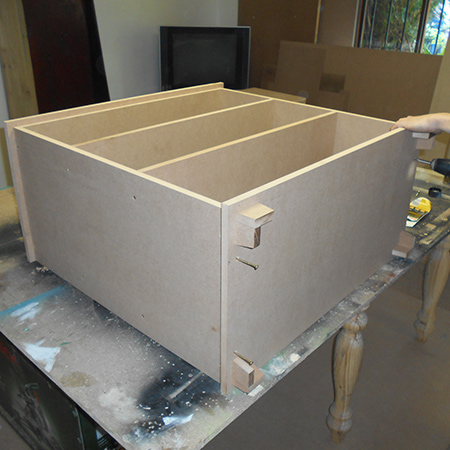
Measure and mark for the drawer dividers, marking on both the front and back of the side sections.
Secure the undertop, bottom and drawer dividers to one side section using 40mm screws. Pre-drill 3mm countersunk pilot holes for all screws so that these can be easily covered up with wood filler.
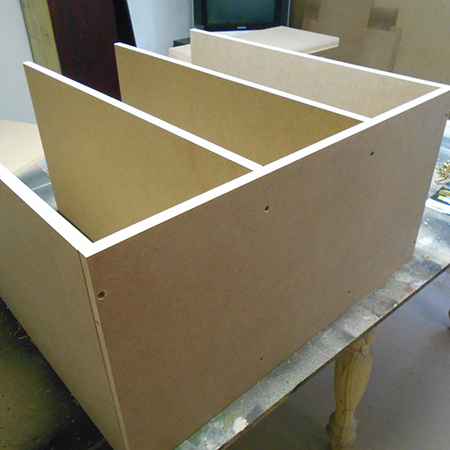
Attach the remaining side in the same way.
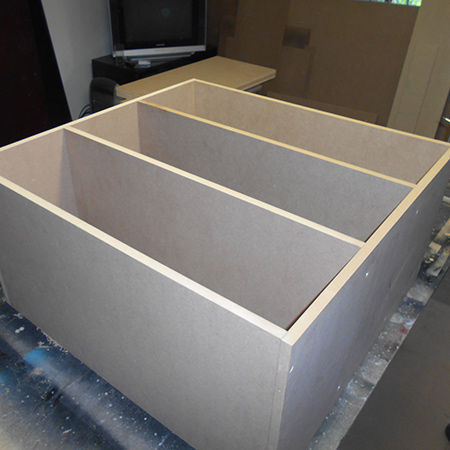
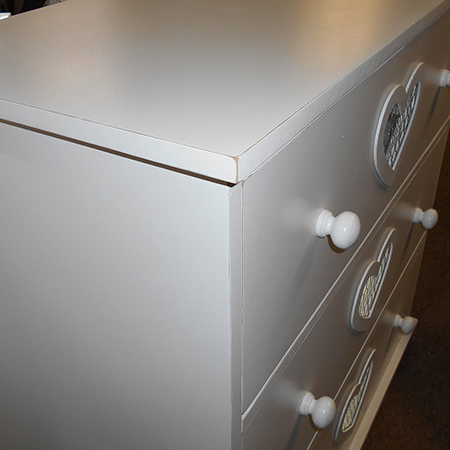
Secure the main top by pre-drilling 3mm countersunk pilot holes into the side sections. Again, these holes can be covered up with wood filler.
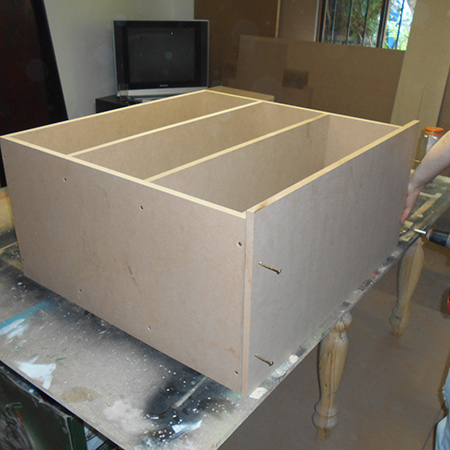
Secure the bottom section to the base in the same way.
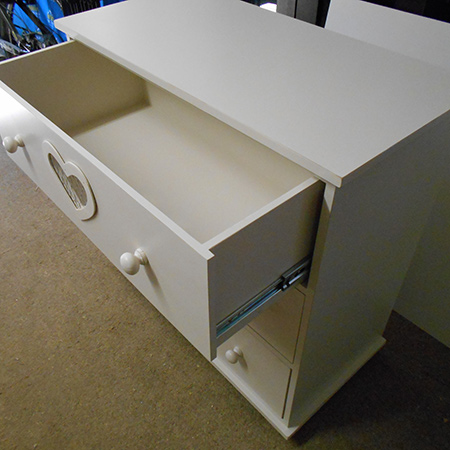
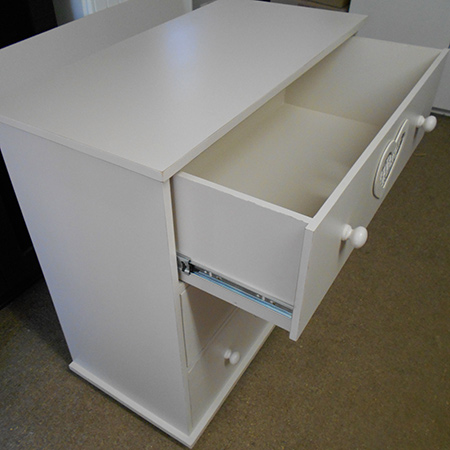
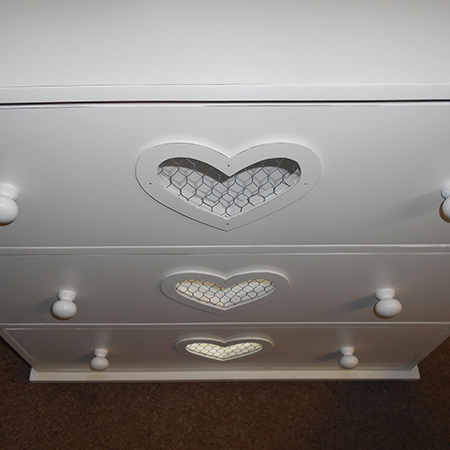
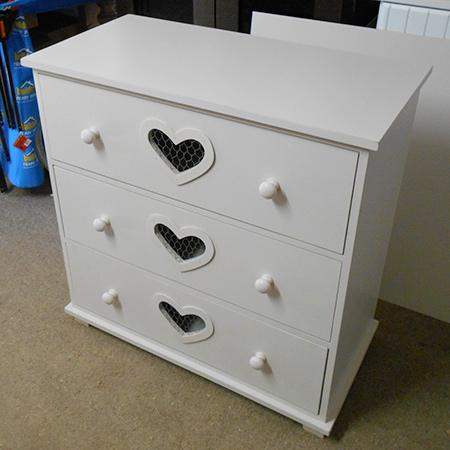
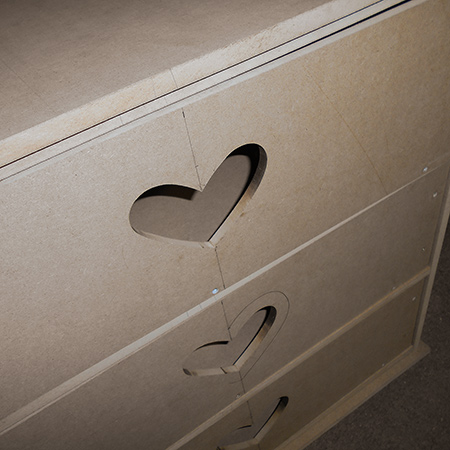
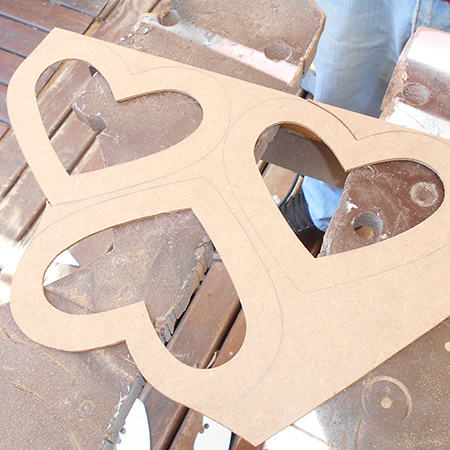
Draw heart shapes onto the drawer fronts and cut these out. Now you can assemble the drawers as shown below. The sides are secured between the drawer front and back and then all pieces are secured to the base.
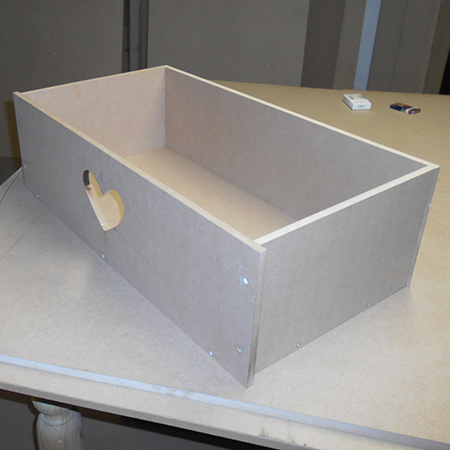
Test fit the drawers to make sure they slide nicely in and out of the cabinet.
Sand and Paint
Use 120-grit sandpaper to remove any irregular edges and then sand all the cut edges with an Orbital Sander and 240-grit sanding pads.
To paint this cabinet I used my Bosch PFS spray system and Prominent Paints Select Matt in Y1-C2-3 ivory. Apply 3 coats of paint, allowing each coat to dry for approximately 4 hours before applying the next coat.
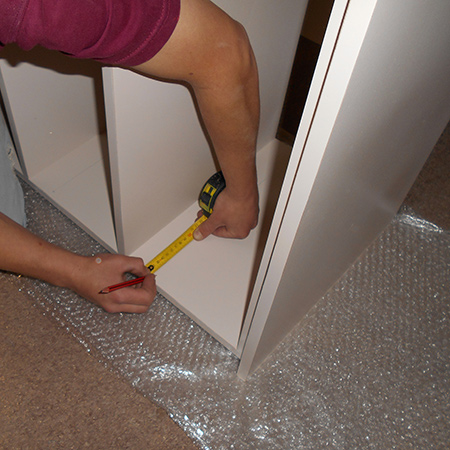
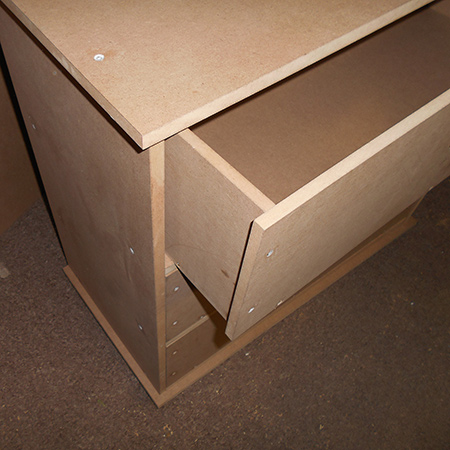
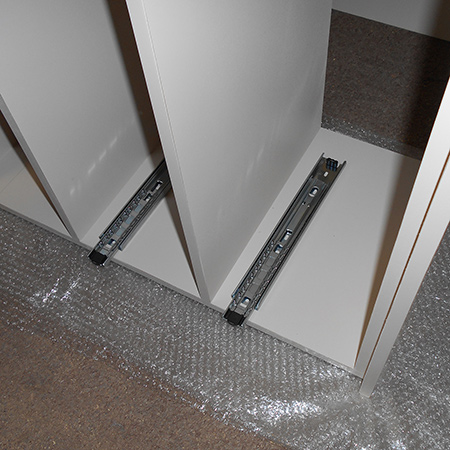
Once painted you can secure the drawer runners to the frame and drawer sides. See here for advice on fitting drawer runners.
Finishing
Draw out heart shapes approximately 100mm high x 140mm wide and about 30mm wide on a piece of masonite / hardboard. You will find plenty of templates that you can use on the Internet and print this out.
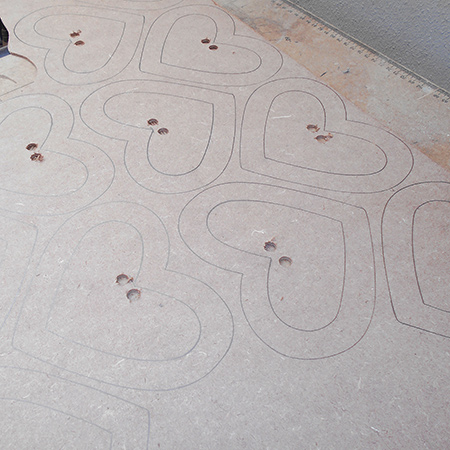
Use a 10mm wood bit to drill a couple of holes in each of the heart shapes and then cut out the shapes with a jigsaw.
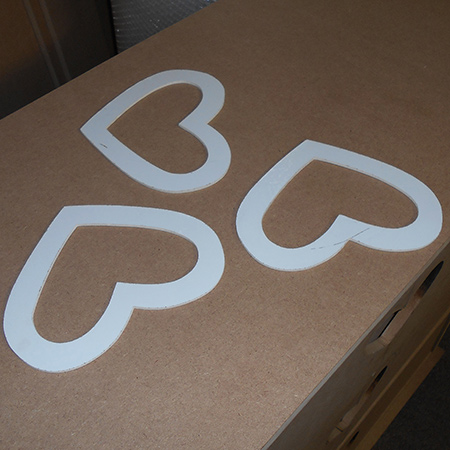
Paint the heart cut outs separately.
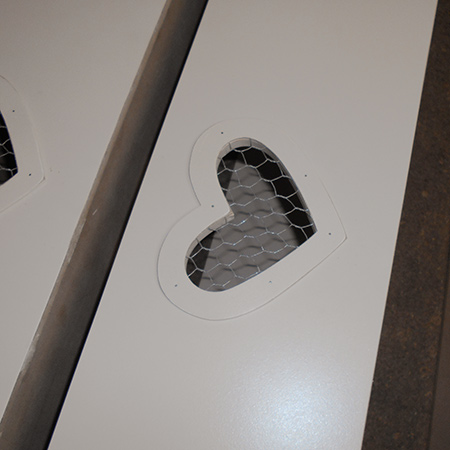
Cut out a piece of chicken wire slightly larger than the heart shape opening in each drawer front. Staple this onto the drawer front and use tin snips to cut off excess chicken wire. Place the cut out heart over the top and use a hammer and panel pins to secure.
Drill holes and secure your choice of knobs or handles. We painted pine handles to match the colour of the chest of drawers.