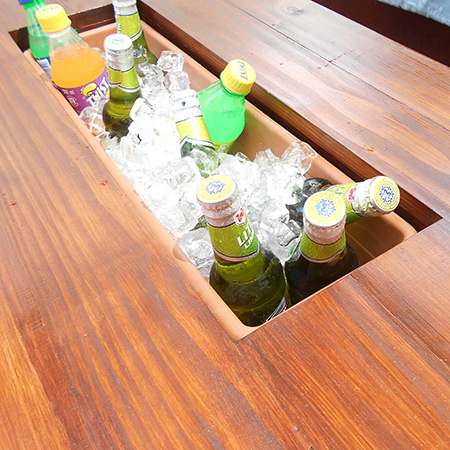
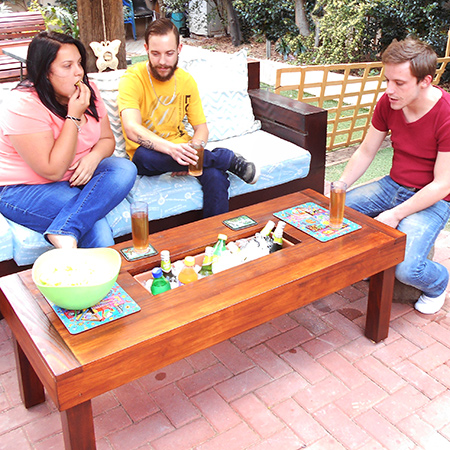
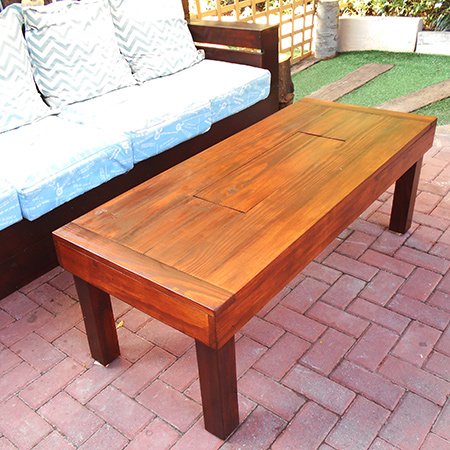
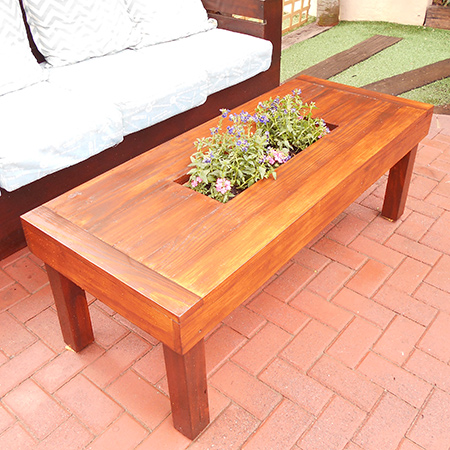
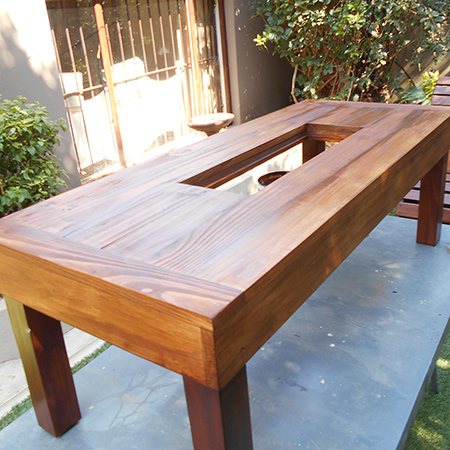
Outdoor table with ice box cooler
Here's a great project you can do in a weekend using supplies that you will find at your local Builders. This outdoor table has a built-in ice cooler to keep all your summer refreshments cold on hot, hot days.
You can buy everything you need for this project at your local Builders store, including the plastic containers (plant boxes) for keeping your summer drinks at just the right temperature... cold !
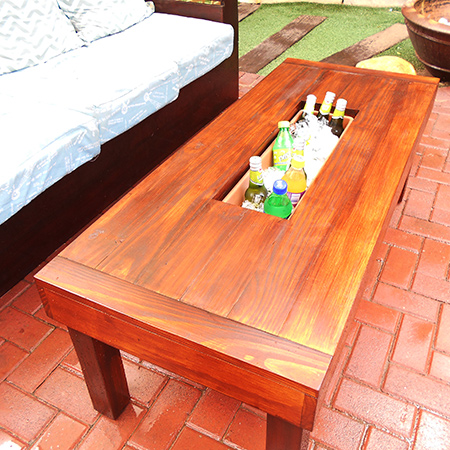
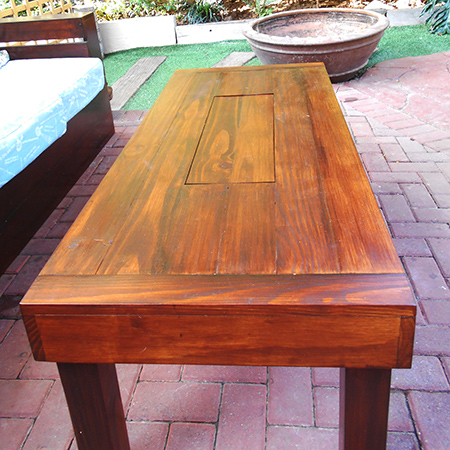
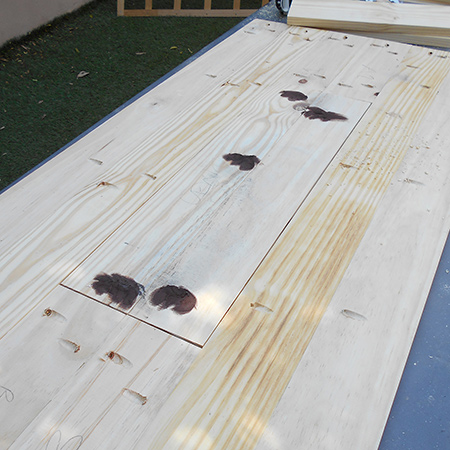
The rectangular, plastic plant containers are perfect as ice boxes for your summer refreshments outdoors on the patio or by the pool, and the table is designed that you can easily hide the ice box when not in use.
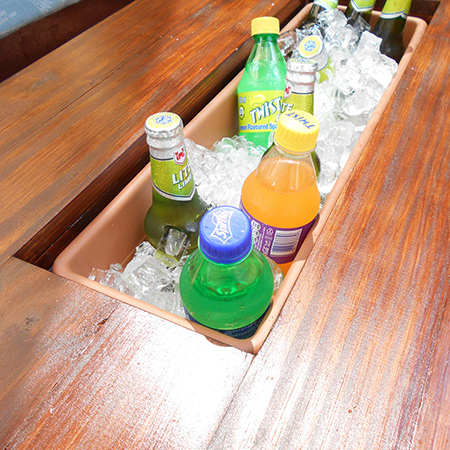
When you don't need to use the table for cold refreshments, buy two plastic plant containers and fill one with colourful plants.
YOU WILL NEED:
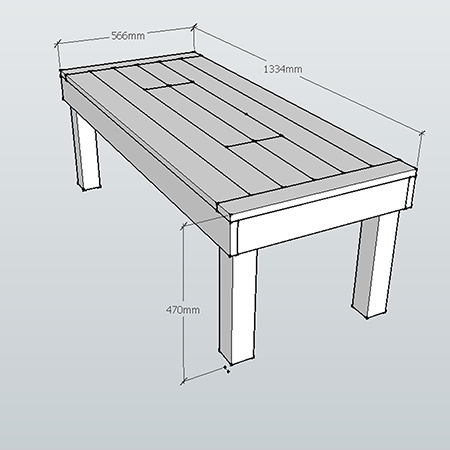
8 of 94 x 1800mm PAR pine cut to lengths:
- 6 of 94 x 1200mm PAR pine - top slats*
- 2 of 94 x 1334mm PAR pine - long aprons
- 2 of 94 x 530mm PAR pine - short aprons - trimmed to length when fitting - short aprons
- 2 of 94 x 520mm PAR pine - slat supports
2 of 67 x 600mm PAR pine - trimmed to length when fitting - top end slats
2 of 32 x 32 x 1800mm PAR pine cut to lengths:
- 1 of 32 x 32 x 1800mm PAR pine - cut to fit - container supports
- 8 of 32 x 32mm leg supports
1 of 67 x 67 x 1800mm PAR pine - cut into 4 sections for legs
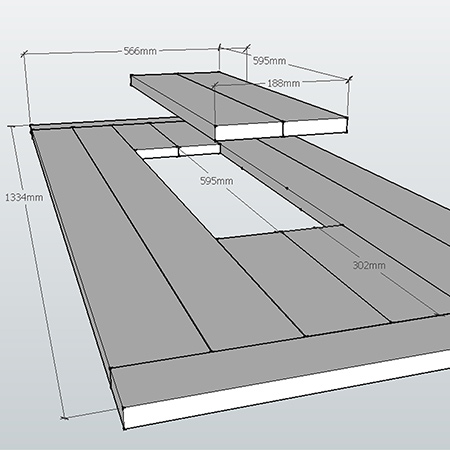
Plastic plant container 180 x 595mm*
Wood glue
Wood filler - to match finished stain
Screws, 35mm and 40mm
TOOLS:
Drill / Driver plus assorted bits
Jigsaw, circular saw or table saw
Kreg Pockethole jig
Orbital sander plus 120- and 240-grit sanding pads
*The two centre slats are cut to allow for fitting the plastic container. If you are unable to source a container exactly the same size you will need to adjust the length to accommodate whatever size container you have.
Buy everything you need for this project at your local Builders store.
HERE'S HOW:
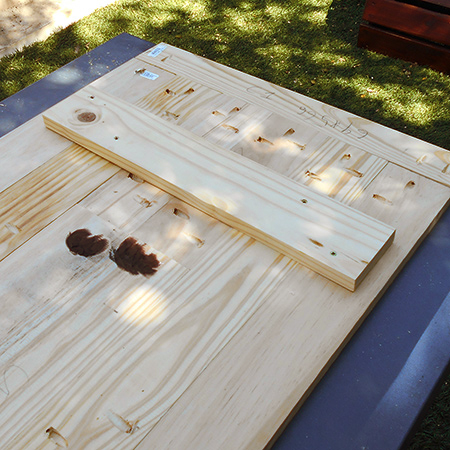
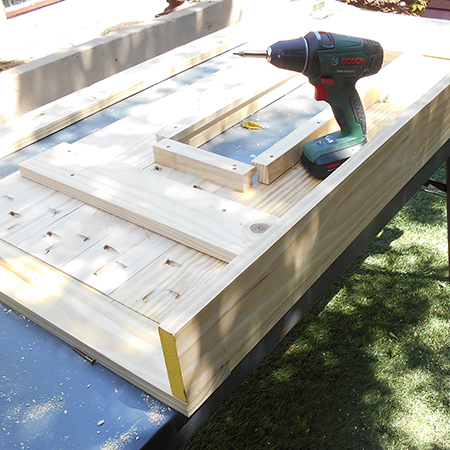
1. It is surprisingly easy to join the slats together using a Kreg pockethole jig. Simply use the jig to make holes along the length of each slat, approximately 6 holes per slat with one hole about 50mm from the edges.

2. Also drill holes along the edge of the slats and along one edge of the table ends to be able to join these sections together.

3. Use 30mm screws to join all the sections together. Don't overtighten the screws to prevent splitting the wood, since pine is soft. Even without any wood glue the pockethole jig provides extremely tight and strong joins.
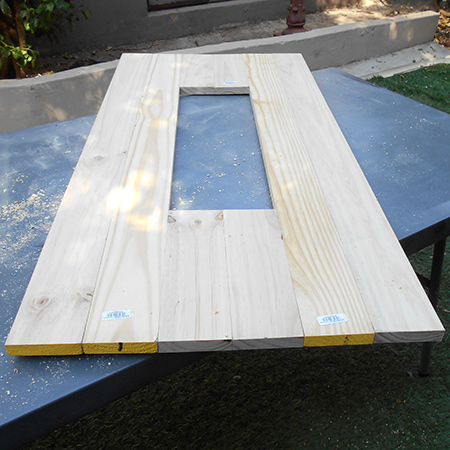
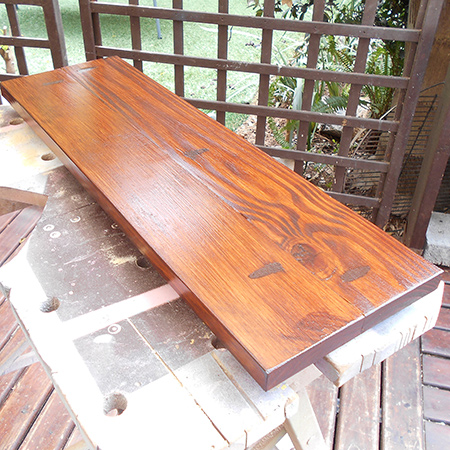
4. The two slats that make up the lid are also joined using a pockethole jig. To disguise the holes fill with wood filler. Select a colour that matches the finished colour of the table.
5. Screw the slat supports over the width of the joined slats using 30mm screws. Although not essential, these supports will add extra support - you never know who might want to sit on the table !
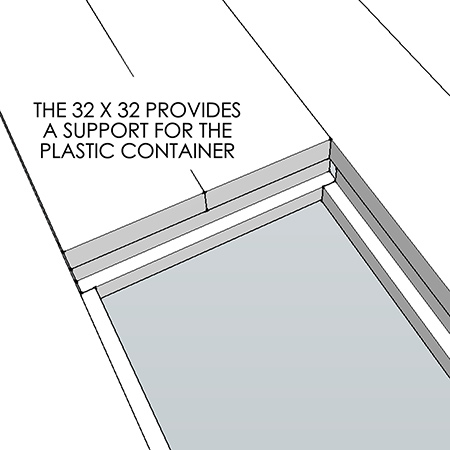
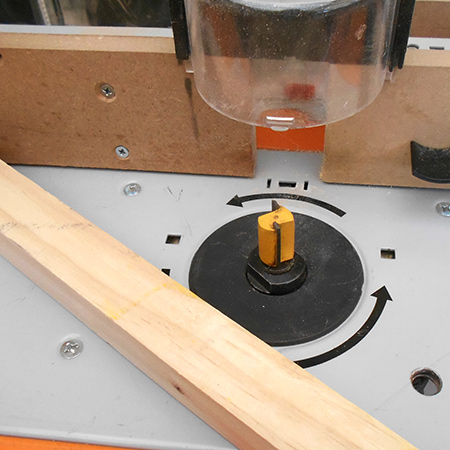
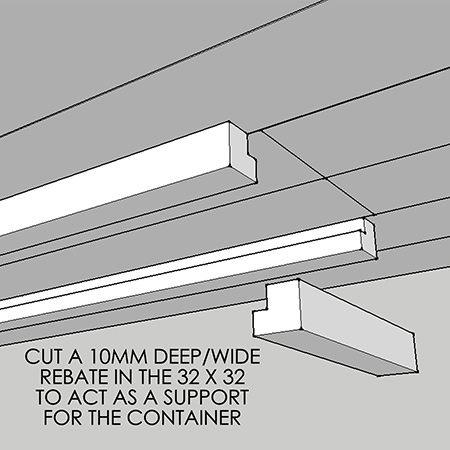
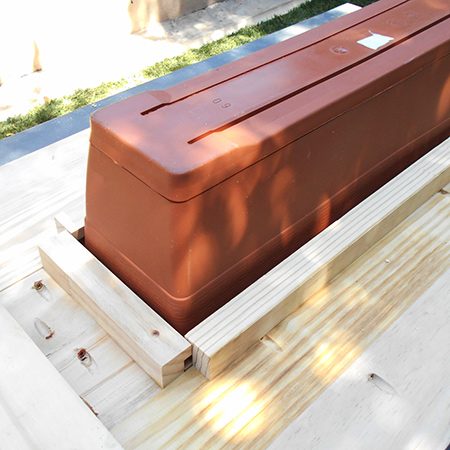
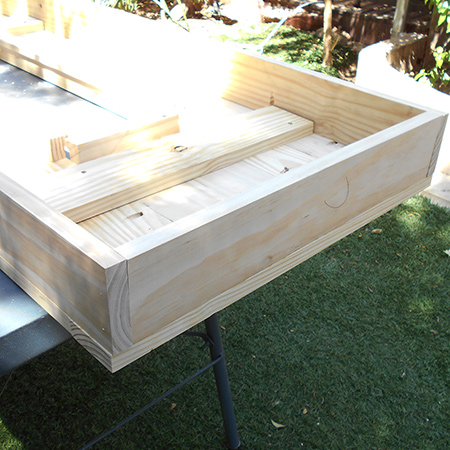
6. To make the support frame using the 32 x 32mm pine I used my router table to cut a rebate that is equal in height and width as the top of the plastic container. This will allow the container to sink below the surface of the table and the lid be placed on top.
7. Test fit the container within the supports and then mount the support frame to the underside of the slatted top using 40mm screws along the length.
8. Unfortunately both the side planks were slightly warped - one more than the other. To remedy this I added a few more pocketholes along the length to be able to pull the planks straight. It made it easier to screw the two end holes in place first and then have someone push the warped boards straight while I secured the remaining holes.
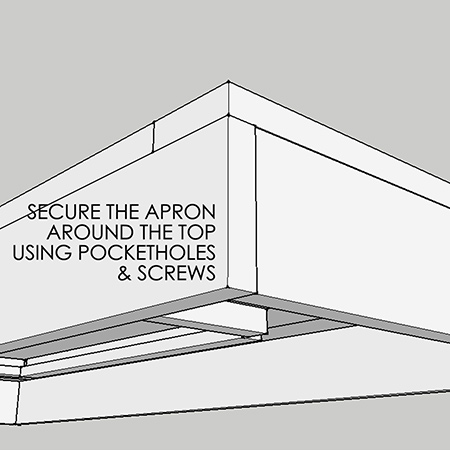
9. Measure the length of the short aprons and trim to fit. These are also attached to the underside of the slatted top and the long aprons with pocketholes.
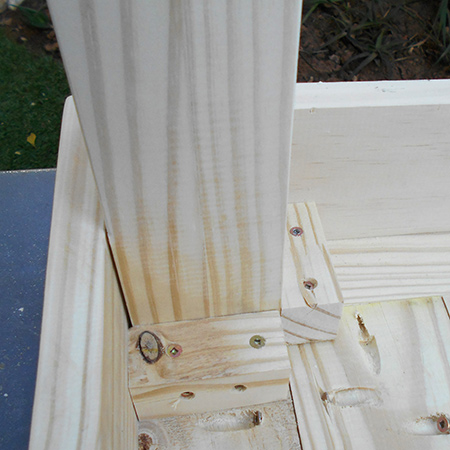
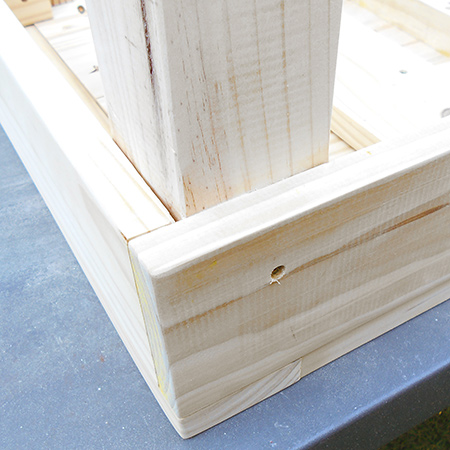
10. Make sure the legs are exactly the same length... measure twice and then again for a table that doesn't wobble !
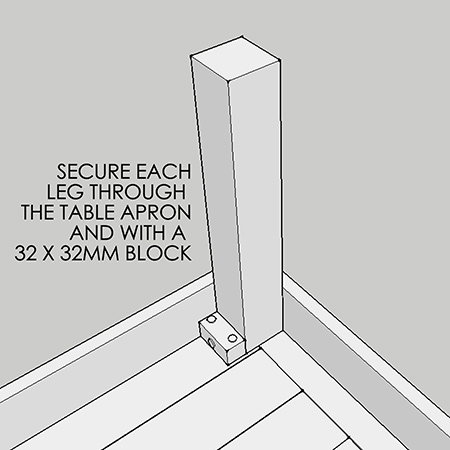
Secure the legs using the small blocks. Screw the blocks to the underside of the top and to the leg.
Finishing
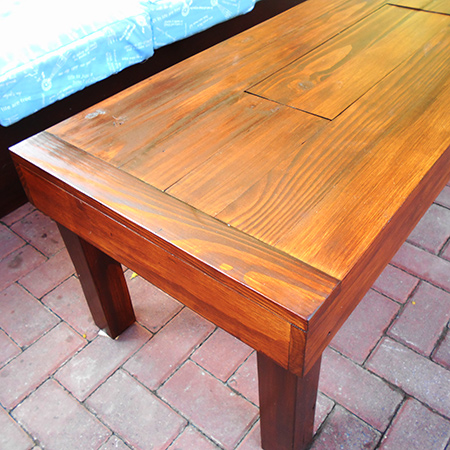
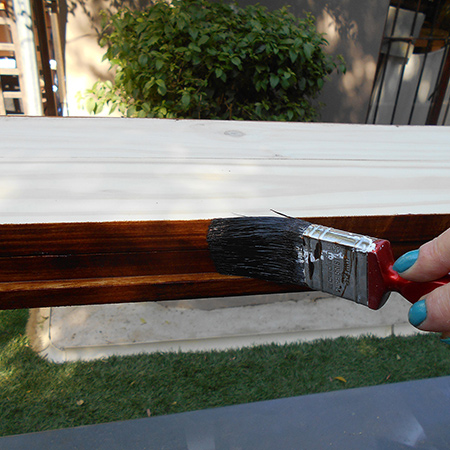
After sanding I finished the table with my new favourite product... Woodoc Water Borne Deck in Teak. This product is super easy to use and dries fast, plus it uses water borne technology rather than solvent as a carrier, which means it is eco-friendly as well. I have already used this product on my slatted love seat and outdoor sofa and love the ease of application, easy of clean up and ability to apply multiple coats in one day.
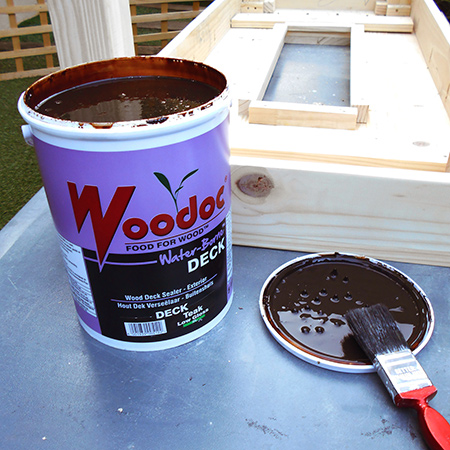
Start with the underside of the table and the legs, making sure to apply liberally to the bottom of the legs and cut edges, as these absorb product quickly. Follow the instructions on the container, applying three coats in total.
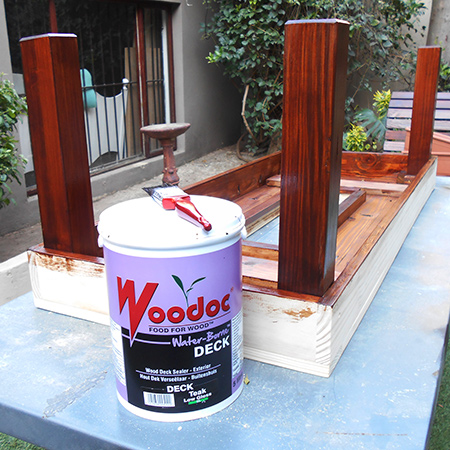
Allow each coat to dry before applying the next coat. A light sanding is recommended between the first and second coat.
Turn over the table and start with the apron and then the end strips.
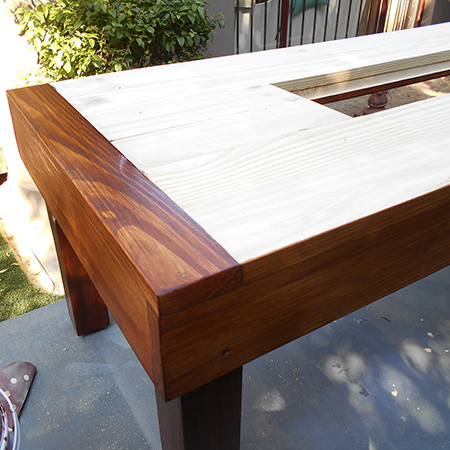
When applying to the support frame use a dabbing motion on the edge to prevent staining the top. Smooth along the grain to even out.
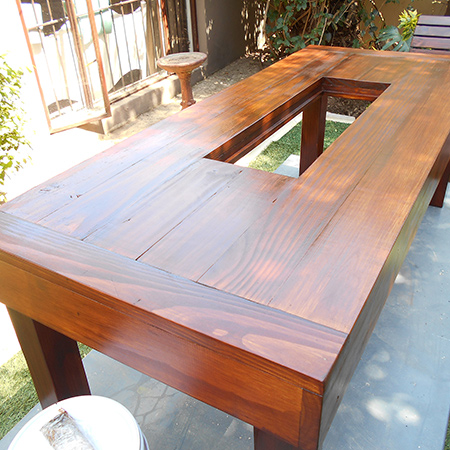
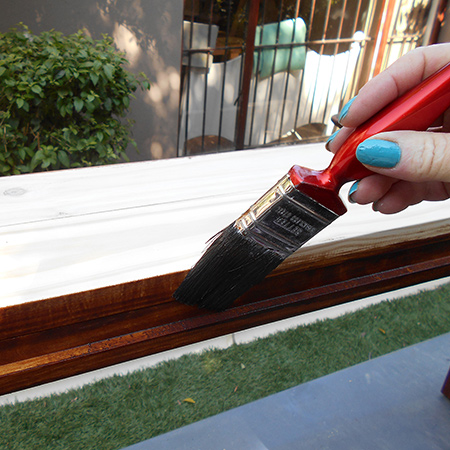
After sanding the wood filler, apply Woodoc to the lid section.