Finish off any room with Over Skirting
Not inspired by the range of wood skirtings available, a small passage was finished off with simulated wood polymer Over Skirting.
29/11/2018
As part of my mini home renovation I'm going room to room to finish off small things that have been left half finished, and there are more than a few! One project is to update the skirting in a small passage. This area still has the builders-grade skirting and it looks ugly. After shopping around, I wasn't very impressed with the range of skirtings available. Plus the fact that most of them would entail me ripping out the old skirting to install. I was looking for a quick and easy solution to add skirting and a bit of style to the space.
Having previously used over skirting for my upstairs bedroom, I realised that I still have a few pieces left over that would work for this small area. The over skirting previously installed was done quite a few years back and still looks great.
Where to buy Over Skirting
I originally sourced the Over Skirting from Park Lane Decor, and I see these guys still offer the product and ship countrywide. There's no need to remove your old builders-grade skirting boards since the over skirting fits directly over the top.
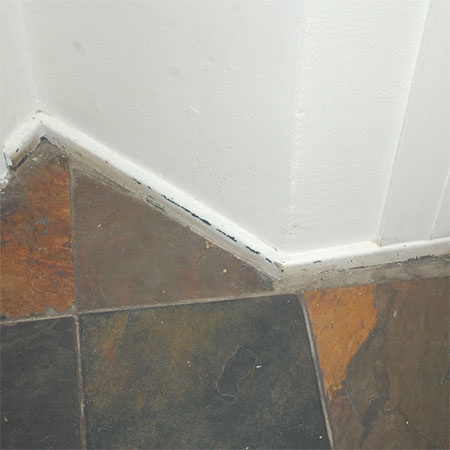
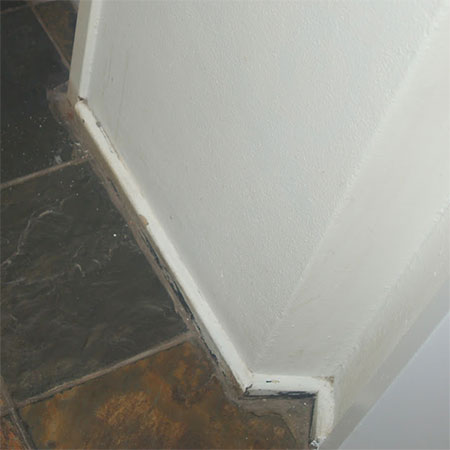
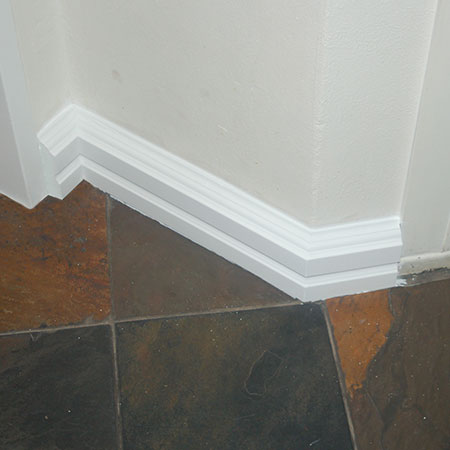
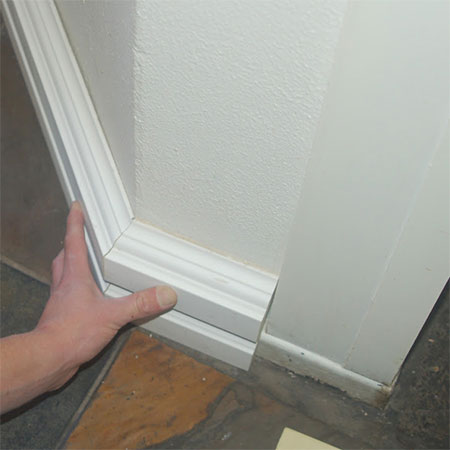
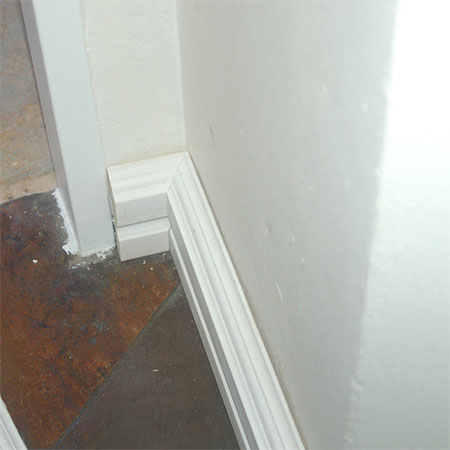
The area where I added the over skirting is not a big area, but it does have quite a few difficult angles and it will be easier to do these with the polymer over skirting than have to use wood skirting.
Cutting angles is easy
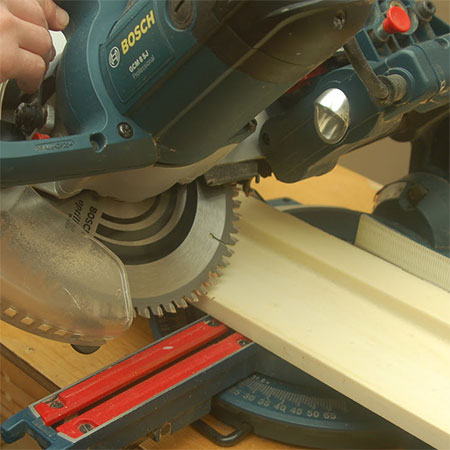
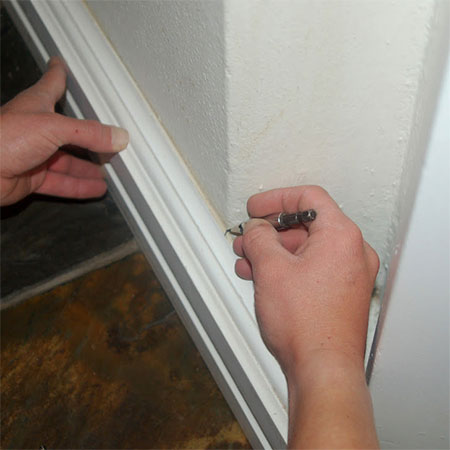
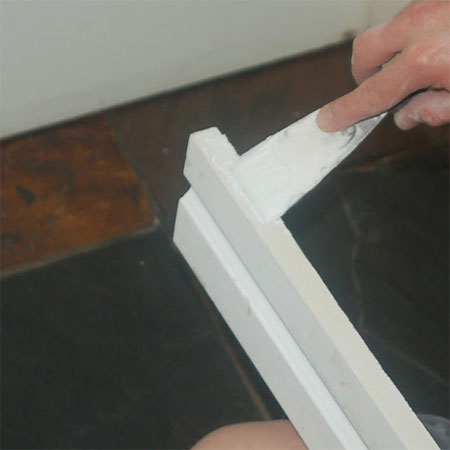
It is easy to cut the polymer over skirting using a compound mitre saw, but you can do it just as easily using a mitre box and backsaw. Set the mitre saw for 45-degree bevel.
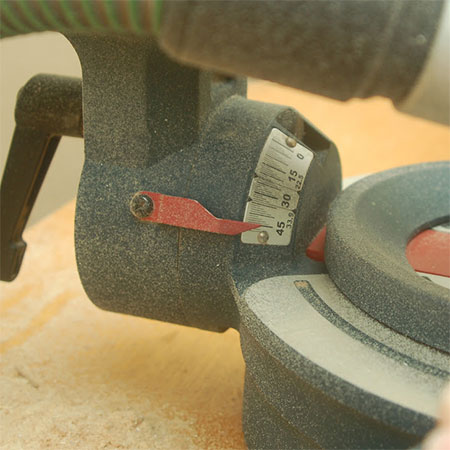
Mark where the polymer over skirting needs to be cut and accurately line up the mitre saw to cut on the mark.
Measure and mark accurately
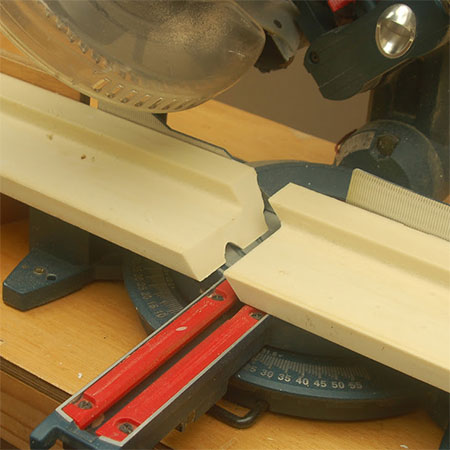
It is important to measure and mark accurately for perfect corners or fitting around tight angles. That's where using polymer over skirting is a breeze - the soft material is very easy to cut.
GOOD TO KNOW: When ordering lengths for a particular area, order a little bit more than you need to be able to cut a few sections to use as test pieces. This is especially important when working with awkward angles like the one shown below.
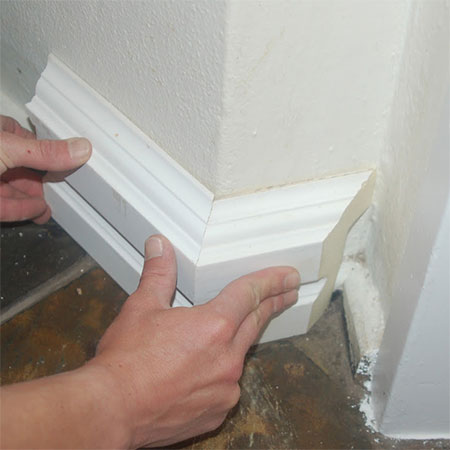
GOOD TO KNOW: Test fit all corners and angles before applying adhesive.
Installing Over Skirting
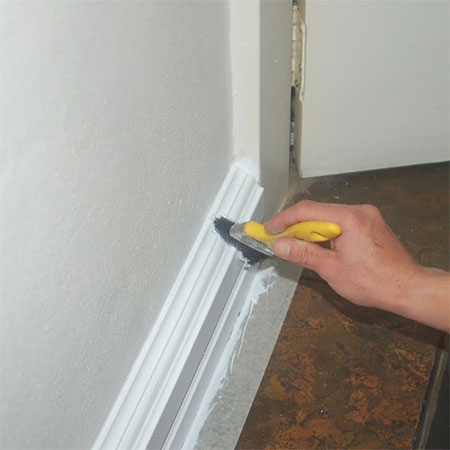
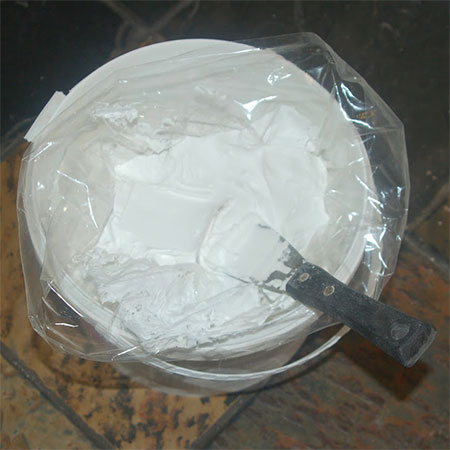
When installing the over skirting it is important to use the right adhesive. Alcolin Cornice Adhesive and Filler is a flexible adhesive that can be used with polystyrene, plaster and polyurethane cornice, ceiling tiles and panels. It is white in colour and can be painted and used as a flexible, crack-resistant filler, prior to painting.
GOOD TO KNOW: When undertaking the over skirting installation in my bedroom, I used Pattex No More Nails and only later discovered that this does not work. Eventually the over skirting came loose and had to be glued down with cornice adhesive.
Apply cornice adhesive to the edges to be joined, along the back, as well as the base of the over skirting. This helps to fill in any gaps, You can also use the cornice adhesive as a filler along the top edge of the over skirting, especially if walls are not completely flat and there are gaps.

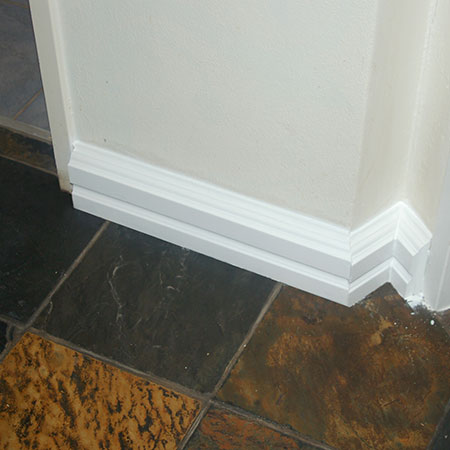
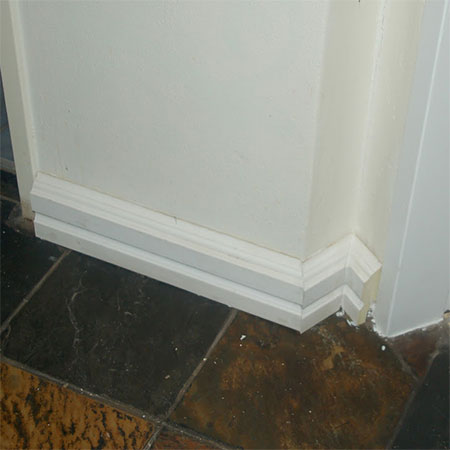
The over skirting gives a neat edge and sharp corners that add the perfect finishing touch to this space. Plus, the ugly edge around the tiles is now completely hidden out of sight.
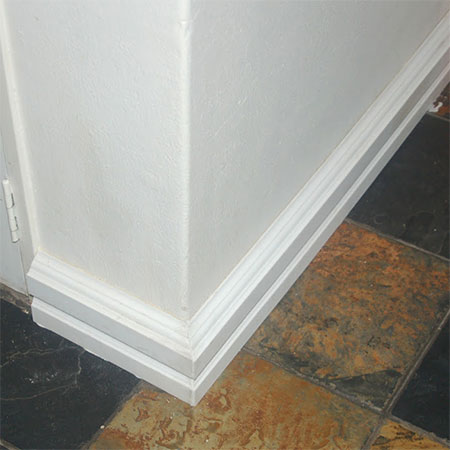
After installation, the over skirting was painted with Fired Earth non-drip water based enamel. The tiles were masked off and two coats of paint applied.