Wood carving with Dremel tools
It seems that everyone is buying Dremel Tools, and why not - there are so many different tools to choose from that you can do almost anything with them.
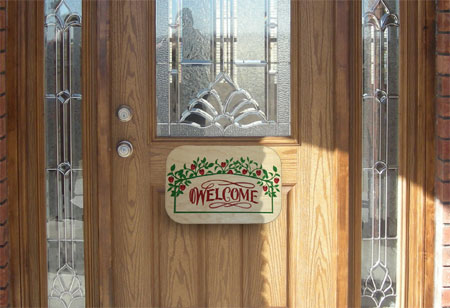
By request, this week I'm going to show you how easy it is to use a Dremel Trio for carving a welcome sign. You don't have to use a Dremel Trio for this project, you can use any Dremel MultiTool and an engraving cutter for this project. Before we start there is one very important thing you should know... don't expect to get it perfect on the first try. In this project I'll show you how to engrave the welcome as the first step and then leave the rest to you. Click here for the full design template.
YOU WILL NEED:
Piece of pine or meranti - 300 x 250mm
Dremel Trio or Dremel MultiTool


Ruler, tracing paper and pencil
Woodoc gel stain - I used Dawn Red
Woodoc 30 exterior sealer
Paintbrush
Artist's stiff paintbrush
Woodoc steelwool
Orbital sander and 180-grit sanding pads
Safety glasses
Clamps
Workbench
CONTINUES BELOW
HERE'S HOW:
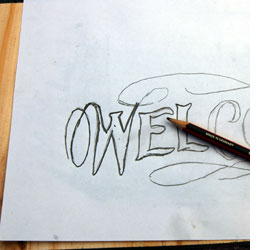
1. Trace the lettering that you want to use for your welcome sign and transfer this onto the piece of timber that you will be using. I used pine for this project and I will be finishing with Woodoc 30 so that it can be hung outdoors. There is a template here if you want to use the same design as the one in this project.
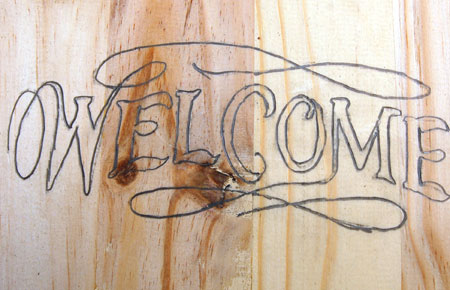

2. For those of you using the Dremel Trio, set the depth adjustment for no more than 3 to 4mm deep and insert either a straight router bit or tile cutting bit. As you can see, I used a tile cutting bit as I found this to be a nice width for the letters.
SAFETY FIRST
Have the board firmly clamped to a workbench so that it does not move around while you are cutting.
3. Start off with a plunge cut into the first letter. A plunge cut means that you start the tool and then insert the cutter into the surface of the project.

DIY Tip:
For this type of project it is better to have the Dremel Trio with the handle in the upright position. It is easier to hold and easier to see the working surface as you follow the drawn guides.
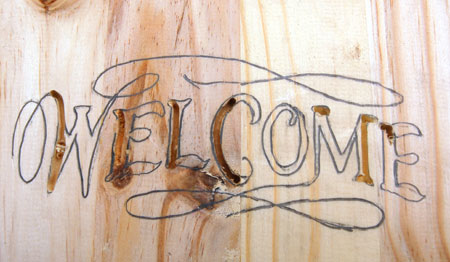
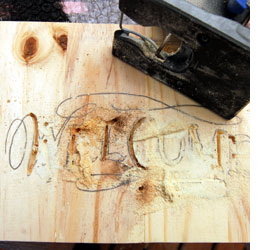
4. Pop on your safety glasses and hold the tool with both hands as you gently guide along the drawn lines. It is easier to work on an area only until you can't see anymore and then move onto the next letter.
Remove all the loose sawdust before continuing for another run. It will take a few runs, with cleaning in between, until your letters are completed and then they may still require a bit of touch up here and there.
Remember, they aren't going to be perfect the first - or even the second - time around. Practice makes perfect!
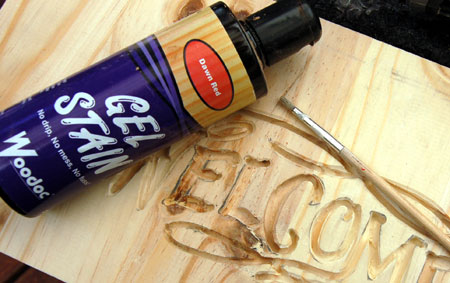
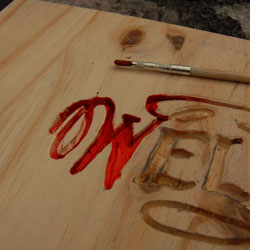
5. When all the letters are nicely done, blow away any sawdust. Use a stiff artist's paintbrush and Woodoc gel stain to colour in the carved out letters. You don't have to worry too much about messing at this stage, as you will be sanding the board.
6. Sand the finished board with an orbital sander and 180-grit sandpaper to remove any mess and have a nice smooth finish.
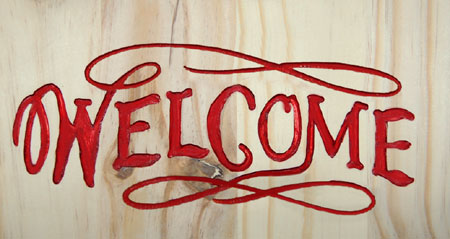
7. Apply three coats of Woodoc 30 to the finished project. After the first coat has dried, wipe with Woodoc steel wool to remove any excess sealer on the surface and then apply the second coat. Once this is dry you can then apply a third and final coat. Be sure to apply to the front and back, as well as all edges so that it will be well protected if you are going to hang outdoors.