
Upcycle Storage Cupboards or Bookshelves into Display Cabinets
Still busy turning the DIY Divas workshop space into a lounge, now I am going to show you how I upcycled my two workshop and tool storage cabinets into display cabinets for the living room.
27/03/2022
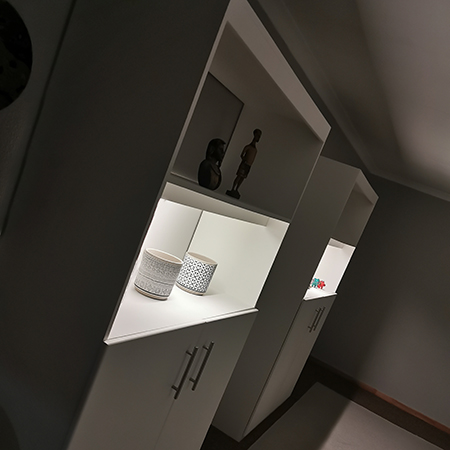
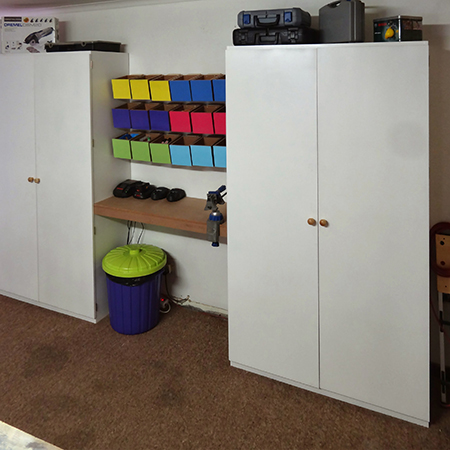
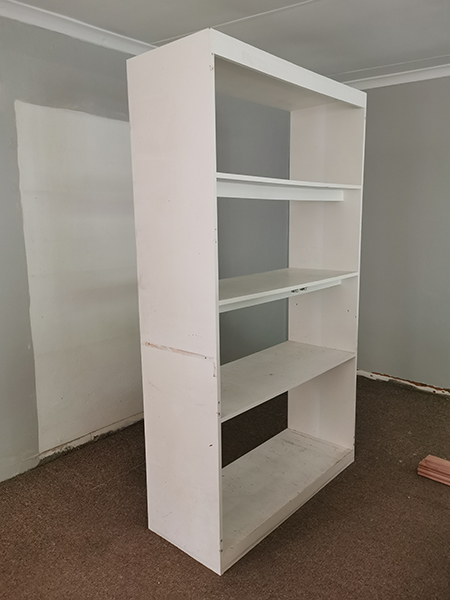
I have previously mentioned that I am reclaiming the space that I used for the DIY Divas workshops. Over the past week, I upcycled the two tool and storage cupboards in the room into display cabinets with hidden lighting that would be used for displaying decor accessories as well as adding accent lighting to the room. These two storage cupboards were made about 8 years ago to provide storage for all my tools and DIY accessories and were easy to make and served their purpose well. Since both the cabinets are still in good condition apart from needing a good sanding down and re-painting, I decided it didn't make sense to throw them out when a few modifications would make them as good as new and give them a new purpose.
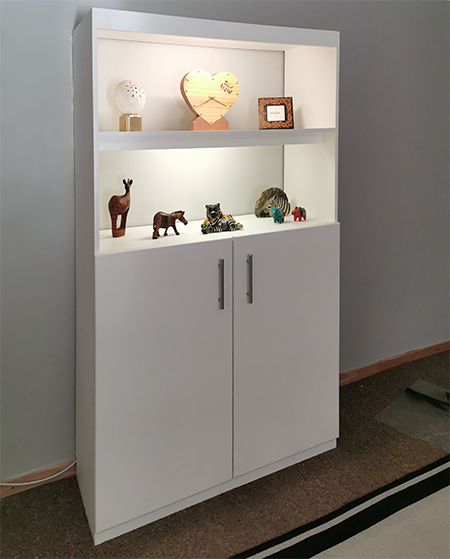
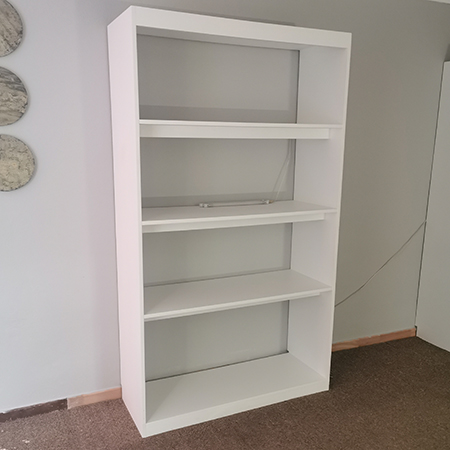
The original storage cupboards were made using 16mm SupaWood which was painted using a spray gun. What is nice about painting your projects, particularly when using SupaWood, is that you can sand away any stains or blemishes and then re-paint them again in any colour you want. Since my new living room is going to be light grey and black, I thought that re-spraying them white would be great and add a contrast to the room for a modern look.
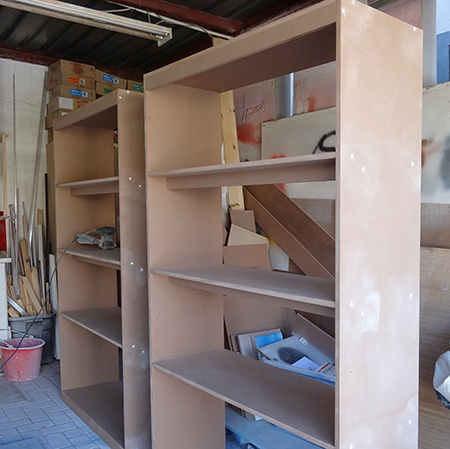
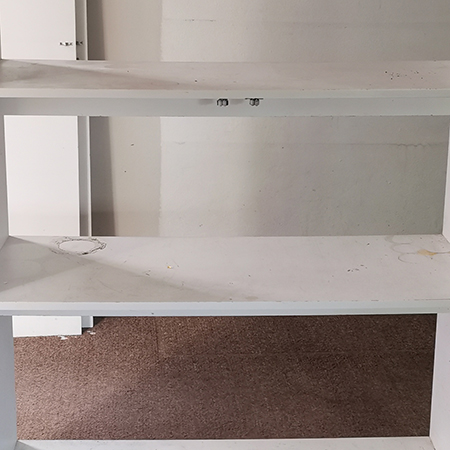
When the storage cupboards were originally assembled, there was a ledge underneath the shelves to prevent any bowing with heavy tools and paint cans. These ledges will come in handy to mount lights behind to provide illumination for the display shelves. I also think that support under long shelves is essential as it prevents the shelves from bowing later and this can happen with SupaWood, other board products and softwood like pine, so something to keep in mind for future projects.
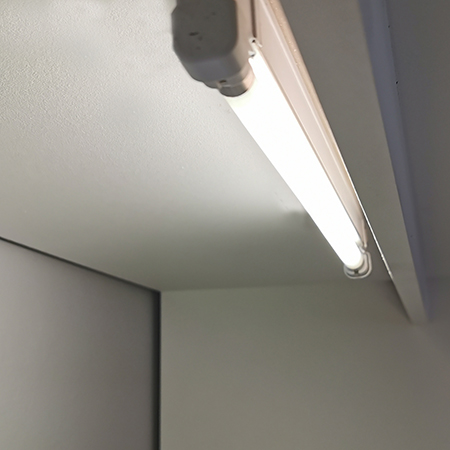
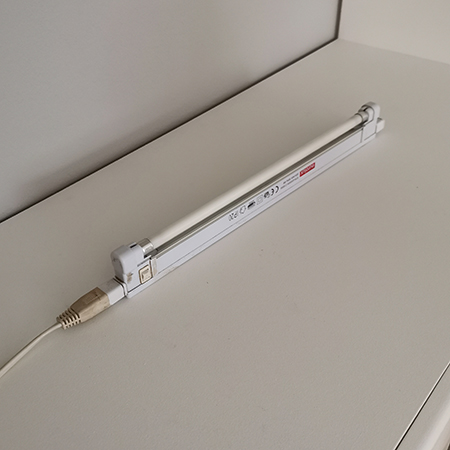
The lighting is provided by CFL lights that I already have, and I just need to buy new CFL tubes for these. I did some online searching for new lights and didn't find anything within the budget and these lights will work just fine.
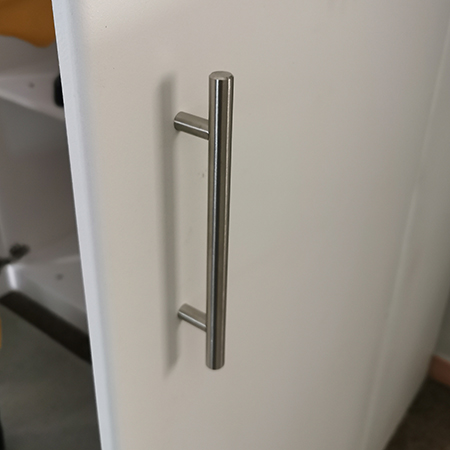
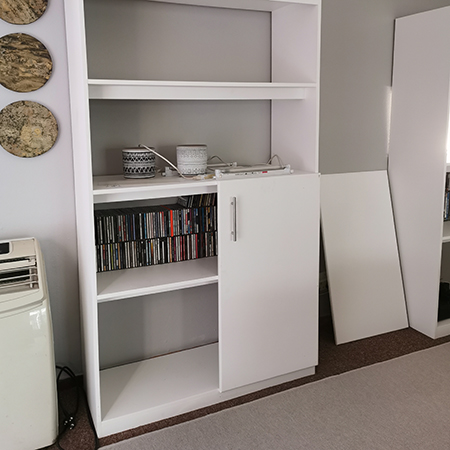
New handles were fitted on the modified doors at the bottom of the display cabinets.
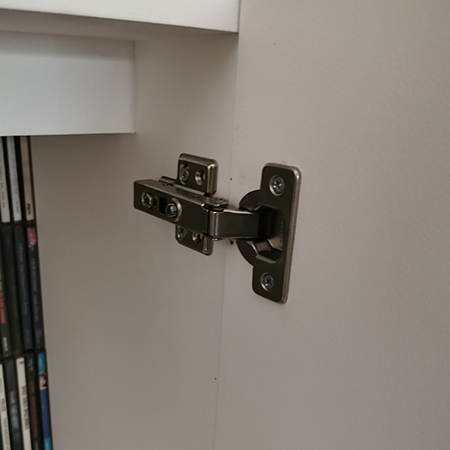
The original cupboard doors were fitted with conventional butt hinges, but I opted for slow-closing concealed hinges for the new doors.
The original cabinets were easy to make; it is just a straightforward frame with shelves and doors. Below you can see how ledges were added underneath the shelves and top to prevent the 16mm SupaWood from bowing under the weight of items being stored, which is also necessary if you are assembling bookshelves to store books or anything else that is heavy. You will find step-by-step instructions to make the storage cupboards here.
Because the cupboards have a painted finish, it will be easy to sand them back and re-paint with my Bosch PFS 2000 spray system. That is an added benefit of painted furniture over laminated or melamine since you can easily sand away any blemishes and apply new coats of paint without any hassle.
Step 1
The doors and hardware were removed and any and all holes filled in with wood filler.
Step 2
The frame and shelves of the cupboards were badly stained from paint and varnish cans and other supplies stored in the cupboards. It was necessary to sand these back to remove all the surface damage and have the perfect finish for painting again. If there are any defects such as chips or dents, repair these with wood filler or epoxy putty before sanding.
Step 3
The sanded cupboards were then given 4 coats of Fired Earth Walls and Ceiling paint. It needed to be watered down to 80% paint - 20% water to make it runny enough to run through the Bosch PFS 2000 spray gun. Also, note that the finish was sanded between the 2nd and 3rd coats with 180-grit sandpaper and after the 4th coat with 400-grit sandpaper. This was done by hand for a smooth finish.
Step 4
With the cupboards painted, the full-size doors were cut down to size, sanded and painted in the same way before being mounted onto the cabinets using slow-closing concealed hinges. And finally, the lights were installed behind the shelf and top ledges.
Why Bother?
There is just no getting over the fact that we are the waste generation. It is so easy for us to throw away and buy new and, in fact, many of the items we purchase these days are manufactured to do exactly that; they have a lifespan of a set number of years and then get tossed out and replaced. We need to change this mindset and realise that not everything should be tossed out because it is no longer of use. These cupboards might not be used for workshop storage, but it cost little to upcycle them into display cabinets - zero waste!