Quick Project: How To Make A Small Cupboard For Makeup
It has been some time since I refreshed my walk-through closet area by giving it a couple of coats of paint and fitting mirrors on the built-in cupboard doors and now I am adding a compact makeup cupboard.
10/07/2021
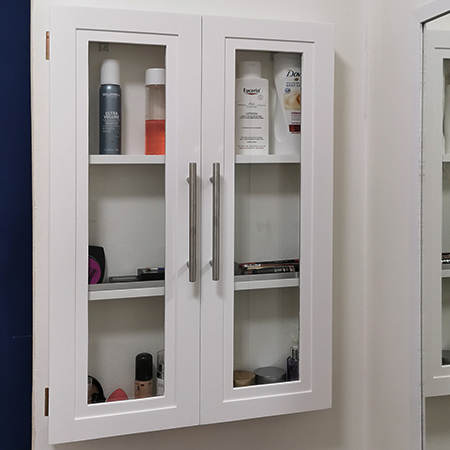
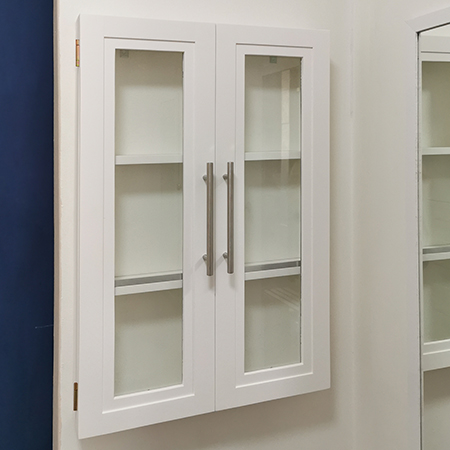
My new makeup cupboard fitted onto the wall
With the addition of new lighting in my walk-through closet, I now tend to apply my makeup in this room as I'm able to stand close to the framed mirrors mounted on the built-in closet doors. I am looking at replacing the framed mirrors with large mirror panels that cover the entire door and adding a decorative feature over the top of this, but more on this later on when I determine how much it's going to cost.
Most of my makeup collection is in clear acrylic cases or left loose in a drawer in the bathroom vanity and I usually have to dig around to find anything. Now that I apply my makeup in the walk-through closet, it makes sense to have my makeup close at hand. I decided to make a narrow cupboard that would accommodate my meagre makeup collection as well as a few beauty products that are used daily.

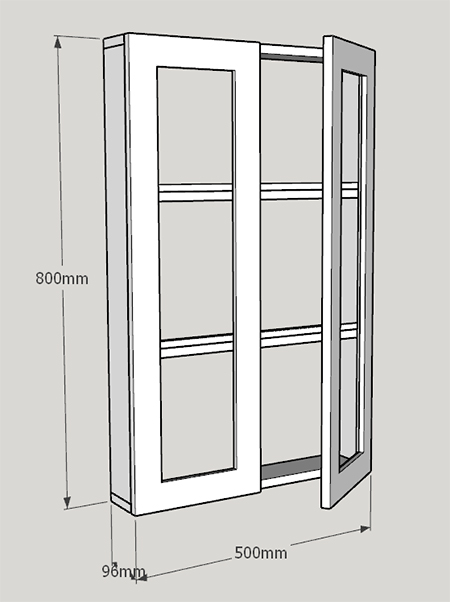
I had to make the cupboard quite narrow to fit onto the wall, as otherwise, I wouldn't be able to fully open the wardrobe door. But even as small as it is, it's large enough for what I have and you can quite easily modify the measurements to make a deeper cupboard that is wider or longer depending on the space available where you want to mount the cabinet.
YOU WILL NEED;
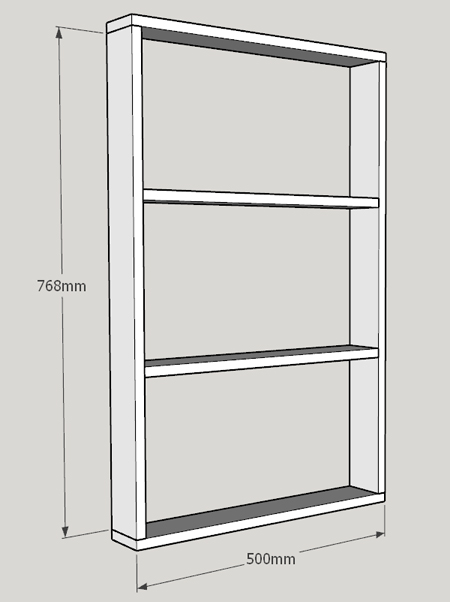
2 of 80 x 768mm 16mm SupaWood - frame sides
2 of 80 x 500mm 16mm SupaWood - frame top/bottom
2 of 80 x 468mm 16mm SupaWood - shelves
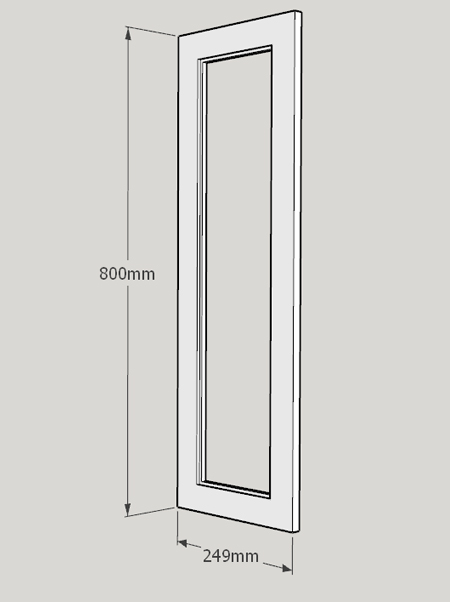
2 of 249 x 800mm 16mm SupaWood - doors
4 x 40mm cut screws
4 butt hinges plus 13mm screws
2 door catches
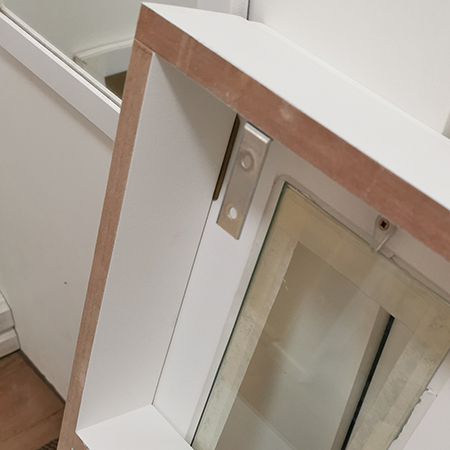
2 angle brackets, 50mm
1 of aluminium angle cut to size
2 of 5mm glass cut to size
Wood filler
10-minute epoxy adhesive
8 of glass clips
Paint to finish
White silicone sealer
Wall plugs and screws for mounting onto wall
TOOLS:
Drill/Driver plus assorted bits
Orbital sander plus 120- and 180-grit sanding pads
Jigsaw
Router plus assorted bits
Spirit level
Tape measure and pencil
Safety gear
HERE'S HOW:
This cupboard was designed to fit into a small space next to the build-in cupboards. You can easily modify the depth of the cabinet as well as the width and height to make a makeup cabinet that meets are your personal requirements.
Step 1
Make the frame by joining the top and bottom pieces to the sides. Pre-drill countersunk pilot holes before joining together with screws.
Step 2
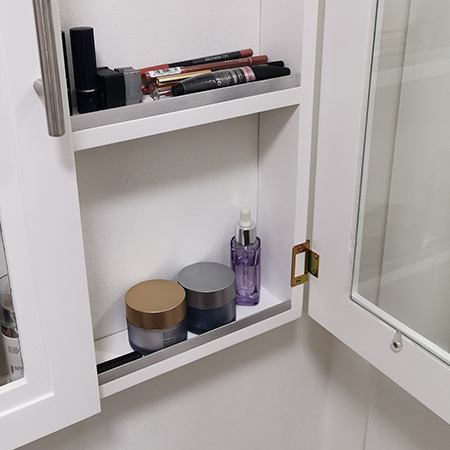
Decide where to mount the [2] shelves to accommodate what you will place in the makeup cupboard. My top shelf is wider than the other two to allow for tall bottles. Measure and mark the location for the shelves before pre-drilling a countersunk pilot hole and securing the shelves in place with screws.
Step 3
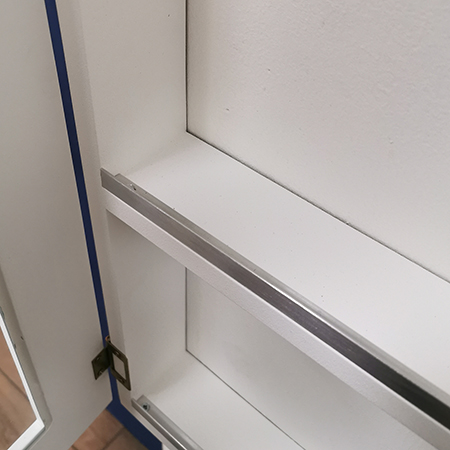
Cut the aluminium angles to length and use 10-minute epoxy adhesive to attach to the front edge of the shelves, as shown below.
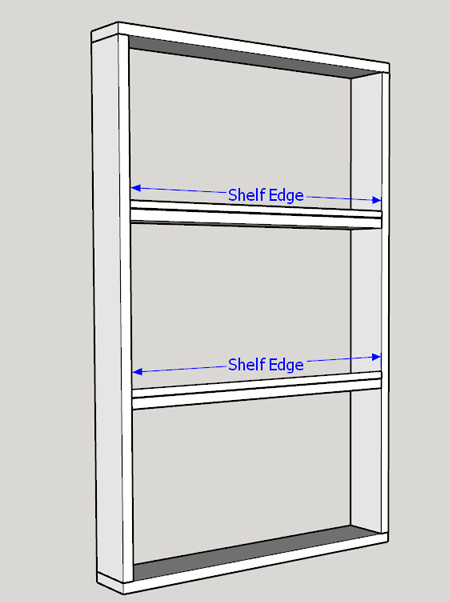
To ensure nothing rolls off the shelves such as eyebrow pencils, eyeliners and lip liners, I glued an aluminium angle to the edge of the shelf (available at Builders).
Step 4
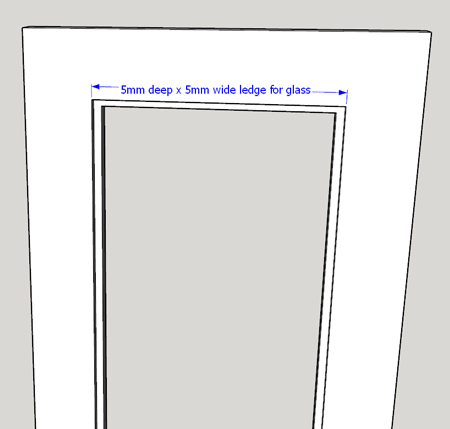
Measure 50mm in around the edge of each door and drill a 10mm hole to insert the jigsaw bit and cut out the opening for the glass panel.
Step 5
Once you have done that, set a cutting or rebate bit in your router and rout out a 5mm deep x 5mm wide ledge around the door cutout. This ledge will hold the glass panel firmly in position.
GOOD TO KNOW: Take accurate measurements of the opening so that you can pop into Builders or glass supplier and have the glass cut to size. It's always a good idea to make the glass panel 2mm smaller all around to allow for discrepancies.
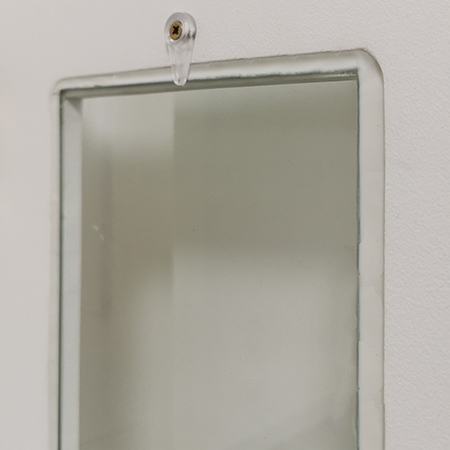
Step 6
I inserted the glass pane in the opening and then applied silicone sealer around the edge of the glass to fill the gap between the glass and frame. This ensures the glass panel is firmly seated in the door. Now you can secure glass clips - one per side to hold the glass panel in place.
GOOD TO KNOW: If you don't have a router and want to make this cupboard, simply mount the glass over the back of the opening and secure the corners with corner brackets.
FINISHING:
1. Apply wood filler to all the holes, let this dry and then sand the entire unit first with 120-grit to remove any uneven edges and then with 180-grit for a smooth finish. wipe clean.
2. You can use a paint roller or paintbrush to apply acrylic paint or spray paint to finish off the cabinet.
3. Measure and mark the location for the butt hinges and secure with 13mm screws.
4. Finally, add [2] 50mm angle brackets to make it easy to mount the unit onto the wall. Transfer the location of the brackets onto the wall to drill holes for wall plugs and screws. Use a spirit level to ensure the cabinet will be straight and level.