
Make a Storage Base for a Bed
Although this is more of a DIY project, here's how to make a storage base for a bed that will not only free up a bedroom of clutter, it will also add a finishing touch if you don't already have a base, or where you want to have a bed storage base that matches a headboard.
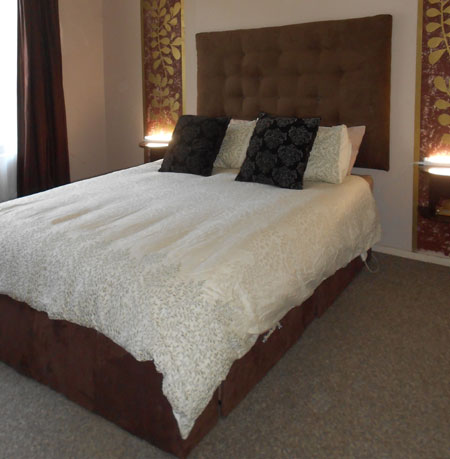
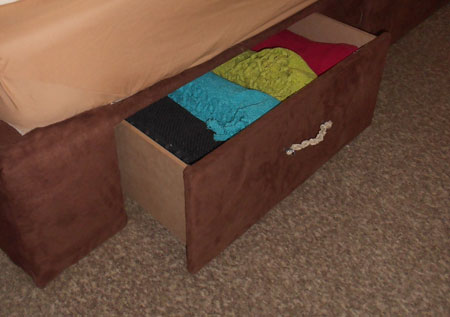
To tie in with our Upholstered Headboard project we decided it might be nice to design a storage base for the bed. Finished in a matching fabric, the storage base has four large drawers on castors that can be wheeled in and out for easy storage.
Our storage base takes up the same amount of floor space as a standard upholstered base but also make use of this valuable space for extra storage, and who doesn’t need extra storage in the bedroom.
YOU WILL NEED:
1 sheet 16mm BisonBord – one sheet cut to the bed size
1 sheet 16mm BisonBord cut to sizes:
6 of 250mm by width of bed [support box]
6 of 250mm x 300mm [support box]
8 of 12mm SupaWood 180mm x 800mm [drawer sides]
8 of 12mm SupaWood 180mm x 480mm [drawer front/back]
4 of 12mm SupaWood 456mm x 800mm [ drawer base]
4 of 16mm BisonBord cut to 250mm x 500mm [drawer front]
Pack of 4 x 35mm wood screws
Wood glue
12 castors - 45mm total height and small screws
2 metres medium-thickness batting
2 metres fabric of choice
4 handles and screws
TOOLS
Drill/Driver and assorted bits
Countersink bit
Staple gun and 10mm staples
Hammer
Tape measure
Pencil
HERE'S HOW:
ASSEMBLE THE BASE

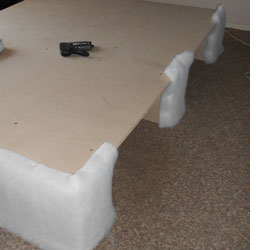
1. Assemble the three support boxes by screwing the ends onto the sides as shown. Drill pilot holes and countersink before attaching using 4 x 35mm screws.

2. Measure and mark to position the support boxes at both ends and centre of the base. Screw the base top to the support boxes by drilling pilot holes and countersinking all holes.
GOOD TO KNOW: The easiest way to mount the support boxes is to lay the top base on its side with the support boxes along one side. Partially drive the screws through the top so that the tip is visible on the back. This will allow you to position the support boxes in the exact spot.
MAKE THE DRAWERS
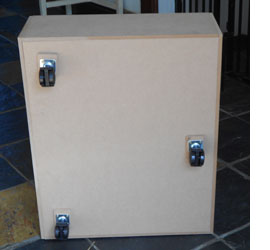
3. Assemble each of the four drawers by gluing the front, back and sides together around the base. Leave the glue to dry and then screw on the castors. There are two castors at the front and one at the back – as shown.
4. Start wrapping the bed base with batting; staple to the top of the base, around the sides of the support boxes. In Step 6 you will lift the base and place on its side, at which time you can staple batting to the inside of the support boxes.
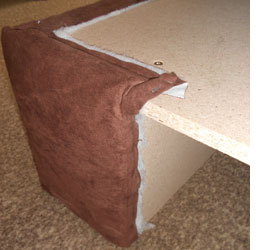
5. Staple your fabric over the batting. Fold under a small hem at the top and make allowance for the same at the bottom; only staple down the top and sides of the fabric at this stage. Make sure to use enough staples along the edges for a lasting finish. Too few staples and the fabric will not lay nicely over the batting.
GOOD TO KNOW
If you need to join fabric at any stage, fold under a small hem on a new piece of fabric and staple this onto where the fabric ends. This will not be noticeable once the bedding is in place, but you can always touch up with a little paint in a matching colour if necessary.
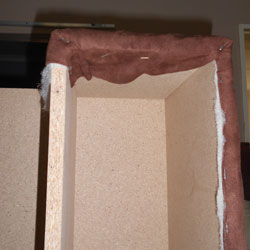
6. Lift the bed base and place on its side so that you can staple batting and fabric to the inside of the storage boxes and to the edge at the bottom of the base. Flip the bed base right side up.
GOOD TO KNOW
Tuck and fold fabric and batting around the inside of each support box to conceal as much board as possible.
7. Place the storage drawer into the base so that you can measure and mark to screw the drawer front to the drawer. The top of the drawer should line up with the edge of the top. Wrap the drawer front with fabric and staple down.
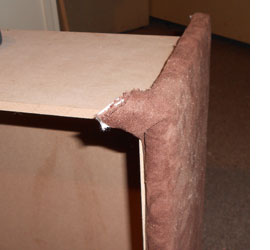
GOOD TO KNOW
Pay particular attention to creating neat corners. It may take a bit of playing around and folding, but you want the corners nice and square.
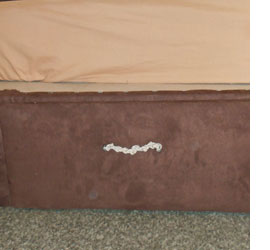
8. Now you are ready to add handles. I made my own handles with rope and eye hooks. These were screwed onto the front of each drawer.