How To Make A Vanity Or Bathroom Mirror With Strip Lights
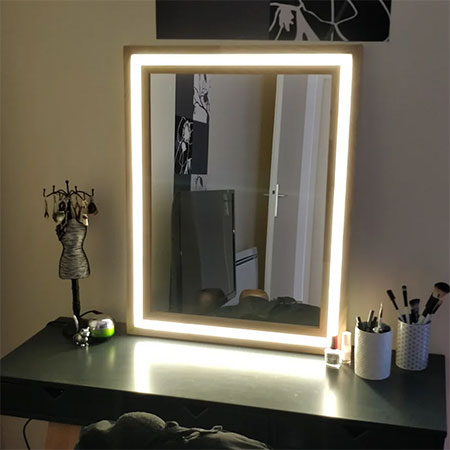
A well-lit mirror is essential for when you are putting on your makeup and this mirror with LED strip lights is ideal for a dressing table or bathroom vanity.
28/02/2021
instructables.com/Modern-Wood-and-LED-Vanity-Mirror/
Putting on your makeup or daily grooming requires plenty of light and this DIY LED strip lighting mirror is perfect for on top of a dressing table or bathroom vanity. All you need to make this strip light mirror are a few supplies and accessories that you can get off-the-shelf at your local Builders store.
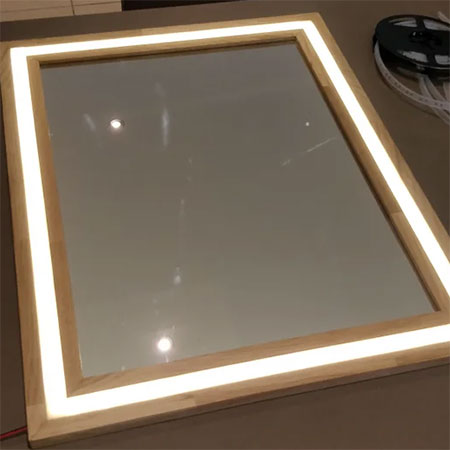
Using a basic DIY picture frame design and one which you can modify is many ways, the strip lighting is mounted into the front of the frame and covered with thin acrylic strips to cover up the LED light strips finish off the frame.
YOU WILL NEED:
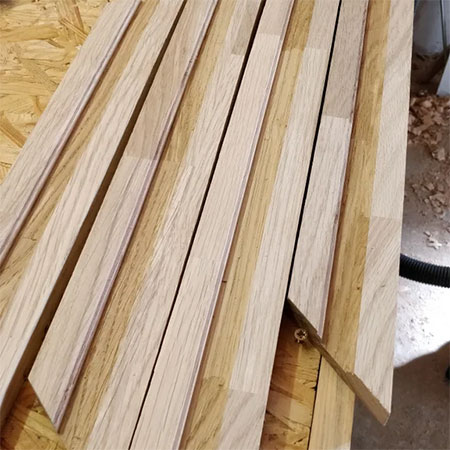
22 x 69 or 94mm wide PAR pine - enough for the mirror size you want to make
Mirror, cut to size, or make the frame to fit around a mirror you can make or have cut to size
Acrylic strips, 3mm thick
LED light strips
Wood glue
Wood filler
120-grit sandpaper
No More Nails adhesive
Finishing for your frame
TOOLS:
Mitre saw
Router plus cutting and groove-cutting bits
Biscuit joiner plus #20 biscuits (or substitute with Kreg Pocket-Hole Jig or Festool Domino)
Strap or frame clamps
Tape measure and pencil
Safety gear
CLICK ON IMAGE FOR ENLARGED VIEW
HERE'S HOW:
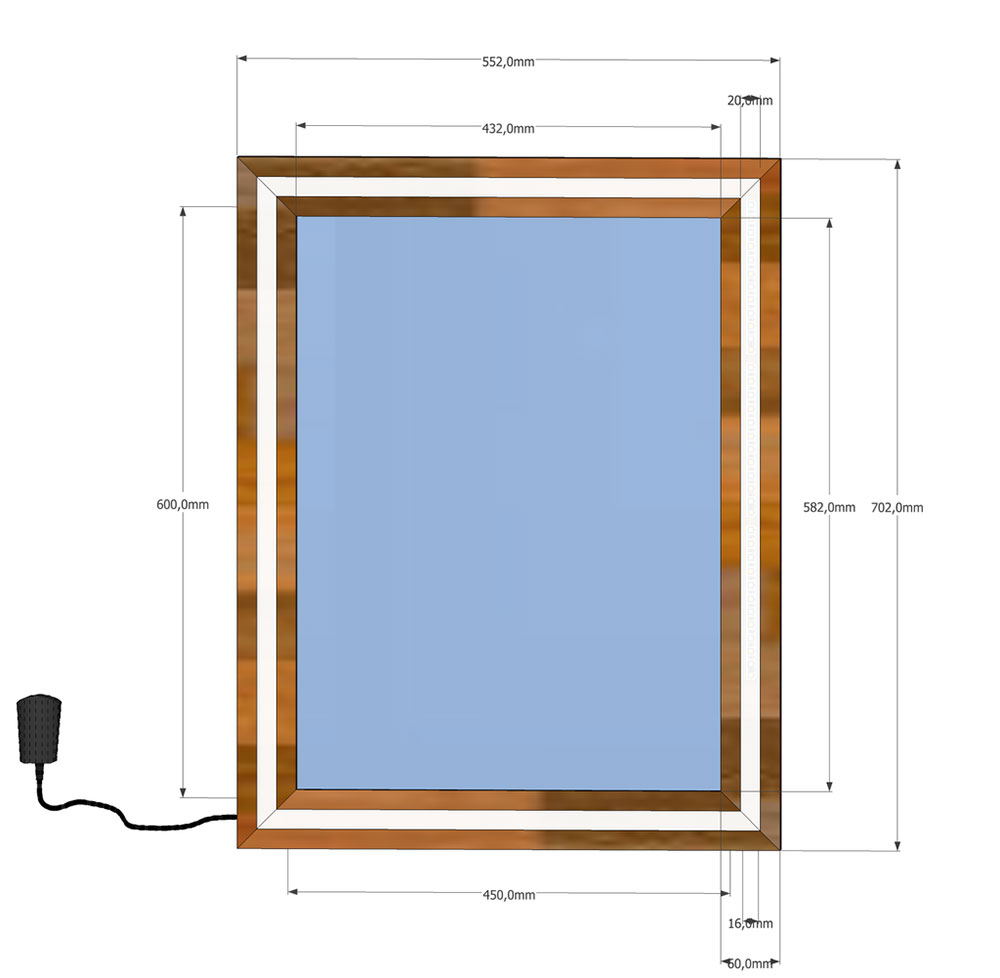
1. Work out what you need for your particular size of mirror and frame using our diagram above as your guide.
2. Cut all PAR pine to size for your frame, using a mitre saw to cut 45-degree angles as shown below.
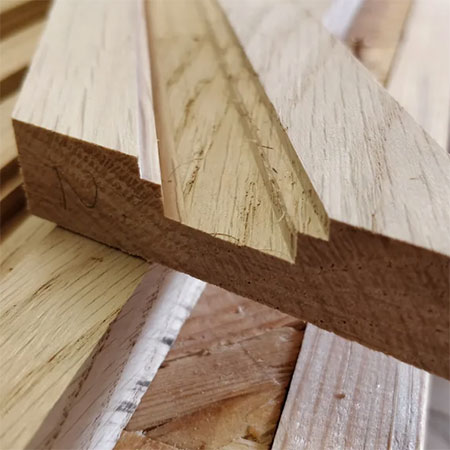
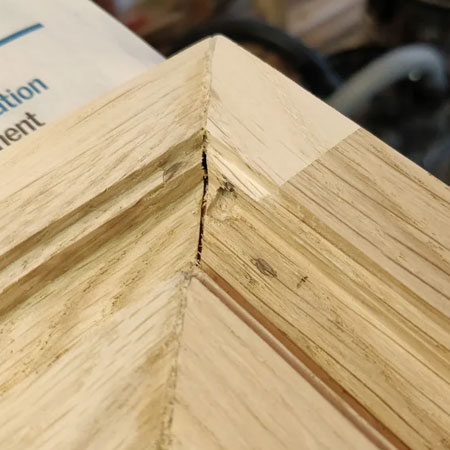
3. Use your router and cutting bit to carve out the channel for the LED strip lighting and a second, higher channel to accept the acrylic strips that are mounted over the LED strip lighting. The finished channel should look like that shown in the image below.
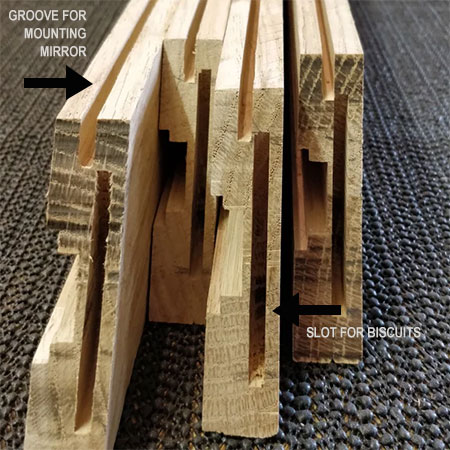
4. Use a groove-cutting bit in the router to make a 5mm wide slot for mounting the mirror.
5. Cut the slots for the #20 biscuits. If you prefer, you can substitute this using a Kreg Pocket-Hole Jig or Festool Domino.
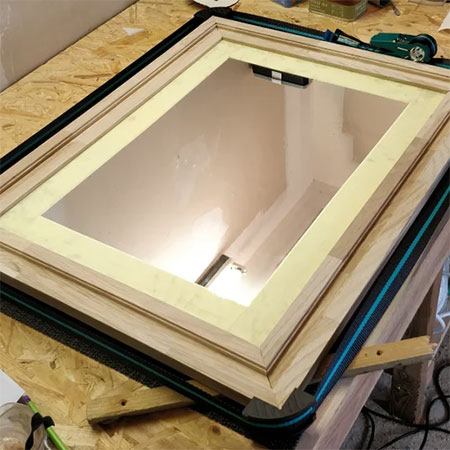
6. Now you can assemble the frame by placing the frame around your cut mirror, applying wood glue to the biscuit slots to insert the biscuits and clamping everything to leave overnight.
7. Fill any gaps at the corners with wood filler and then sand smooth.
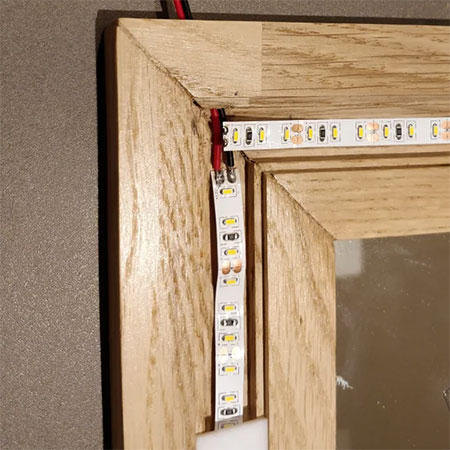
8. Stick the LED strip lighting inside the carved out channel.
GOOD TO KNOW: Drill a hole through the channel to the back in order to push the strip lighting wire through.
9. Cut the acrylic sheet into strips to fit in the channel around the frame and press into place with No More Nails Adhesive. Use a damp cloth to immediately wipe away any excess glue.
FINISHING
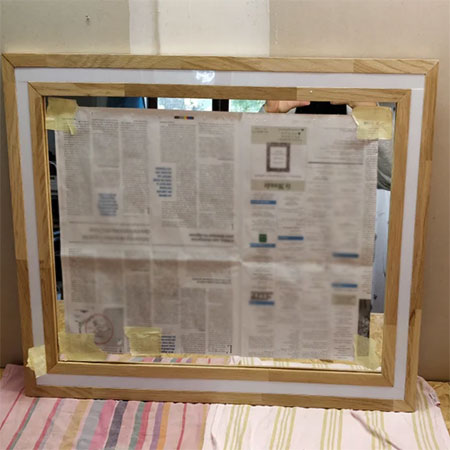
Cover the frame with newspaper to apply your choice of finish. In hindsight, this is better done before inserting the acrylic strips.
Plug in and your new mirror is done!
If you need information on wiring up LED strips, see the bottom of this article for details.