
Easy DIY Installation Steps of Glass Shelves in corners
Having corner glass shelves within your home or office can help you save on space.
19/02/2019
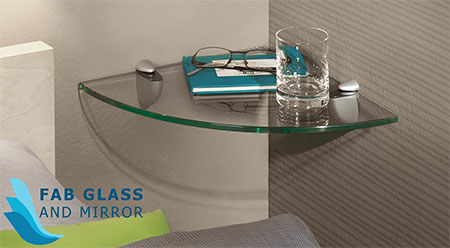
Having corner glass shelves within your home or office can help you save on space. They are useful for both storage and display. When you are looking forward to making your home more elegant, you should check on the type of glass shelves that you install so that you make the space more attractive as well as modernized. Most homeowners make the mistake of buying glass shelves that do not fit in their corners precisely.
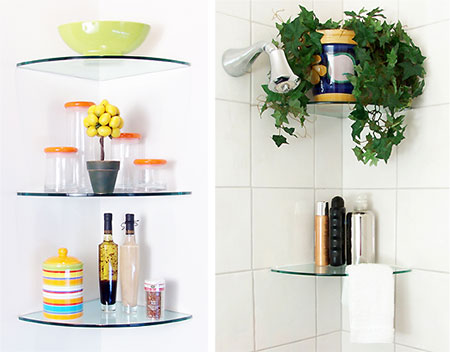
There are basic steps that you ought to follow when you need to create an attractive as well as a modernized outlook of your bathroom, living room or kitchen. The corner glass shelves in the bathroom can be used for holding the towels, toiletries among other essential things. For homeowners who are interested in DIY projects, understanding the basic steps of installation should be essential. With the knowledge of how to install them, you will not find it challenging but interesting. You, however, will be needed to buy the right tools to aid you in the installation process. In this article we will look at every step you must follow during the installation of the glass shelves in corners.
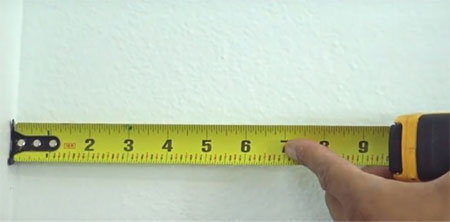
Mark The Location
Marking the spots where you will install the glass shelves in your corners is the initial step of the DIY installation in your home or office. Marking should be done using a pencil so that you can erase easily in case of errors. A straight edged steel ruler should also be used to create straight lines when making the markings. When installing rectangular shaped corner shelves, you should ensure that you mark the long and the short sides.
Marking them will reduce the occurrence of errors when you are mounting the glass shelves. For instance, if you mark the longer and the shorter side, you will find it easy to identify where to place either side of the glass shelf. This is also similar for the triangle or rounded glass shelves.
Draw Horizontal Lines
After deciding the level at which the glass shelves are to be installed, you should mark them using a leveling tool. A straight horizontal line should be drawn from the marked points to ensure that you identify where you will place the bottom side of your glass self. While doing this, you should test your wall to ensure that it is plumb and will not interfere with the orientation of the shelves.
When the wall is not plumb, you should call in a technician to help in making it straight so that you can install the shelves without any hindrances.
Mark Groove Positions
When you buy the glass shelves from vendors near you, they will most likely supply you with a template which has grooves drawn on them. The templates with grooves will help you to identify the exact spots where you will drill. Place the template on the level line that you drew in the previous step and mark the spots where you will drill your groves. When doing this, ensure that you have aligned the groove template to the leveling line.
Without the template being in line, you will find it difficult to keep the glass shelves aligned. Ensure that you have someone who will help you confirm that the template is placed in the right positions before you drill through.

Drill The Holes
The holes are essential elements when mounting your new glass shelves. At the points where you have marked the holes, drill using a professional drill so that it does not spoil your wall. The holes should be precise and well done so that the glass shelves will be fitted correctly. Once you are sure you have drilled the holes as they should be, try mounting the glass shelves. If the glass shelves fit as they should be, you may proceed with the next step. However, if you feel that the holes were wrongly made, you should not hesitate to correct the errors before its too late.
Apply Adhesive
There are different kind of adhesives that are used to install the glass corner shelves if you are doing a DIY project. Consider inquiring from fab glass and mirror to know more about the type of adhesives available. Before applying the recommended adhesive, ensure that you clean the marked spots of any dust particles. This will help to make the adhesive more effective in sticking the glass shelves in the long run. Apply the adhesive in all the marked edges and the groves.
Mount The Glass Shelves
This is the final step after applying the adhesive on the wall. Whether you are installing a triangle glass shelf or any other shape, ensure that you clean the adhesive from all the edges. Support the glass shelf from below and leave it overnight to dry and stick perfectly on your wall. Before placing anything on it, ensure that you test its strength.