Quick Project: Fit This Pullout Pan Rail to a Kitchen Cupboard
An easy do-it-yourself storage solution to cut out digging out pots and pans and storing them organised.
25/10/2021
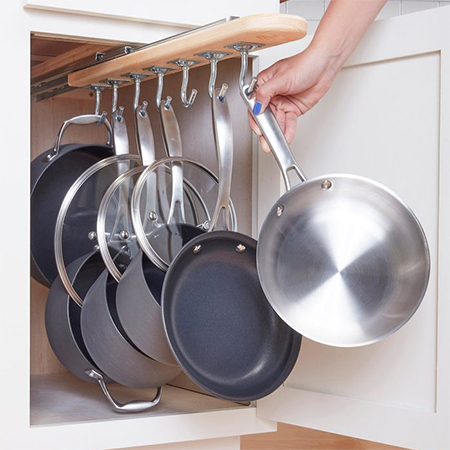
Rattle those pots and pans with the pullout rail that makes it easier to find what you need!
Organising pots and pans isn't an easy task. The only way to store pots and pans is to stack them on top of each other, but the hassle that comes with digging out a particular pan, especially at the bottom of the pile, is no fun. You end up having to take all the pots and pans out of the cupboard every time you need one. This pullout rail can easily be fitted to an existing cupboard and the ingenious design uses ball-bearing drawer runners that allow you to pullout the drawer, remove the pan you need and then push the rail back inside the cupboard. Clever, hey!
CLICK ON IMAGE FOR ENLARGED VERSION
YOU WILL NEED:
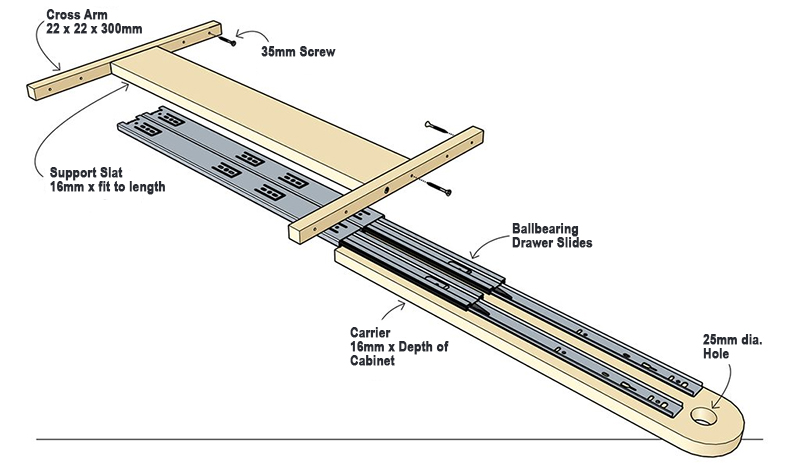
2 of 22 x 22 x 300mm PAR pine - adjust this to the width of the cupboard
1 of 16mm plywood or SupaWood - support slat
1 of 16mm plywood or SupaWood - carrier
2 of ball bearing drawer runner - to depth of cupboard
35mm screws
16mm screws
Wood glue
GOOD TO KNOW: All the sizes shown above are determined by the width and depth of the cupboard.
TOOLS:
Drill plus assorted bits
25mm spade or MAD bit
HERE'S HOW:
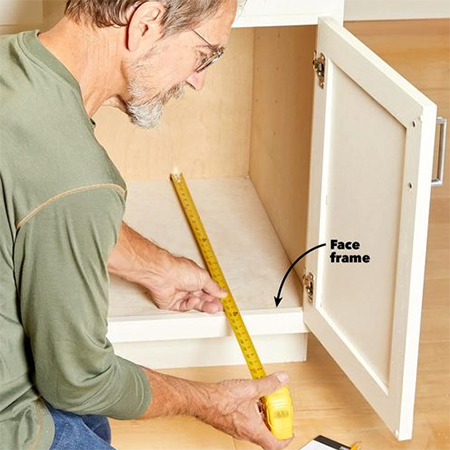
1. Determine the dimensions
Before you can order the materials you need, you have to determine the dimensions of the cupboard where the rail will be mounted. Measure the depth, width and height of the cupboard. The most important measurement is to get the depth accurate as this measurement determines the size of the frame and the ball-bearing drawer runners you will need.
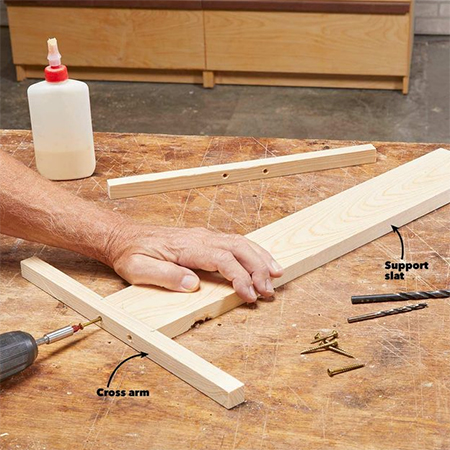
2. Cut and Assemble
With accurate measurements on hand, you can cut and assemble the frame for the pullout rail. It's easy enough; simply use wood glue and 35mm screws to connect the cross arms at both ends to the support slat, as shown below. Make sure to wipe away any wood glue that oozes out.
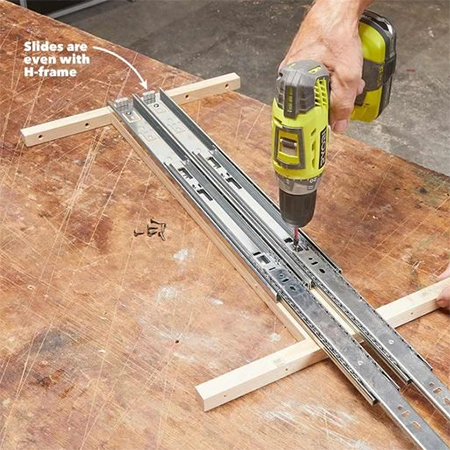
3. Attach the Drawer Runners
Separate the drawer runners as shown in this article and then use 16mm screws to secure the [2] drawer runners to the underside of the support slat. Make sure the ends of the drawer runners are flush with each other.
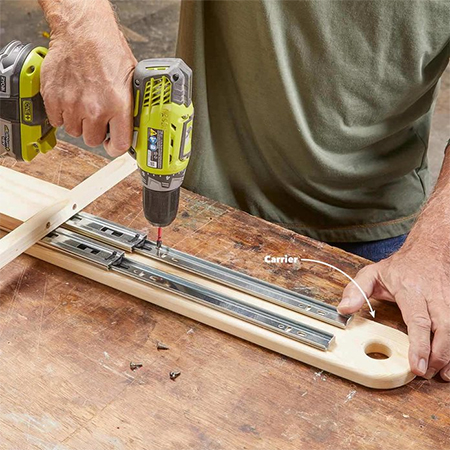
4. Complete Installation of Drawer Runners
The other part of the drawer runner is screwed onto the top of the carrier. Make sure to have all the measurements correct so that the [2] drawer runner components can be slotted in place.
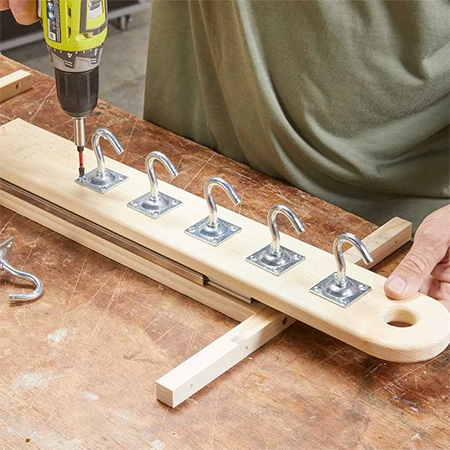
5. Add the Cup Hooks
You probably won't be able to find the cup hooks shown below but that doesn't matter. You can use screw-in cup hooks, preferably a strong design, to hold your pots and pans. Screw the cup hooks firmly in place.
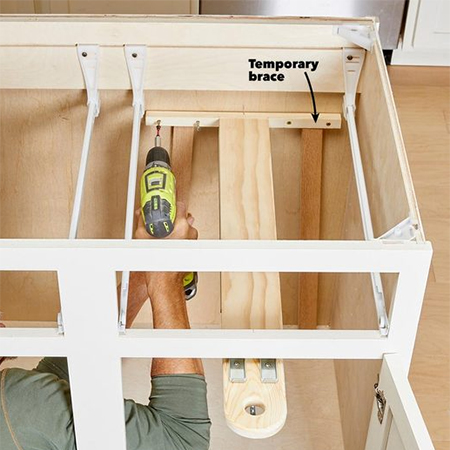
6. Install the Pullout Rail
Now all that is left to do is to fit the assembly inside your kitchen cupboard and test it out.