Make These Pine and Plywood Storage Containers
Make a set of small, medium and large pine and plywood storage containers for your kitchen.
05/09/2021
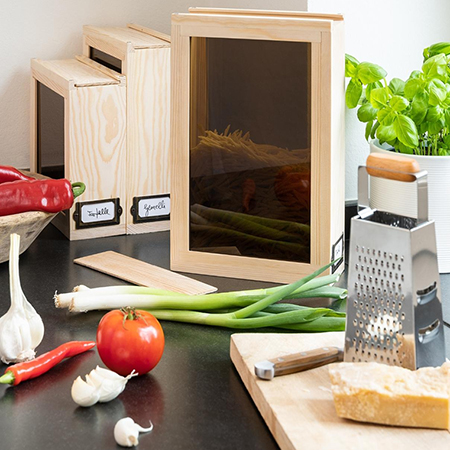
These pine and plywood storage containers are excellent at keeping foods fresh and they will add something different to your kitchen countertops. The wood food containers will add interest and texture to the kitchen and are definitely more appealing than conventional plastic containers.
Pop into your local Builders or hardware store to grab all the supplies you need and follow the step-by-step instructions below to make up a set of these wood storage containers for the kitchen.
YOU WILL NEED:
1 of 13 x 80 x 2000mm PAR pine cut to lengths:
- Small Container
1 of 200mm - base
2 of 179mm - side panels
- Medium Container
1 of 200mm base
2 of 219mm side panels
- Large Container
1 of 200mm base
2 of 269mm side panels
3 of 12 x 12 x 1000mm grooved strips (4 x 4mm groove) cut to lengths:
- Small Container
2 x 200mm - lid
4 x 174mm - base +lid
4 x 151mm - side panels
- Medium Container
2 of 200mm - lid
4 x 174mm - base + lid
4 x 191mm - side panels
- Large Container
2 of 200mm - lid
4 of 174mm - base + lid
4 of 241mm - side panels
1 of 64 x 200mm 3mm plywood
2 of duracryl panels 3 x 247 x 156mm (@ Builders R162 ea.)
8 of 3.5 x 30mm screws
OPTIONAL: Nameplate and screws
OPTIONAL: Howard butcher block oil or conditioner
Wood glue
Scrap offcuts
TOOLS:
Drill plus assorted bits
Countersink bit
Sander plus assorted sanding sheets
Jigsaw or NanoBlade saw
Multifunction or oscillating tool
Clamps
Tape measure and pencil
safety gear
HERE'S HOW
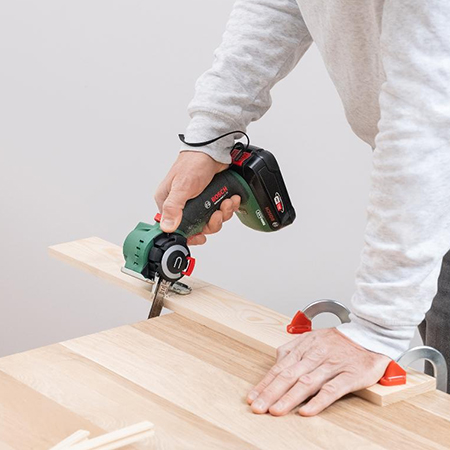
If you don't get the pieces cut to size, use a Jigsaw, NanoBlade saw, or mitre saw to cut all the pieces.
Step 1
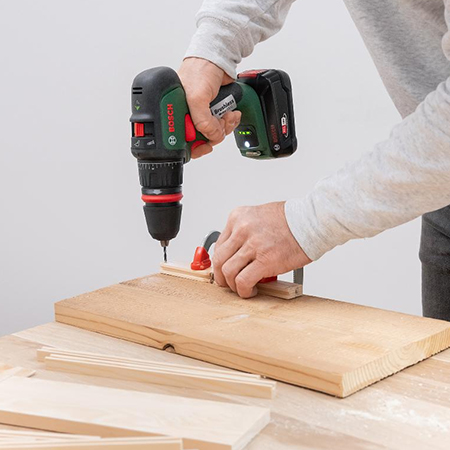
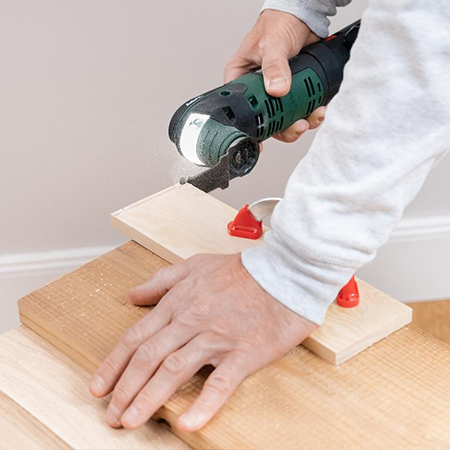
Using a scrap piece of timber as a sacrificial board, place the small base (80 x 200mm) on this and drill a hole at the four corners with a 3mm wood bit and countersink. The holes should be 5mm in from the edges. Repeat this process for the [2] grooved strips (12 x 200mm) being careful not to drill in the grooved area.
Step 2
On all side panels, mark a recess of 4mm (height) x 12mm (width) at the top end of each panel. The best way to do this is with a multifunction or oscillating tool.
Step 3
Apply a bead of wood glue to the grooved strips and press down to the centre of the side strip edges, making sure that the grooves face upwards. Repeat this process for the base plate.
Step 4
On the lid, glue [2] 200mm grooved strips together with 174mm grooved strips, ensuring that the groove on the longer strip faces to the side and, on the shorter strip, the groove should be face up. The grooves serve as a guide rail.
GOOD TO KNOW: Allow all the glued sections to dry overnight.
Step 5
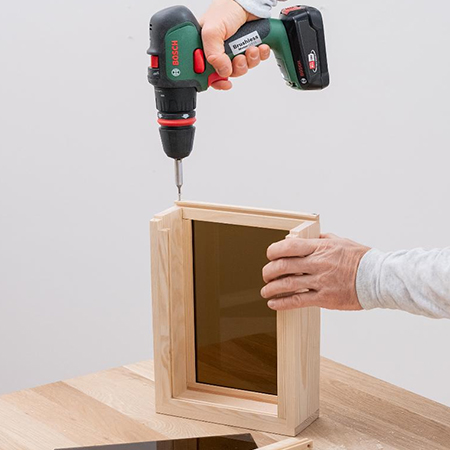
Now it is time to assemble the containers. Secure the ends of the side panels - those without a recess - to the base. Take the previously glued grooved strips and attach these to the side with the recesses. First, secure the base plate to the side strips by pre-drilling 3mm pilot holes so that the wood doesn't split.
Insert the duracryl panels from top into the shell that has been created. Now you can fit the grooved strips previously glued together to make the lid, making sure that the grooves face inwards.
Finally, drill 3mm pilot holes to screw each side together.
Step 6
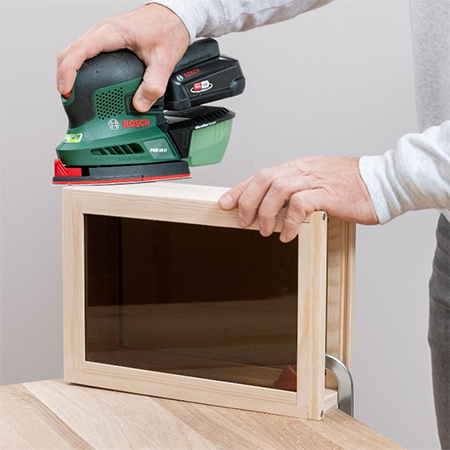
In this last step, sand and smooth all the edges, starting with 120-grit and finishing off with 240-grit. You also need to sand the plywood panel until it fits perfectly into the grooves to create the sliding lid.
GOOD TO KNOW: If you wish, you can apply Howard Butcher Block Oil or Conditioner to the wood to extend the lifespan. Only use food-grade products for this.