
Make a Kitchen Cupboard Organiser
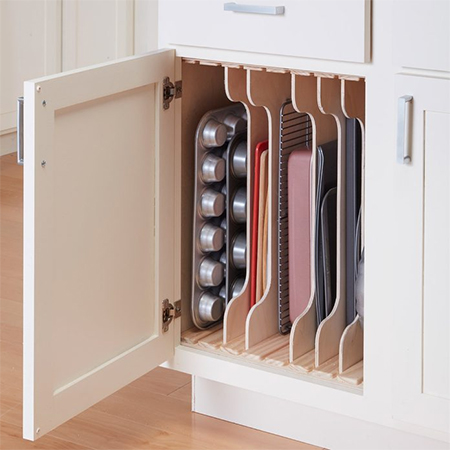
Any organisation you can add to kitchen cupboards makes your job easier and this DIY organiser lets you store assorted cookware for easy access.
16/01/2022
family handyman magazine
If your kitchen cupboards don't have at least some organisation, they usually end up in a mess and you have to pack everything out before you find what you need. Making this kitchen cupboard organiser is a weekend project that will immediately have your cupboard organised and allow you to store accessories such as cutting boards and baking trays neatly and ready for use.
Make using pine plywood, or you can substitute with pine or your choice of hardwood, this project won't cost you much and will save you time normally spent in trying to find what you need.
YOU WILL NEED:
Sheet of 6mm pine plywood or veneered plywood OR 6mm SupaWood
1 of 19 x 44mm x 1800mm PAR pine
1 x 32 x 32mm x 1800mm PAR pine
Wood glue
40mm chipboard screws
TOOLS:
Drill plus assorted nits
Pneumatic nailer, pneumatic stapler, or heavy-duty stapler
Table saw or circular saw
Jigsaw
Orbital sander plus assorted sanding pads
Tape measure and pencil
Safety gear
Pop into your nearest Builders store for all the tools, materials and supplies needed to make this project.
HERE'S HOW:
Good to Know
After cutting all the individual components to make the kitchen cupboard organiser, sand them smooth.
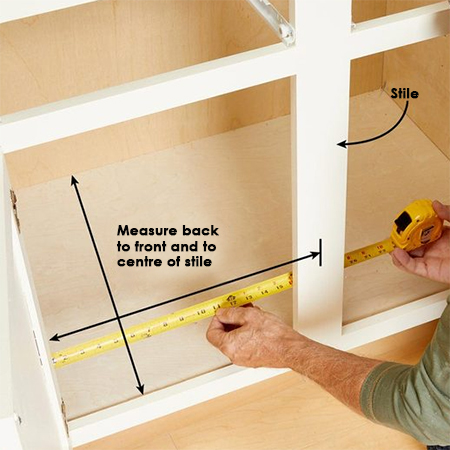
Step 1
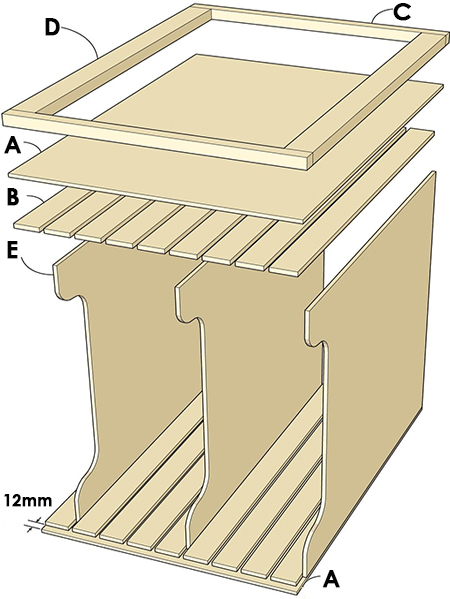
Before doing any assembly, you need to take the necessary measurements to cut the necessary components to fit the existing cupboard. Cut [2] pieces of 6mm plywood for the [A] Top and Bottom Supports, making sure to allow a bit extra so that the end is hidden behind the centre stile. For a double cabinet, you can cut this to span the entire length.
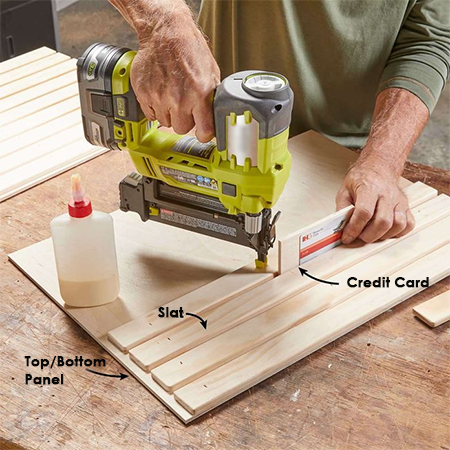
Step 2
Cut the 6mm plywood into Slats [B] that are 12mm shorter than the Top and Bottom Supports. Attach the slats to the Top and Bottom Supports as shown in the diagram above. Use a scrap offcut of 6mm plywood and an old credit card as a spacer to equally distance the slats over the supports. This will give an extra little bit of wiggle room for when sliding the Dividers into place. Use a pneumatic nailer, pneumatic stapler or heavy-duty stapler and wood glue to secure the Slats in place.
GOOD TO KNOW: If using a pneumatic nailer or stapler check that the pins will not be too long and go through the Support boards or angle them slightly to prevent this.
Step 3
Now it is time to build the Top Frame [C] and [D] to fit inside the cupboard, whether single or double volume. Use a pneumatic nailer or screws and wood glue to assemble the frame.
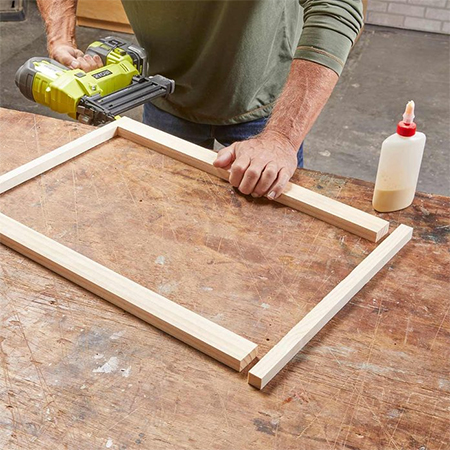
Step 4
Position the Top Frame under the cupboard inside frame and secure this in place with 40mm screws drilled through the back of the frame and into the cupboard frame.
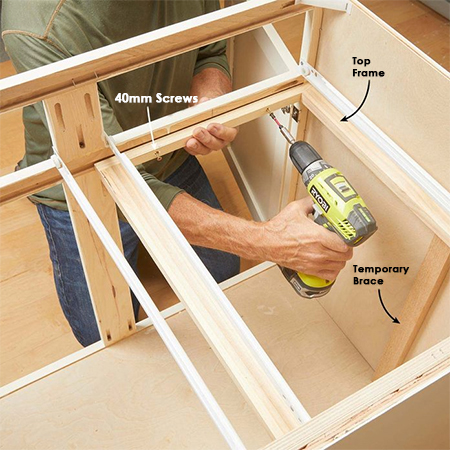
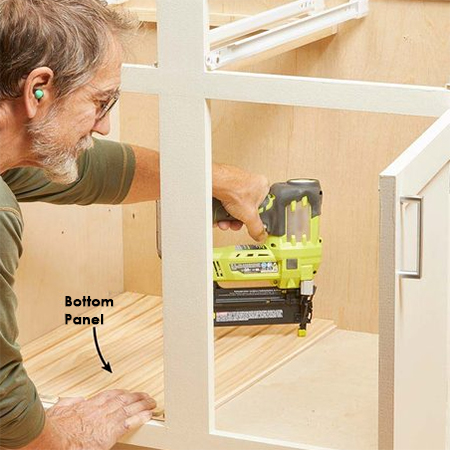
Step 5
With the Top Frame [C] and [D] in place, secure the Top Supports [A] to the top and bottom of the cupboard. The Top Support fits underneath the Top Frame while the Bottom Support is fastened to the base of the cupboard.
Step 6
The final step in this project is to cut the Dividers. Measure, mark and cut one panel and then use this to cut more panels. Cut out a section using a jigsaw and then sand smooth. You can make as many dividers as you need, and these easily slot between the slats.
