
Weekend DIY - Add a Mosaic Splashback
Got some spare time this weekend and looking for an easy DIY project? Why not add a splashback to your kitchen or bathroom?
17/01/2020
Every kitchen and bathroom needs a tiled splashback, not only to protect the walls from grime and grease, but also to add some extra detail to a kitchen. This weekend DIY project shows how easy it is to add a mosaic tile splashback to a kitchen, and you can just as easily do it in your bathroom as well.
All the materials for this project can be purchased at your nearest Builders Warehouse, and you may be surprised at how affordable mosaic tile can be. Plus, they have a wide selection of mosaic tile options to choose from, so that you can select the perfect size, colour and design for your kitchen or bathroom.
If this is your first time doing a tiling project, make sure you buy what is needed to complete the project and then follow the step-by-step instructions below. Read through the tutorial before starting the project to ensure you understand what is involved and the steps required to see the project through to completion. And yes, you can do this project in a weekend!
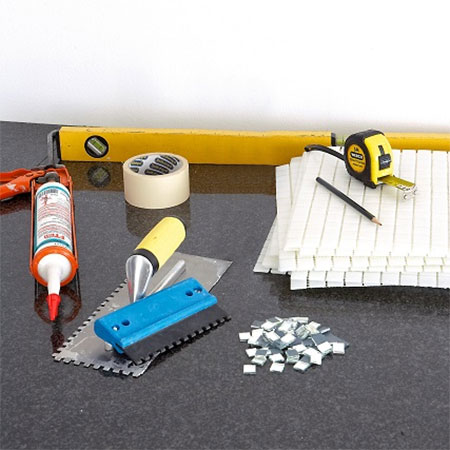
YOU WILL NEED:
Mosaic tile sheets (measure up the area to work out how many sheets/boxes you need) - see Preparation below
OPTIONAL: We also added some coloured and mirror mosaic tiles as an accent design
Tile spacers
Tile adhesive - see Preparation below
Tile grout
Latex bonding liquid
Tiling sponge
Squeegee
Painter's tape
Silicone sealer - in caulking gun
TOOLS:
Spirit level
Trowel with notches
Scissors
Tile cutter or Dremel Multitool and cutting discs
Tile nippers
Tape measure and pencil
HERE'S HOW:
Preparation
To calculate how many sheets or boxes of mosaic tile you will need, measure the height and length of the splashback you want to install. Once you have the height and length you can calculate the square meterage. Take this to your nearest Builders Warehouse and they will be able to provide you with a cost per square metre, depending on the style of mosaic tile you choose. They will also be able to tell you how many bags of adhesive you will need.
GOOD TO KNOW: Using a pre-mixed tile adhesive may cost slightly more, but reduce hassle.
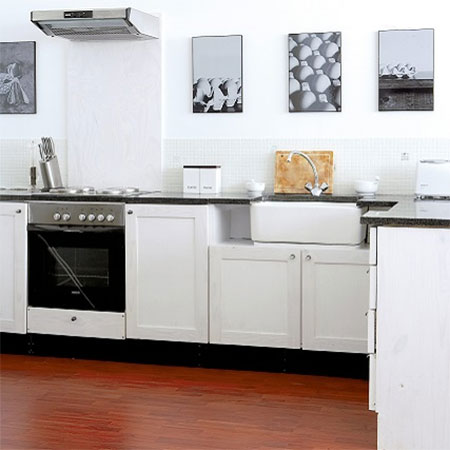
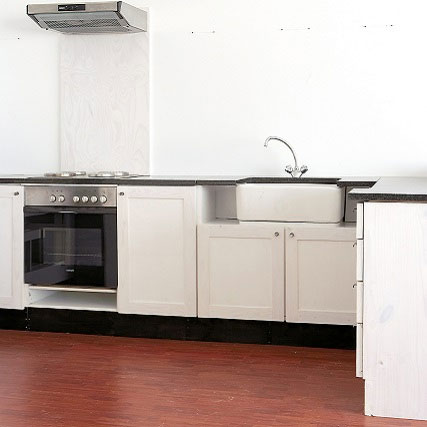
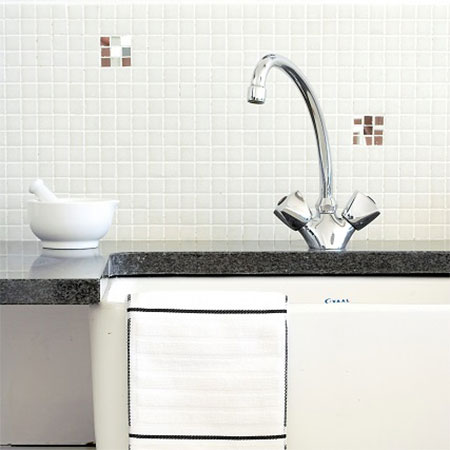
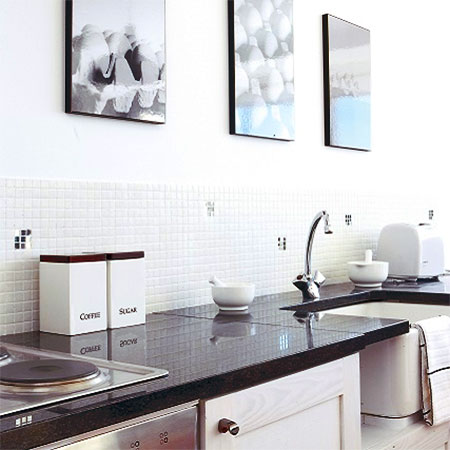
Before you begin, double check that all reference lines and borderlines are plumb with the spirit level and then use painter's tape to mask along all the borders and along the top of the countertop. The layout shown here is a simple one comprising a single row of mosaic tile sheets applied above the countertop, interspersed with nine decorative mosaic tiles replacing four mosaic tiles at random intervals.
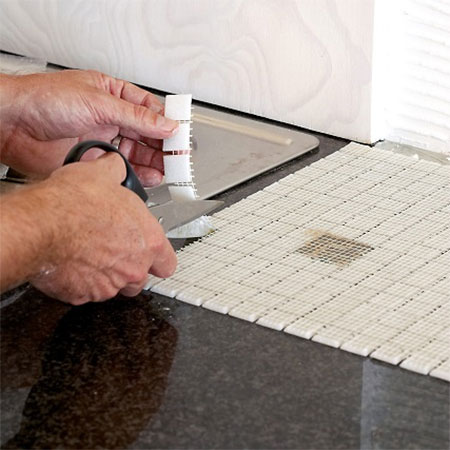
1. Use scissors to cut the mosaic tile sheets to fit around any fittings or fixtures such as light and power outlets. Use a tile cutter or Dremel Multitool, as well as a tile nipper, to cut and trim tiles to fit.
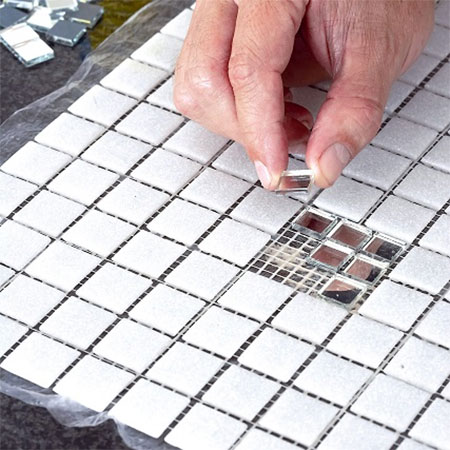
2. If you are adding the decorative design, as shown in our project, remove selected tiles from the mosaic sheet and glue these in place. If you use a 10-minute epoxy adhesive to glue the mosaic bits onto the sheet, you won't have to wait too long for the adhesive to cure.
3. Starting at the bottom, apply tile adhesive using the notched trowel. Only work on a square metre at a time, so that the adhesive remains wet as you work. Apply the tile adhesive as evenly as possible, using the trowel to spread out the adhesive smooth and level.
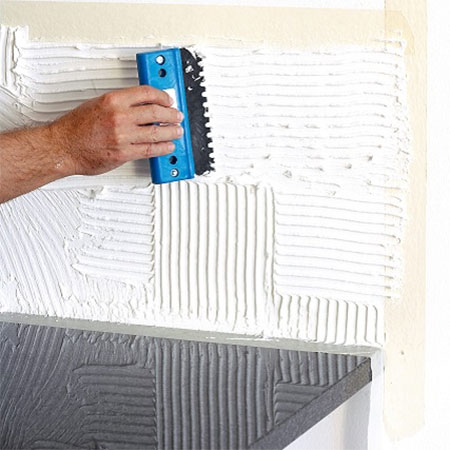
4. Place the bottom of the mosaic sheet at the bottom of the wall and press the sheet lightly into the adhesive, so that the adhesive is not pushed completely through the gaps. It is recommended that you use tile spacers on vertical surfaces to avoid any sliding or movement.
GOOD TO KNOW: For perfectly aligned grout lines, use a slight twisting motion to line up the sheet with those to either side.
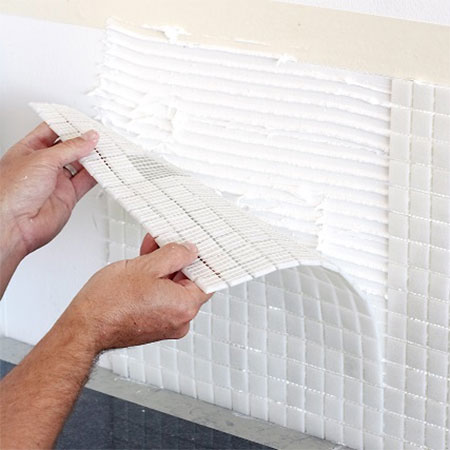
GOOD TO KNOW: Where adhesive squeezes through the grout lines, remove this with your fingertip while still wet.
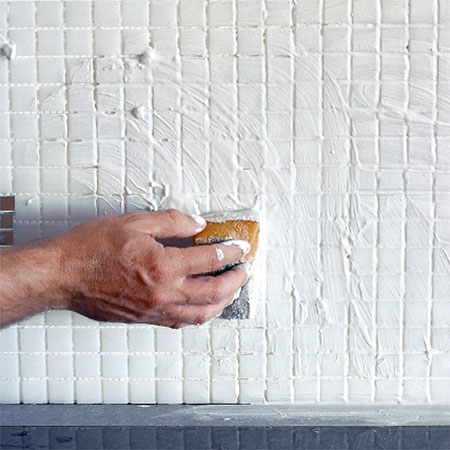
5. After fixing all the mosaic sheets you can mix the grout. Add latex bonding liquid to mix the tile grout - instead of water - and make a smooth paste. The bonding liquid ensures the grout is water-resistant.

6. Using your sponge or squeegee, work the grout into all the gaps on the mosaic. Leave this for about and hour and then wipe with a clean, slightly damp sponge to remove the excess grout. Once completely dry - overnight - polish the entire surface with a dry cloth.
7. Finish off with a bead of silicone sealer along the bottom of the tiles and the countertop. For an even straight line, once again apply painter's tape above and below where the silicone sealer will be applied, apply the silicone sealer, smooth with a fingertip and then remove all painter's tape while still wet.
TOP TIP: Clean all your tiling tools while the adhesive or grout is still wet. Wipe to dry and then put these away until you need them again.
gallo images / home magazine