
Practical undersink storage drawers
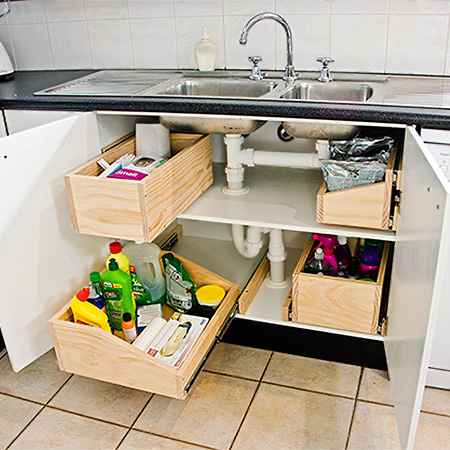
Use the space under your sink for organised storage for all your cleaning products with these easy undersink storage compartments.
au.lifestyle.yahoo.com
The space under your sink usually ends up as a dumping ground for all sorts of odds and ends. Adding pullout storage compartments allows you to not only store more, but have easy access as well.
YOU WILL NEED:
2 of 19 x 184 x 385mm pine - drawer front / back
1 of 19 x 184 x 500mm pine - drawer high side (against cabinet sides)
1 of 19 x 89 x 500mm pine - drawer low side
1 of 385 x 460 x 12mm plywood - drawer base
Offcuts for drawer supports
450mm* ball-bearing drawer runners and 16mm screws
Woodoc interior sealer and paintbrush
TOOLS:
Drill / Driver plus assorted bits
Jigsaw plus clean-cut blade
Tape measure and pencil
*Or to fit drawer length
Your local Builders offers various pine and pine products.
HERE'S HOW:
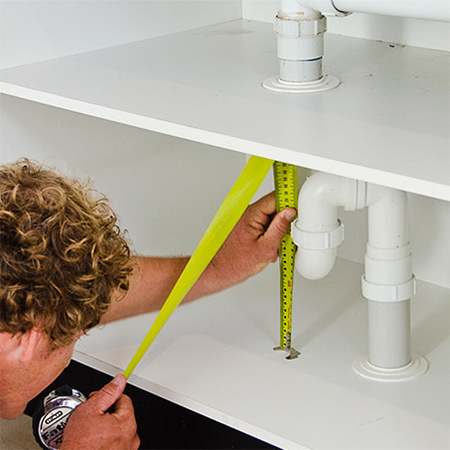
1. Not all spaces are going to be the same, so measure space you have to work with and be sure to allow for pipes or fittings. Most cabinets are 550 deep and these drawers have a maximum depth of 500mm. Also allow for the distance a drawer will have to be out from cupboard sides to clear hinges.
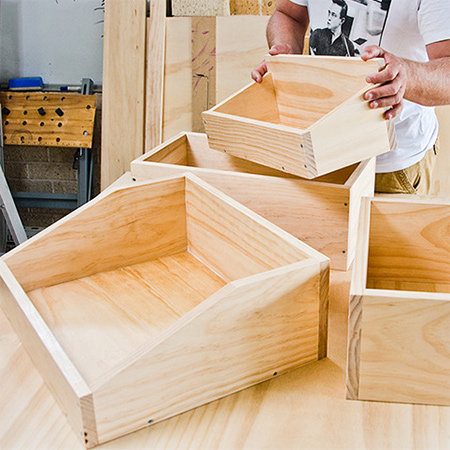
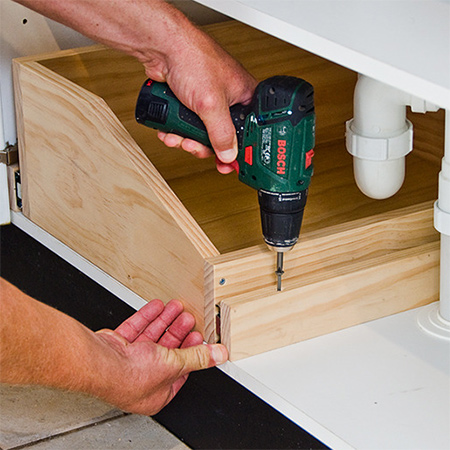
2. Your drawer sizes will obviously depend on the available space. For this project the most practical drawer design has an angled front and back to allow for the sink fittings but still be as wide as possible - with a high side to hold high containers. Have your pieces cut to size at your local Builders, or cut the pieces using a jigsaw.
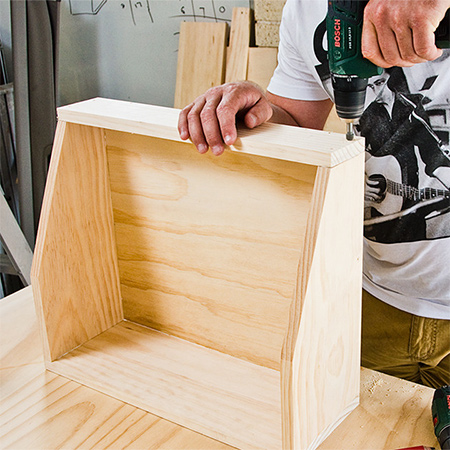
3. Drill 3mm countersunk pilot holes to join the sections together using wood glue and screws, attaching the frame to the plywood base. On the visible front face use glue only so that there are no screws visible. Clamp until the glue dries, or use a pockethole jig or biscuit joiner to secure.
4. Assemble any additional drawers and sand before applying Woodoc interior sealer. Apply sealer to the inside and outside of all the drawers to protect them from moisture and make them easy to keep clean.
5. Separate the runner mechanism by flicking the plastic levers on the drawer runners. To fit bottom drawers, runners will have to be mounted on the drawer supports on each side.
On the cabinet side, the support blocks with fitted 13mm wide runner will clear the door hinges easily.
On the other side of the drawer the support blocks are fixed to base of cabinet to support the drawers. Do not attach the support blocks to the base at this stage.
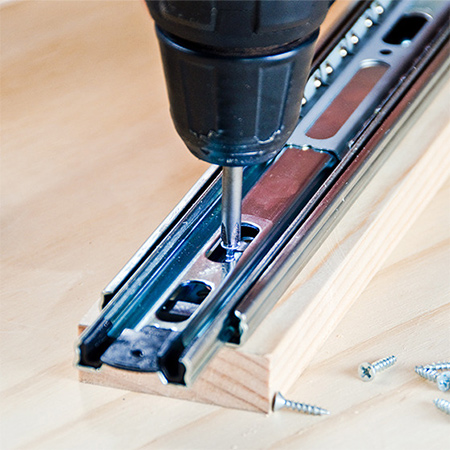
6. To fit cabinet part of runners, measure and draw a line 30mm from - and parallel with - the bottom edge of each block. Screw the runners to the support blocks, aligning screws with 30mm lines and keeping the front of runner 2mm set back from the front. Remember to make left- and right-handed assemblies for each drawer.
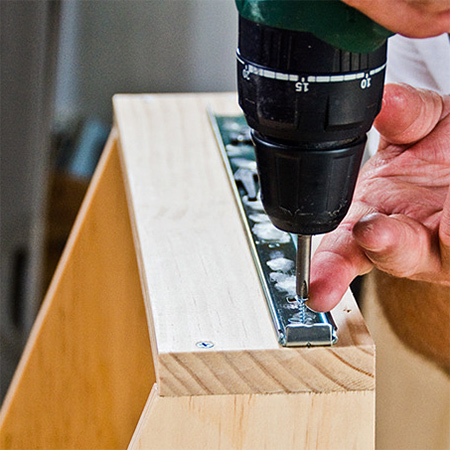
7. Fit drawer components to each side of drawer so screws will be on a line 27mm from bottom of drawer with runner flush at front. Once assembled, this will give a 3mm clearance under drawer. Clips the drawer runners back together (complete with support blocks on one side) and test to ensure smooth operation.
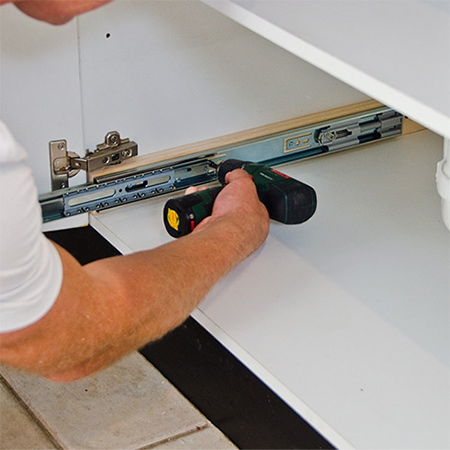
8. Remove the drawers, unscrew the drawer runner from the support blocks in order to secure the support block to the base of the cabinet. Also secure other side support block to the side of cabinet. Screw down through the support block through into base after drilling a long pilot hole through pine block.
GOOD TO KNOW:
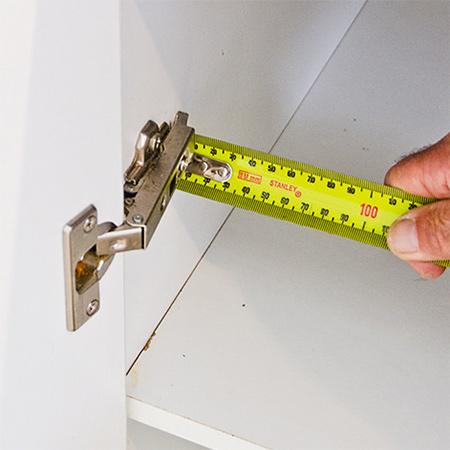
When fitting upper drawers the
shelf may not be strong enough to support drawer
without sagging. For this reason, make drawers
narrower and attach two drawer runners to side of
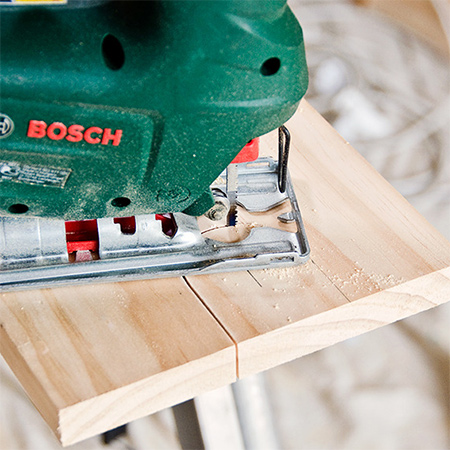
cabinet on a larger support block. ABOVE: Mark position of hinge on block and cut a
neat housing using jigsaw to fit around hinge.
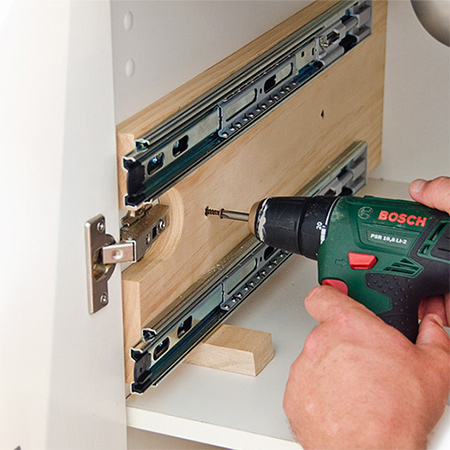
9. Mark lines 25mm from the top and bottom, and 2mm in from the front. Screw the cabinet part of drawer runners on these lines. Attach the block with (2) runners to the cabinet. Use 19mm spacers to get right height. Repeat the measurements to screw the drawer component to drawer. Push in the drawer and make sure it runs easily and smoothly.
