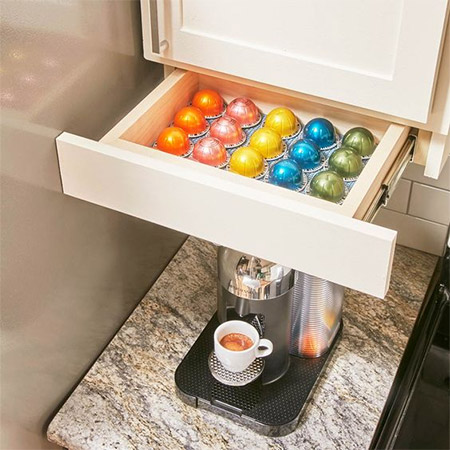
Handy under-cupboard storage drawer
If you're running out of storage in your kitchen, here's a way to install handy storage drawers underneath your wall mounted cupboards.
18/06/2018
family handyman
When you need extra storage in a kitchen there's a way to add more storage by using the space underneath a wall mounted cupboard or cabinet. In this project we show you how to make a storage drawer that fits neatly under you wall cupboard to provide extra storage.
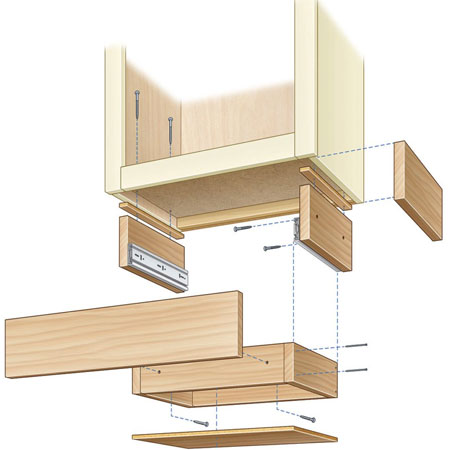
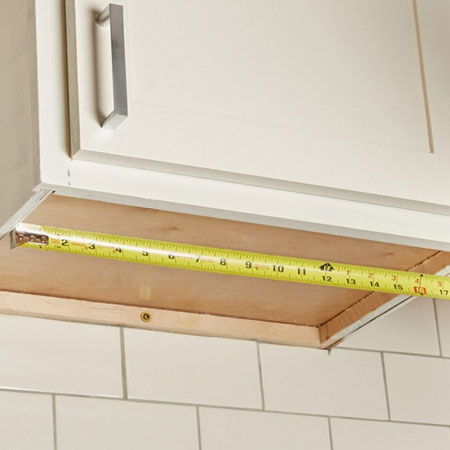
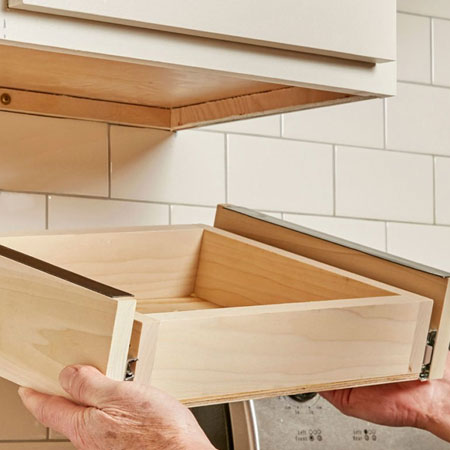
1. Measure up the space below the cupboard where you want to install the drawer. The drawer should fit underneath the cupboard and allow space on both sides for adding trim and at the front for the drawer face.
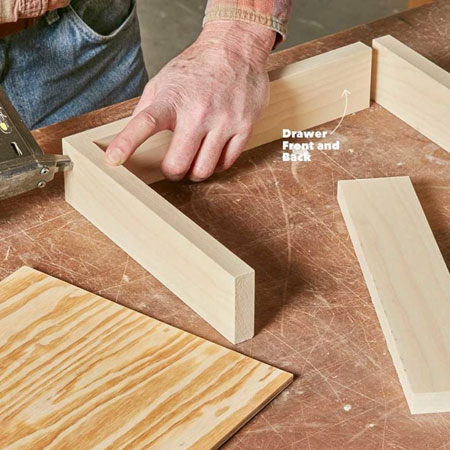
2. Assemble the drawer frame using 19 x 69mm pine for the front/back and sides. Join these together using wood glue and a pneumatic nailer, or screw them together.
GOOD TO KNOW: You will find a selection of PAR pine products at Builders Warehouse.
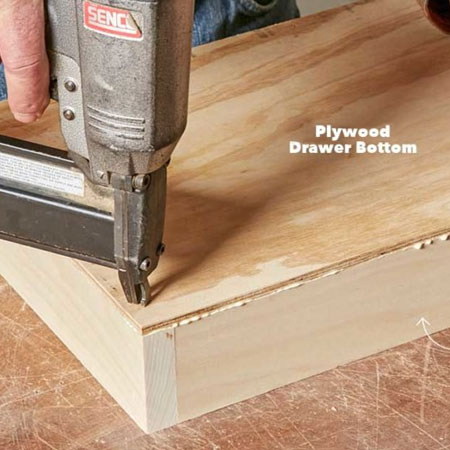
3. Secure the base of the drawer onto the frame with wood glue and pneumatic nailer - or use a hammer and panel pins. For the base of the drawer you can use 3mm plywood, Masonite or hardboard.
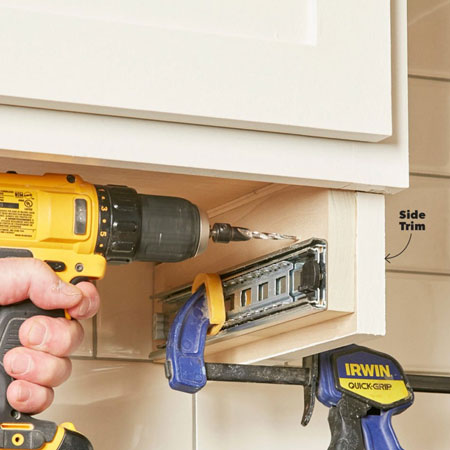
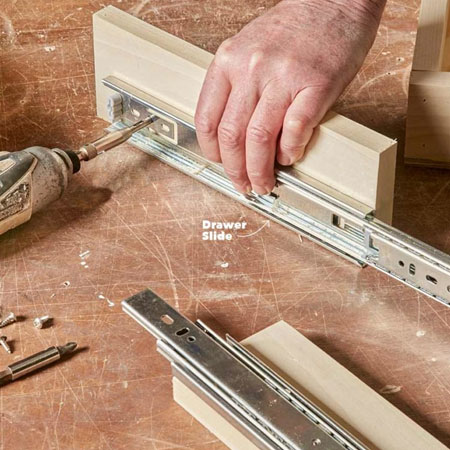
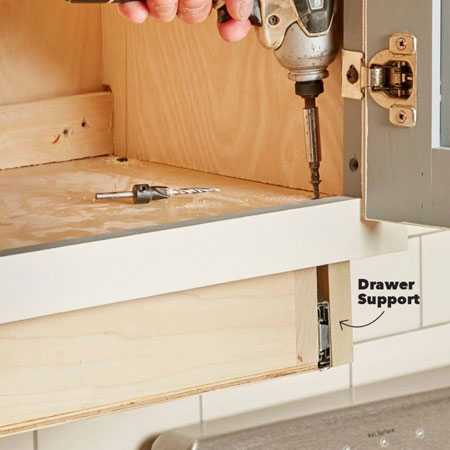
4. Cut [2] pieces of 94mm wide PAR pine to the same length as your drawer sides for the drawer supports. Attach ball bearing drawer runners to both sides. Align the runners with the bottom edge of the side supports and secure with 16mm screws.

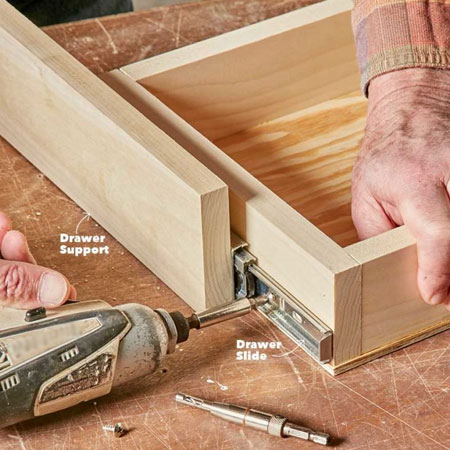
5. Place the drawer supports against the drawer frame and extend the drawer sliders to allow access for securing the drawer slider to the drawer frame. Make sure to align so that the front edge is flush.
GOOD TO KNOW: Have someone on hand to help hold the assembled drawer underneath the cupboard.
6. Have a helper hold the drawer in place while you secure to the cupboard using cut screws.
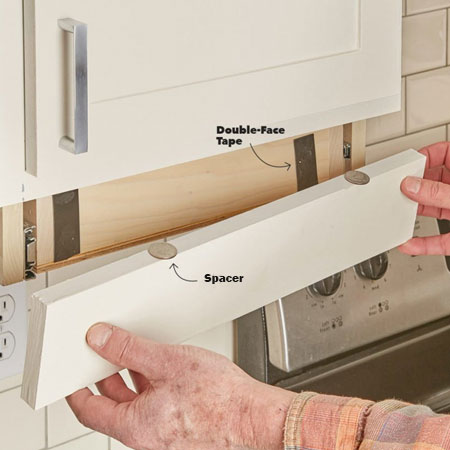
7. The drawer front is cut to the exact same length as the cabinet frame and can be made using the same materials as the existing cupboards. Alternatively, make the drawer front using 16mm SupaWood painted to match the cupboards.
8. Use double-sided tape to temporarily hold the drawer front in place and then remove the drawer and drive screws through the frame into the drawer front for permanent placing.
9. To attach the side trim to finish off the drawer, clamp the trim in place and secure through the drawer supports into the trim to secure in place.