
A Kitchen Renovation That Goes From Simple To Stunning!
If you are looking for ideas to transform your simple kitchen into a stunning kitchen, take a look at this DIY kitchen renovation and gather ideas you can use for your own kitchen.
16/03/2021
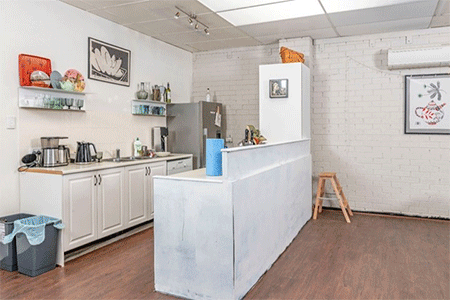
This very basic kitchen was transformed into a stunning beauty on a limited budget simply by making use of readily available and affordable ready-made kitchen cupboard carcasses, some clever ideas and a bit of spare time over a weekend. Rather than have to pay an exorbitant amount for a kitchen installation company to do the job, this homeowner took on most of the work on her own with a helping hand when required.
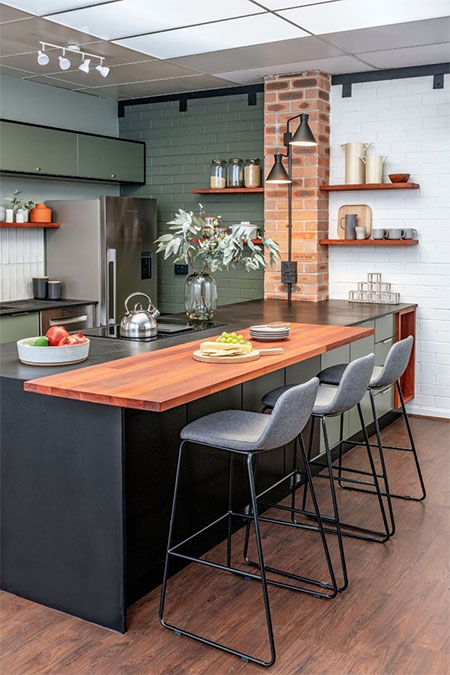
The transformation is amazing and the installation of a much larger island gives the new kitchen a spacious and modern look and feel with a dash of edgy industrial elements that assisted in keeping the total cost lower.
The original layout for the kitchen wasn't altered to remove the necessity of having to employ plumbing and electrical contractor for major alterations. With the sink, stove and appliances in the same position, nothing extra needed to be done to fit everything in place. However, you may need assistance with plumbing in the sink and wiring up an oven or hob and perhaps even an extractor, so keep this in mind when setting up your budget for the renovation.
GIVE YOUR KITCHEN AN AFFORDABLE RENOVATION
It is always a good idea to have a plan of action before you start doing any work on a renovation of any kind. Sort of a step-by-step of what needs to be done and the order it needs to be done in. You don't want your kitchen to be out of action for too long, so planning will ensure you get the job done faster and ensure you have everything on hand that you need.
Step 1
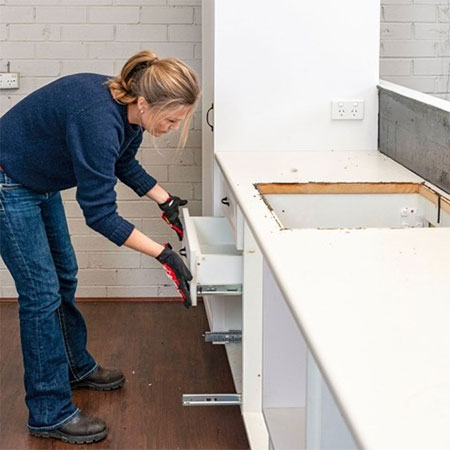
The first thing to do when removing all your existing kitchen cabinets is to switch off the main water and electricity supply. You will switch off the water supply at the main stopcock and have some buckets handy to catch any remaining water in the water pipes. The electricity is switched off on the main distribution board. It's a good idea to let everyone know well in advance that both water and electricity will be off for a while, or at least until you can have all the new cupboards in position.
Step 2
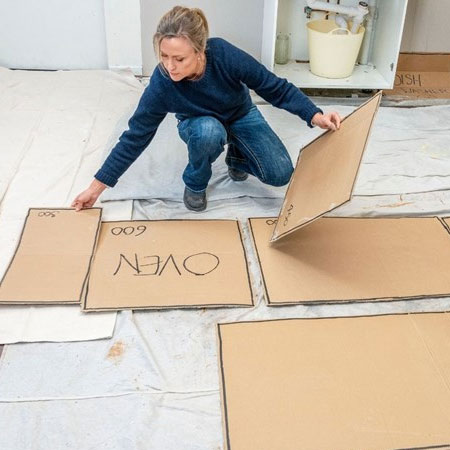
Remove all the existing cupboards and put them out of the way. If you are selling these, put them in a safe place where the buyer can easily collect them. You will also need to remove appliances from the room to prevent them from being damaged and also to give you space to plan out what goes where.
Using cardboard boxes to make cutouts as templates for your cupboard and appliances. This is a practical way to move them around until you are happy. It also lets you plan the space and decide what goes where for maximum functionality.
Step 3
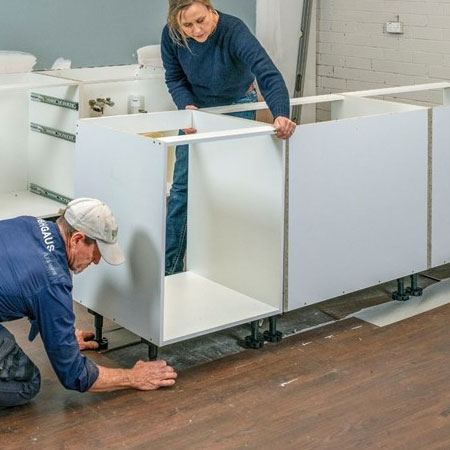
Pre-order the ready-made cupboards you need for the kitchen so that there are delivered in advance and ready to fit into the empty kitchen. Ordering units with adjustable legs make it easier to ensure the height is perfect, especially if the floor is uneven or not perfectly level.
If the cupboards are not fitted with adjustable legs, you will find these at Builders or Gelmar and can fit them yourself. Alternatively, make some shims that can be placed under the cupboards to level them out. These will be hidden behind the kickplate along the base, so no one will even know they are there.
Adjustable legs on kitchen cupboard carcasses make it easy to set the height for a perfectly level top.
Step 4
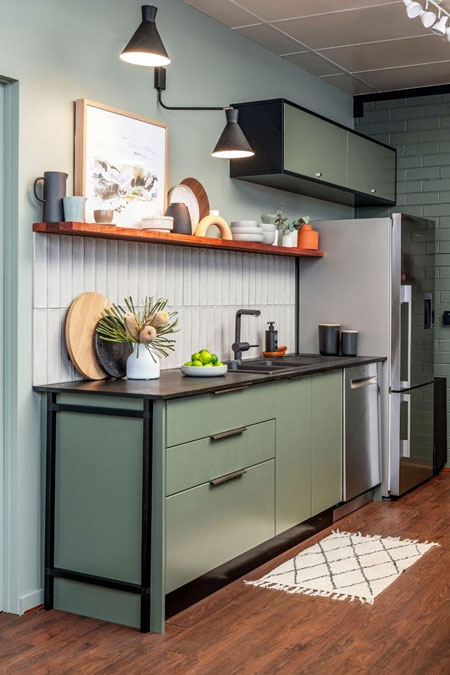
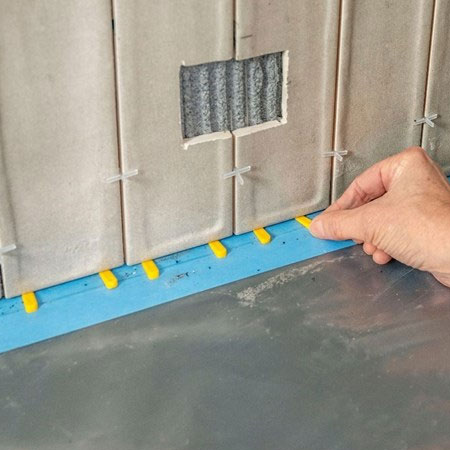
After installing the cupboards and countertops, you can then start any tiling that needs to be done. If you prefer, you can put this off until later when you have more spare time and at least use the kitchen as-is for the time being. For this kitchen renovation, only the backsplash behind the sink was tiled, the rest being face brick.
Step 5
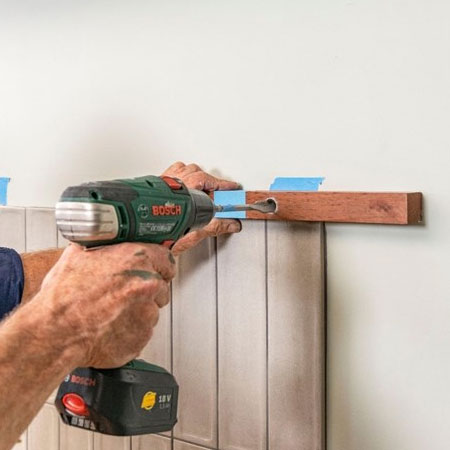
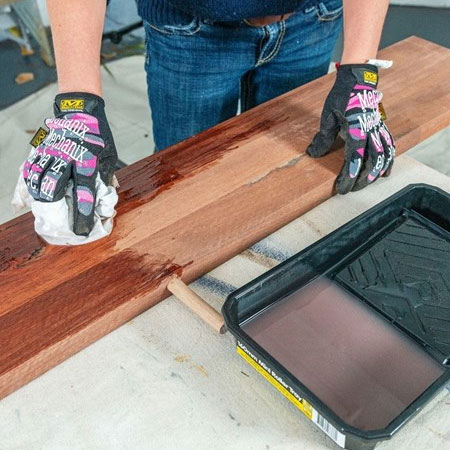
A long, timber floating shelf was installed above the tiles and this not only gives a nice edging for the tiled backsplash, but also provides for essential storage. Meranti timber used for the shelving, which is readily available at Builders, your local hardware store or timber merchant. Meranti is far more durable than pine and gives a rich, warm look to the kitchen.
Step 6
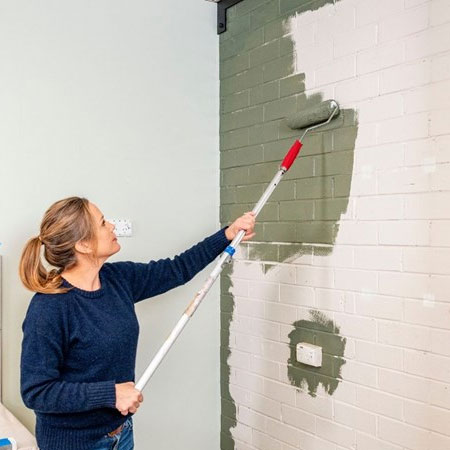
While waiting for tile adhesive and grout to dry, you can start doing any painting. For this renovation, the face brick wall was primed before applying a medium-grey wall colour. This adds to the industrial-chic look of the finished kitchen and ties in with the paint colour used on the kitchen cupboards. Painting the cupboards was done at a later stage once the kitchen was installed and spare time available.
If you are installing new flooring in the kitchen, do any painting work beforehand to prevent paint splatters or damage to the flooring.
Step 7
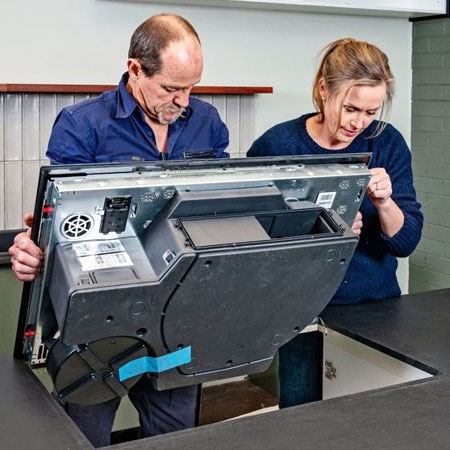
Now it's time to bring back the appliances and install new ones. In this case a new sink, oven and hob were installed. If you have the time, cut out the openings for the appliances to bring down the cost of what a plumber or electrician would charge to do the work for you.
HOW TO MAKE FLOATING SHELVES
Yet another DIY project to save you money on your kitchen renovation is to make your own floating shelves. Use PAR pine, PAR meranti or your choice of hardwood to make floating shelves to a specific size and measurement to fit into your kitchen.
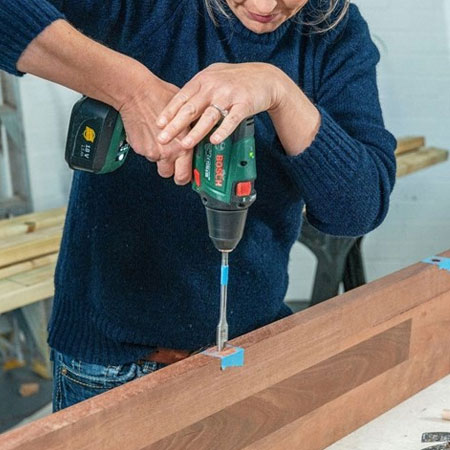
Use dowels, biscuits or a pocket-hole jig to join PAR planks together to create the desired width for the floating shelves and then sand smooth and finish with a suitable sealer.
better homes and gardens australia