
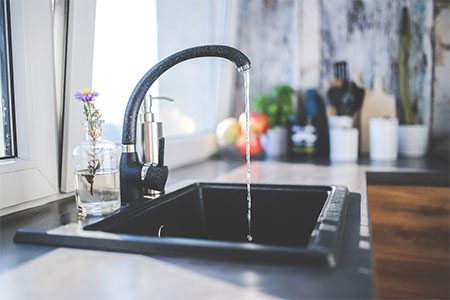
How to Repair Low Pressure in a Kitchen Faucet
The kitchen sink is an extremely important fixture for every home andnd low water pressure can really be frustrating. Fortunately, fixing such an issue is often quick and inexpensive.
04/06/2019
You definitely expect your kitchen faucet to deliver a good level of pressure whenever you turn it on. Unfortunately, routine repairs plus water line breaks can sometimes cause low pressure. And if that’s not the case, your faucet either features a clogged cartridge or a clogged aerator its tip. Both are extremely easy to repair, so don’t worry. In fact, you don’t need any professional plumbing skills. Bear in mind that new aerators, as well as cartridges, are designed to put out less water, hence offering exceptional efficiency and reliability.
It’s also important to note that getting a reliable kitchen faucet can save you lots of money when it comes to maintenance. Therefore, it’s better to know how to choose a kitchen faucet.
What Causes Low Pressure in A kitchen Faucet?
The kitchen sink is an extremely important fixture for every home. And low water pressure can really be frustrating. Fortunately, fixing such an issue is often quick and inexpensive.
First, check underneath your sink to make sure that none of the water supply valves got somehow turned allowing less water to pass through. Perhaps it may sound simple, but it does happen. If that’s not the case, you'll use these simple tips:
Check the Aerator
To repair low pressure in your kitchen faucet, you’ll need a number of items, including plastic tape, Allen wrench, slip-joint pliers, vinegar, towel, screwdriver, old toothbrush, as well as a cartridge-pulling tool.
Unscrew the body of the aerator from your faucet by gently twisting it to the left using your hand. And if you can’t, budge it and wrap the plastic tape around slip-joint pliers’ teeth. This will prevent the faucet’s finish from getting damaged. Utilize the pliers for removing the aerator. Spread a towel on the countertop. Place the sink’s drainer in an appropriate position so that no aerator components go down the drain when cleaning and rinsing them. Separate the aerator’s outer housing from its external shell and make sure that you do it appropriately on the towel. Pull out the washer, mixer, sleeve, flow restrictor, as well as the bushing.
Separate each part and clean it using an old toothbrush. Remember, most debris collects around the mixer as well as the sleeve, so be keen to thoroughly clean these areas. If there’s an excessive buildup of lime, soak the components in a mixer of vinegar and water to get rid of the scale. Reassemble all the parts and put back the aerator onto your kitchen faucet.
Clean the Faucet’s Cartridge
Switch off the sink’s supply valves. Turn on the valve to drain any remaining water. Put the stoppers of your sink in place so that nothing goes down the drain accidentally.
Gently remove the cap which covers the faucet’s screw by slowly prying it off using a screwdriver. Then undo the set screw holding your faucet in place with the help of an Allen Wrench and lift off the handle from your faucet.
Wrap some plastic tape around slip-joint pliers’ teeth. And using the pliers, try loosening and removing the retaining nut which holds the cartridge in position. Certain faucets might have a retaining clip plus a nut, so remove them all. Even more, there could be some washers present inside the retaining nut. Arrange all the pieces on a towel on the countertop in such a way that you can replace them sequentially. Lift up the cartridge and remove it. If you can’t pull it up by hand, you consider utilizing a cartridge pulling tool.
Use water from a different sink to rinse the cartridge. If there’s lots of limescale on the faucet’s cartridge, soak it inside a solution containing equal amounts of water and vinegar. And if the cartridge features numerous scratches, then it’s time you replace it. Slide back the cleaned or newly bought cartridge into the opening. On both sides of the cartridge, align the tabs with the notches facing the faucet opening.
If your faucet has a clip, place it back together with the retaining nut, set screw, faucet handle, as well as the cap. Don’t forget to put back the washers as you reassemble your kitchen faucet. Turn back the supply valves onto the sink.
Blockage in the Water Line?
If you still haven’t found the problem, it could be that the water pipe connecting to the faucet has gotten clogged with mineral deposits. In this case, you’ll need to clean your aerator and replace the cartridge, but if the issue isn’t fully solved, you may want to flush the supply lines.
Switch off the hot water valve below the sink by gently turning it clockwise and place a bucket under it.
Remove the adjustable water supply line from the faucet and hold it over your bucket. Turn on the valve in a neutral temperature position and the hot water line will instantly flush into the bucket.
Once this is done, reinstall the hot water supply pipe repeat the same procedure with the cold water line.
Is It Only the Hot Water Pressure That’s Low?
If you’re only experiencing low pressure with your hot water line, it means the problem is definitely with your hot water heater. Make sure that the hot water “turn off” valve is open and check the pressure once more. If doing this doesn’t increase the water pressure, it’s more likely that the pipes connecting to the hot water heater have malfunctioned. It could also be a problem with the unit itself.
If flushing the system didn’t solve the issue, it could also mean that there’s a clog in your home’s hot water line, particularly at the kitchen sink. In this case, you’ll need to hire a professional plumbing technician to help restore normal water temperature. Their services are always quick, reliable, and affordable. So, don’t allow yourself to suffer while help is a phone call away.
Conclusion
Low water pressure can really be frustrating, especially when you’ve to carry out numerous household chores. But with the above tips, you can easily rectify the issue and continue with your work. Start by removing the aerator and removing all debris. Then proceed to the cartridge and clean it thoroughly. If it’s only the hot water line that’s experiencing such a problem, though, you might want to seek the help of a professional plumber.