DIY pull-out storage drawers
You can easily make these easy do-it-yourself pull-out storage drawers to provide even more storage space in a kitchen.
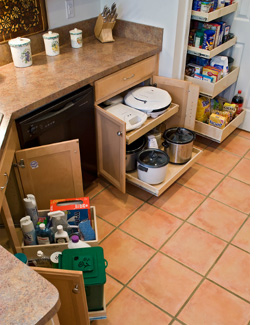
Not only practical for a kitchen, you can use pull-out drawers and shelves in your built-in cupboards to store shoes and clothing, inside bathroom cabinets to allow for easy-to-reach storage, and they are particularly handy as a replacement for fixed shelves in a pantry.
Take a closer look at your kitchen and make any modifications required to cabinets and then start making your own pull-out drawers with our easy DIY instructions.

shelfgenie.com
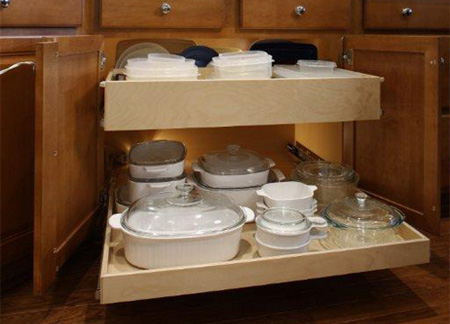
Forget about digging at the back of base cabinets. When you fit pull-out shelves you have each access to stored items
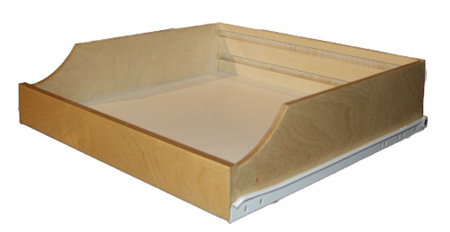
Pull-out or slide-out shelves or trays are made to allow for drawer slides that allow for easy access for stored items, especially those that are normally hidden right at the back and are hard to reach when you need them.
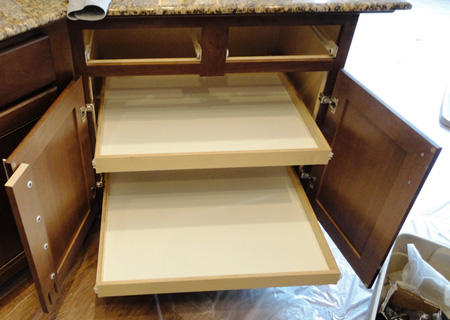
Unlike fixed shelves, pull-outs are made to be fitted into ready-made cabinets simply by adding drawer sliders or runners to the sides. The four sides are normally short (8 to 10 cm high), but you can make your pull-out drawers to any size.
When making your pull-outs, they need to be slightly smaller than the cabinet they will be fitted into - to allow for the drawer slides.
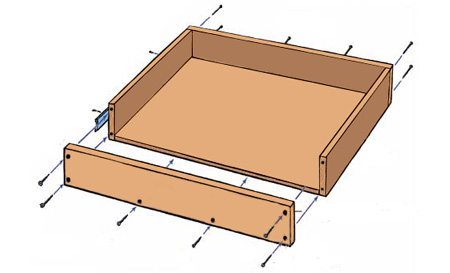
All the required sections to make a pull-out drawer are easily done, either by the hardware store (if you provide them with exact dimensions) or at home using a jigsaw, circular saw or backsaw.
The individual pieces are joined together with basic butt joints, which are glued and screwed.
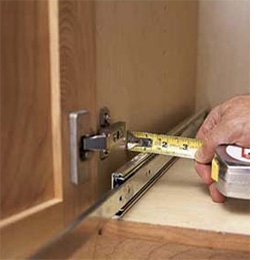
When measuring up to fit pull-out drawers inside a cabinet, note the type of hinges that are installed.
It may be necessary to install cleats - strips of wood - on the cabinet sides to ensure that the shelf can slide past the cabinet door and hinges.
To measure how thick to make the cleats, open the cabinet door and position the drawer slide, with the inner rail extended, as close to the door hinge as it can get without touching. Then measure the space between the cabinet side and the back of the drawer slide.
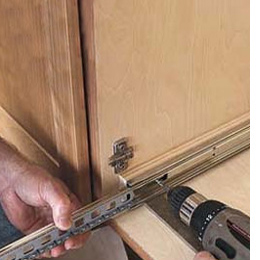
Prepare the drawer slides for installation by first removing the sliding-drawer-rail section from each slide. Have two 3mm-thick pieces of cardboard handy and lay them on the floor of the cabinet; these will raise the slides off the cabinet bottom enough to keep the pull-out shelf from scraping.
After securing any cleats to the cabinet sides, position the drawer slide on top of the shims and against the cleat, and secure it to the cleat with small screws. Install the second drawer slide on the opposite side of the cabinet in the same manner.
GOOD TO KNOW:
In most cases, it will be easier to install the slides and the finished shelf if you first remove the cabinet doors.