
Turn a pine dresser into a kitchen island
Every kitchen could do with a little extra storage and countertop space. An old pine dresser is transformed into a mobile kitchen island to contain clutter and provide a handy worktop.
01/12/2017
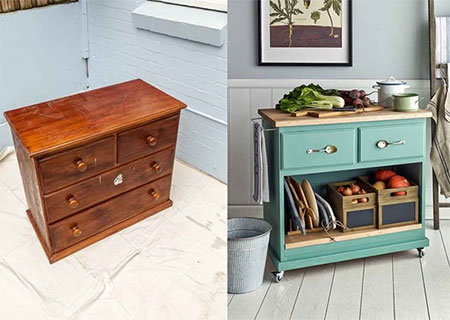
If your kitchen needs a little extra storage and countertop space, turn an old pine dresser into a mobile kitchen island to contain clutter and provide worktop space.
YOU WILL NEED:
Pine chest of drawers or dresser to work with
Laminated pine shelving for top and any shelves
Castor wheels, lockable [4]
Rust-Oleum Chalked ultra matt paint in your choice of colours
Rust-Oleum Chalked protective top coat
Paintbrushes
Angle brackets [8] + 16mm screws
Silver spoons or similar for handles + screws
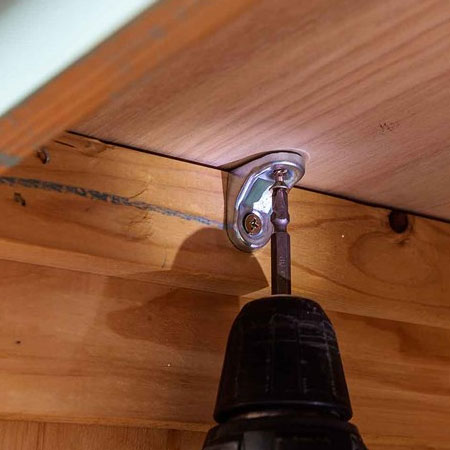
Chrome towel rail + screws
Wood filler
TOOLS:
Drill / Driver + assorted bits
Orbital Sander + 120- and 240-grit sanding pads
Hammer and small chisel
Tape measure and pencil
Buy all the materials and supplies for the project at Builders.
HERE'S HOW:
1. Remove all the old hardware and take out the bottom drawers. For this project you only ideally need a top drawer or two.
GOOD TO KNOW: Put the discarded drawers aside for a future project.
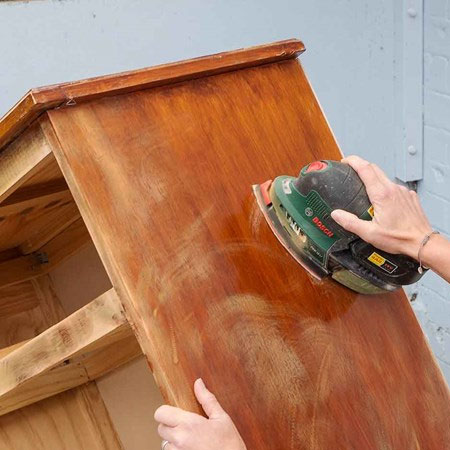
2. Prep the piece by filling any holes with wood filler and lightly sanding the entire piece. Wipe clean.
GOOD TO KNOW: When using Rust-Oleum Chalked you only need to perform a light sanding before painting.
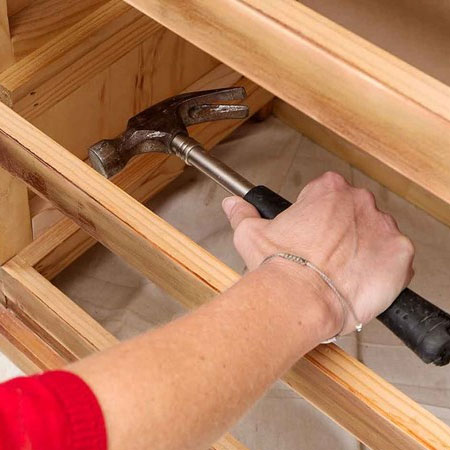
3. Use a hammer and chisel to remove the centre and side rails. Insert tip of chisel between rails and gently tap the chisel to lever the pieces out to make them easy to remove without damaging the frame.

4. Take a look inside to see how to top is attached to the frame. You have the option to re-use this piece as the top, or attach a new top - it all depends on the condition of the existing top.

5. Apply Rust-Oleum Chalked ultra matt paint over the entire frame. You will need to apply at least 2 coats, with sufficient drying time between coats. Once completely dry, apply Rust-Oleum Chalked Protective Top Coat.
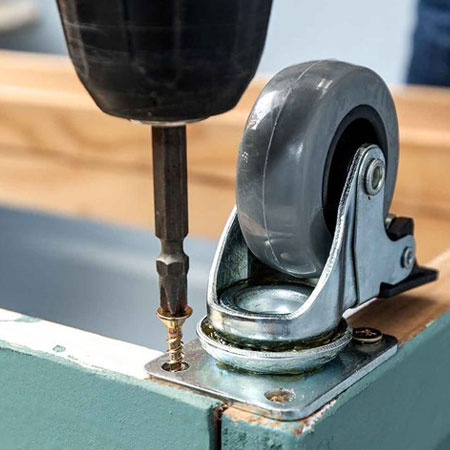
6. Turn the cabinet upside down to attach castor wheels at each corner. The castor wheels allow mobility for your kitchen island, and using lockable castors allows you to keep the island steady when in use.
7. If you are replacing the old top, measure and cut pine to fit, allowing an overhang on the front, back and sides. Also cut a piece of pine for any shelves and for the base. If you are re-attaching the old top, sand this to remove any defects. Use angle brackets to secure the top onto the cabinet.
GOOD TO KNOW: Apply a food-grade oil to the top, or apply sealer or polyurethane and use a cutting/chopping board to prevent food contamination.
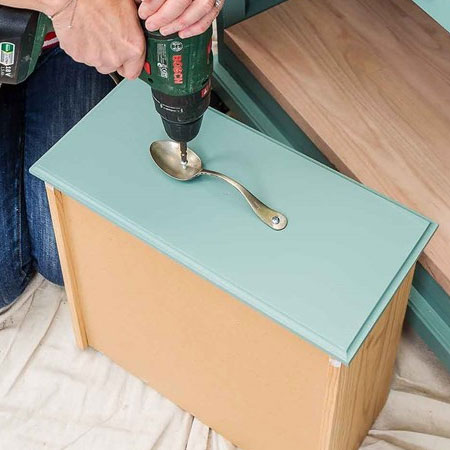
8. Use an HSS bit to drill holes in the spoons – 1 hole through centre and 1 through handle. Bend stem of each spoon slightly to allow easy grip of the handles to open and close the drawers. Secure onto the front on the drawers with screws.
bhg.com.au