
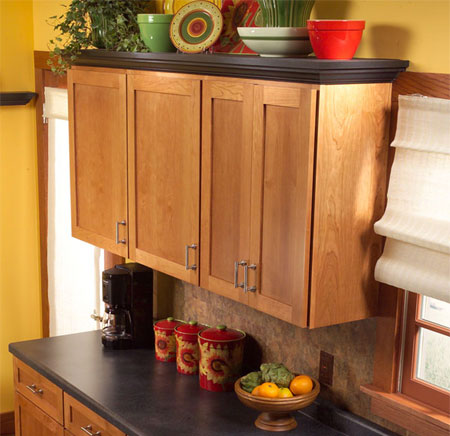
Make a shelf for top of cabinets
Make use of empty space above your kitchen cabinets by fitting an attractive display shelf. With basic woodworking skills and a few tools you can easily build this shelf in a day.
Additionally you don't have to worry about matching the existing finish of your cabinets, this shelf will look great if you paint it to match another accent colour in the room.
You will need:
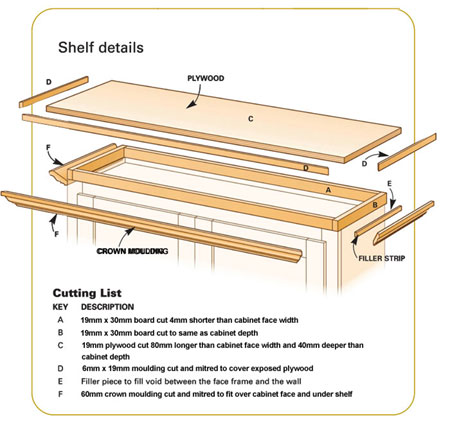
The best material for the main shelf is 19mm plywood or 18mm MDF. If you use the former, be sure to find a sheet that is smooth and easy to sand.
For this project, if you don't have access to a table saw, you can carefully cut them with your circular saw and an edge guide, or even with a jigsaw. Besides the crown moulding, you'll need trim to cover the edge of the plywood or SupaWood for a finished look. You will find a selection of moulding and trim at your local Builders Warehouse. Just follow the photos for details about sizing and fitting the pieces.
Here's how:
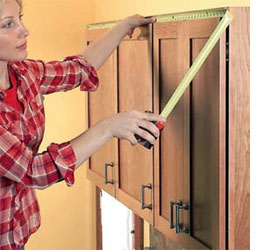
Step 1
It's essential to take exact measurements for a professional finish. Measure the tops of your cabinets to determine the length of moulding and trim that you need. Also check the distance above the cabinet doors to determine the support cleat height for the shelf.
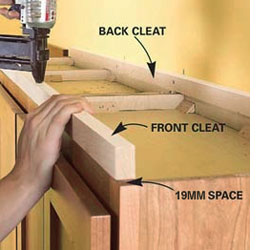
Step 2
Using a hammer and wire nails, nail cleats to the tops of the cabinets to elevate the shelf. Leave a 19mm space on each side for the side cleats. The side cleats will overhang on the cabinet side.
Step 3
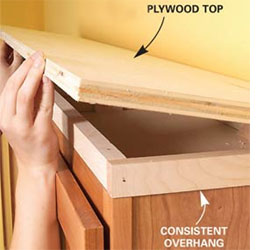
Fit the side cleats so there's a consistent overhang on the edge. We had to notch the cleat to fit behind the window moulding.
Step 4
Measure and cut the top from 19mm plywood or 18mm SupaWood, overhanging 40mm on the front and each side.
Step 5
Nail the top to the cleats with wire nails. Make sure the overhang is even on each side.
Step 6
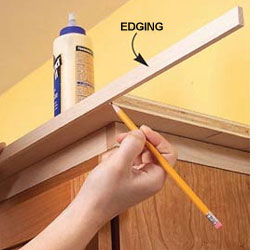
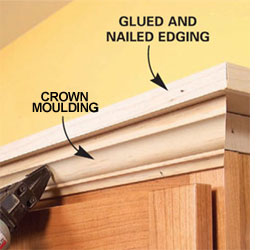
Use wood glue and wire nails to nail the 19mm-wide edge moulding to the exposed plywood or MDF edges. Mitre the corners for a more finished appearance.
Step 7
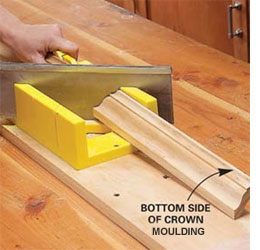
Position your moulding upside down in the mitre box to support both the top and the bottom of the moulding. Check the direction of the angle twice before you cut.
Step 8
Nail the crown moulding to the face of the cabinet and up into the shelf at an angle. The moulding will completely cover the cuts.
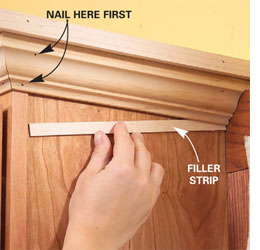
Step 9
Fit the side pieces of crown moulding and slip a 3mm-thick filler strip under the front edge to hide the gap created by the face frame overhang.
familyhandyman.com