Mini Kitchen Makeover
If you are desperate to give your kitchen a new look but don't have the budget, here's a mini-makeover that won't cost that much AND is quick and easy.
onekingslane.com
I found this inventive idea on One Kings Lane, and it's a project that shows how you can easily - and affordably - give kitchen cabinets at DIY colourful makeover without too much fuss.
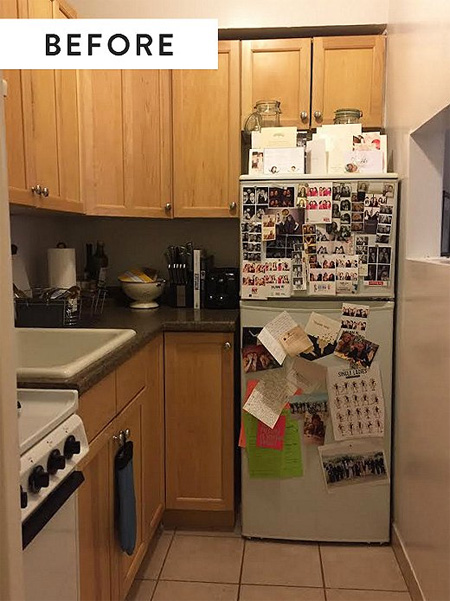
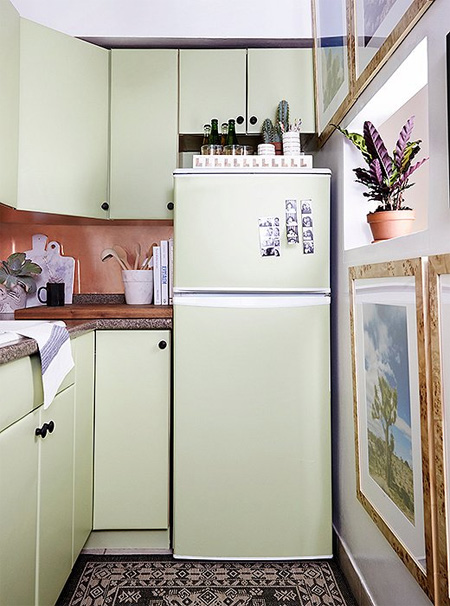
The before and after pictures shown here are testament to the difference a mini-makeover can make. And this makeover doesn't use any paint or expensive materials, as you will see below.
You may be wondering how timber panel doors can be transformed into a solid surface. Well, the trick is to use mylar (medium-thick plastic) and self-adhesive Contact paper. You can buy Contact paper at hardware stores around the country, or get in touch with www.Gordons.co.za to find your nearest retail outlet.
YOU WILL NEED:
Mylar sheets - available at craft/hobby stores
Contact self-adhesive vinyl
Scissors, craft knife and cutting mat
Double-sided sellotape
Screwdriver
HERE'S HOW:
Preparation
To make this project a breeze you need to remove the doors from the cabinets, as well as any hardware, knobs and/or handles. Mark each door so you know where they are fitted once you're done.
Choose a large worktop to do all the work on, so that you have plenty of space to lay everything out, cut and wrap without too much hassle. It might be a mini-makeover but you still want the finished job to look great!

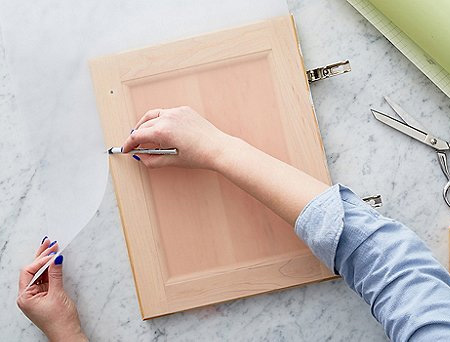
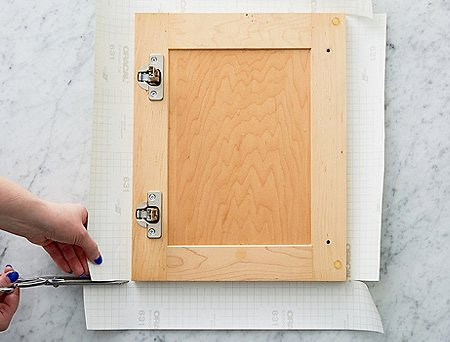
1. Measure the fronts of the doors and cut mylar sheets to fit. Place a strip of double-sided tape around the front edge of the door and place the mylar sheet on this. Press down firmly all the way around. The mylar sheet covers up the recessed panel and creates a semi-solid surface of the door fronts.
2. If there is any excess mylar - trim this away.
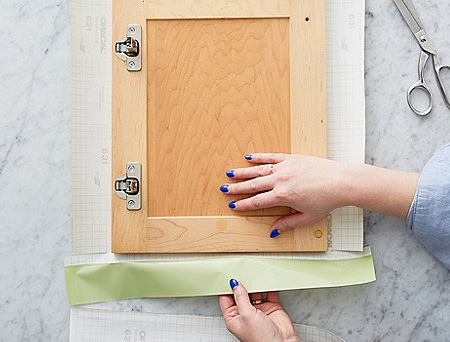
3. Cut the self-adhesive vinyl for the doors so that there will be enough to wrap around the door and secure at the back (neatly). Centre the cut vinyl on the door and cut slits at the corners in order to fold over to the back of the door.
4. Carefully fold the vinyl over the edges to the back of the door. Make creases as you fold.
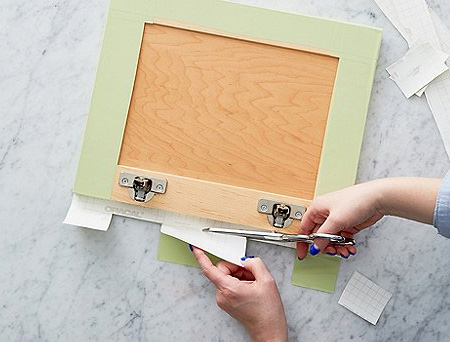
GOOD TO KNOW: At this stage, don't remove the backing from the self-adhesive vinyl. Later on you will only remove backing from the sections being stuck down at the back. The backing gives this method additional rigidity and creates a smooth surface.
5. Using the creased lines as a guide, trim and peel the backing away from the edges that will be secured at the back. Fold the self-adhesive vinyl over and secure on the back the door - one side at a time.
Start at the bottom of the door, then do the top, and lastly, wrap the sides over the secured top and bottom sections. The bottom and top edges are trimmed to the edge of the back and not wrapped around the door. This gives a neat, smooth finish.
GOOD TO KNOW: Take the time to trim corners carefully and neatly.
6. Where the hinges are mounted you will need to cut out for the hinges.
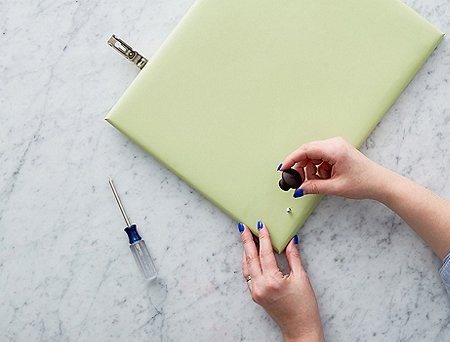
7. Carefully locate the holes for re-attaching or adding new knobs or handles. Poke a hole through the vinyl to mount.